Download

1 / 12
0 likes | 9 Views
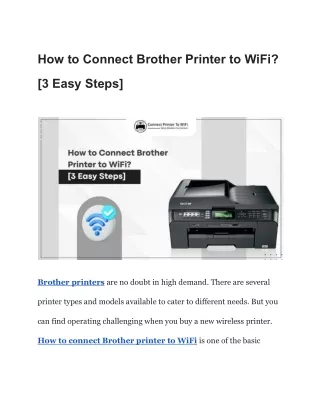
Brother printers are known for their reliability and quality, and connecting them to your WiFi network can make printing tasks seamless. Whether youu2019re a working professional or a student, knowing how to connect your Brother printer to WiFi could be very helpful for you. In this blog, Weu2019ll tell you the step-by-step process of how to connect your brother printer to Wi-Fi, so that you can start printing wirelessly immediately.

E N D
How to Connect Your Brother Printer to WiFi https://freeprintersupport.us/how-to-connect-your-brother-printer/
Brother Printer to WiFi Connecting your Brother printer to WiFi can significantly enhance your printing experience by allowing you to print from multiple devices wirelessly. Whether you’re using a computer, tablet, or smartphone, being able to print without physical connections simplifies the process and increases productivity. This guide will walk you through the steps required to connect your Brother printer to a WiFi network, ensuring a seamless and efficient setup. https://freeprintersupport.us/how-to-connect-your-brother-printer/
Understanding Your Brother Printer Model Before you begin, it’s crucial to understand your Brother printer model and its specific requirements. Different models might have slightly different interfaces and options. Refer to your printer’s user manual to familiarize yourself with its features and WiFi capabilities. https://freeprintersupport.us/how-to-connect-your-brother-printer/
Gather Necessary Information • To connect your Brother printer to WiFi, you will need the following information: • WiFi Network Name (SSID): The name of your wireless network. • WiFi Password: The password for your wireless network. • Ensure you have this information handy before starting the setup process. https://freeprintersupport.us/how-to-connect-your-brother-printer/
Initial Setup Unboxing and Setup Unbox your Brother printer and set it up according to the manufacturer’s instructions. Plug in the power cord and turn on the printer. Load paper into the paper tray and install the ink or toner cartridges as directed. Positioning the Printer Place your printer within range of your WiFi router to ensure a strong and stable connection. Avoid placing the printer in areas with thick walls or large metal objects that might interfere with the WiFi signal. https://freeprintersupport.us/how-to-connect-your-brother-printer/
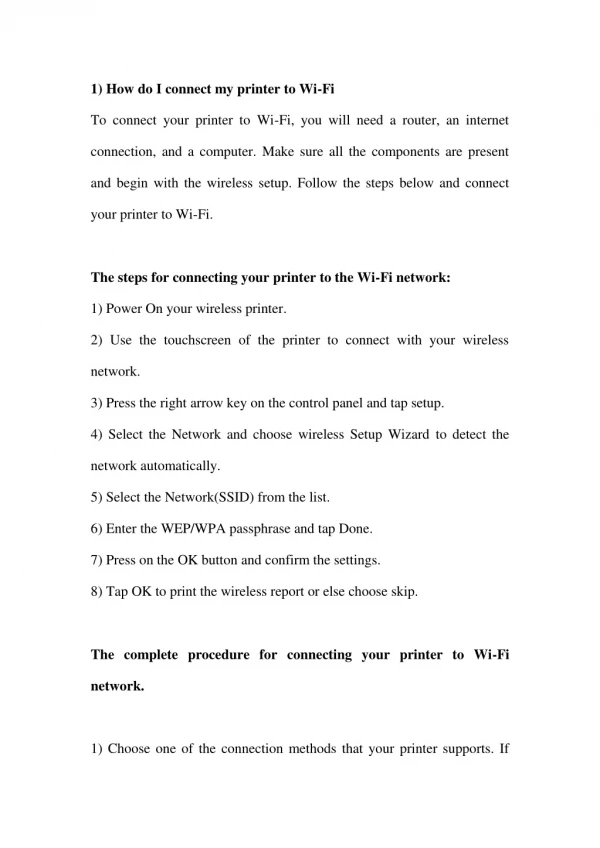
Accessing the Printer’s Control Panel Most Brother printers have a control panel with a menu button. Navigate through this menu to find the network settings. This process might vary slightly depending on the model, but generally, you’ll follow these steps: • Using the Printer’s Control Panel • Press the Menu button on the printer’s control panel. • Use the arrow keys to navigate to Network and press OK. • Select WLAN and press OK. • Choose Setup Wizard and press OK. • The printer will start searching for available WiFi networks. https://freeprintersupport.us/how-to-connect-your-brother-printer/
Connecting to WiFi Using the Control Panel Connecting to WiFi Using WPS • Selecting Your Network • Once the list of available networks appears, use the arrow keys to select your WiFi network (SSID). • Press OK. • Entering the WiFi Password • When prompted, enter your WiFi password using the printer’s control panel. • Press OK to confirm. • The printer will attempt to connect to your WiFi network. If the connection is successful, you will see a confirmation message on the control panel. • If your router supports WPS (WiFi Protected Setup), you can connect your Brother printer to the WiFi network using this method. WPS allows for a quick and secure connection without entering a password. • Using WPS • Press the WPS button on your router. • Within two minutes, press the WPS button on your Brother printer. • The printer will automatically connect to the WiFi network. https://freeprintersupport.us/how-to-connect-your-brother-printer/
Connecting Your Printer to a Computer • After connecting your Brother printer to WiFi, you’ll need to connect it to your computer to start printing. This can be done wirelessly or via a USB cable. • Wireless Connection • Download the Brother printer driver and software from the Brother website. • Install the software and follow the on-screen instructions. • During the installation, select Wireless Network Connection. • The software will search for your printer on the network. Select your printer and complete the installation. • USB Connection • Connect the printer to your computer using a USB cable. • Download and install the printer driver and software from the Brother website. • Follow the on-screen instructions to complete the setup. https://freeprintersupport.us/how-to-connect-your-brother-printer/
Printing a Test Page • To ensure everything is working correctly, print a test page. This confirms that your printer is connected to the WiFi network and properly set up with your computer. • Printing a Test Page • Open the Devices and Printers menu on your computer. • Right-click on your Brother printer and select Properties. • Click Print Test Page. • If the test page prints successfully, your setup is complete. https://freeprintersupport.us/how-to-connect-your-brother-printer/
Troubleshooting Connection Issues • Common Issues and Solutions • Incorrect WiFi Credentials: Double-check that you have entered the correct SSID and password. • Weak Signal: Move the printer closer to the router to improve signal strength. • Firmware Updates: Ensure your printer’s firmware is up to date by checking the Brother website for updates. • Network Interference: Avoid placing the printer near other electronic devices that might interfere with the WiFi signal. • Resetting Network Settings • If you encounter persistent issues, resetting the network settings on your printer might help. • Access the Network menu on the printer’s control panel. • Select Network Reset and confirm. • After resetting, follow the initial setup steps to reconnect to the WiFi network. https://freeprintersupport.us/how-to-connect-your-brother-printer/
Conclusion Connecting your Brother printer to WiFi enhances its functionality, allowing you to print wirelessly from multiple devices and take advantage of advanced features like mobile and cloud printing. By following the steps outlined in this guide, you can ensure a smooth and successful WiFi setup for your Brother printer. Regular maintenance, keeping firmware updated, and using genuine consumables will ensure your printer continues to perform optimally. With your printer connected to WiFi, you can enjoy the convenience and efficiency of wireless printing in your home or office. https://freeprintersupport.us/how-to-connect-your-brother-printer/
Thank You Phone Number: +800-718-6528 Website: https://freeprintersupport.us/ Location: 3500 South Dupont Highway, Dover, DE 19901 USA


![How to Connect Brother Printer to WiFi? [Top 3 Solutions]](https://cdn7.slideserve.com/12805208/how-to-connect-brother-printer-to-wifi-dt.jpg)