Download
1 / 14
0 likes | 8 Views
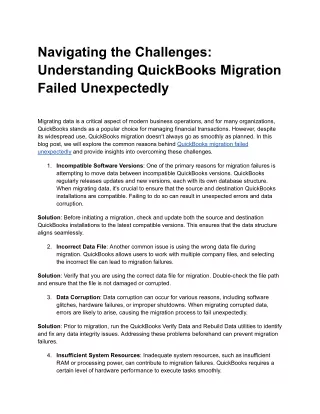
"QuickBooks Migration Failed Unexpectedly" denotes an unexpected breakdown that occurred when trying to move files or data to a new version of QuickBooks or system. This problem may arise from a number of sources, including software bugs or incompatible data formats, and will require further research and debugging to effectively complete the move. If you require quick help and guidance, don't hesitate to contact the QuickBooks Support Team directly at 1.855.738.2784.

E N D
QuickBooks Migration Failed Unexpectedly: Revised Troubleshooting Guide
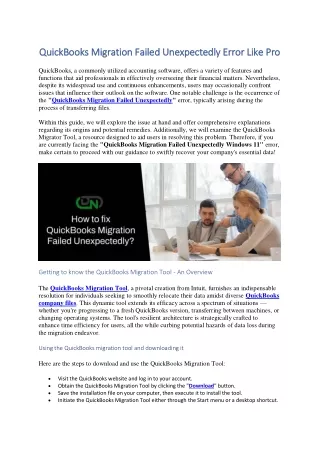
QuickBooks has a thoroughly advanced technical configuration that makes it superior to other accounting applications & Intuit has achieved great popularity and profits through the aggressive marketing of this software. According to market observers, the major customers of QB Desktop continue to be small-scale businesses across the globe. New computers with enhanced capabilities are released in the market every year. QB Desktop users also want to shift all the QB Company files from the old computer to the new computer. Generally, they accomplish this objective very easily using the ‘QB Migrator Tool’. Nevertheless, the ‘QB Migrator Tool’ does not always succeed in moving the QB data files from the old system to the new system. This troublesome problem is given a new name called the ‘QuickBooks Migration Failed Unexpectedly’ problem & it needs to be tackled in an efficient manner.
There is also a strong possibility of sudden data loss if the user tries sending all the QB data files via the ‘QB Migrator Tool’ despite experiencing repeated failures. The present article is written in great detail & it contains reliable and easy-to-use troubleshooting methods that you can deploy to overcome this irksome technical glitch. If you want instant technical guidance to overcome the ‘QuickBooks Migration Failed Unexpectedly’ problem, you need to dial +1-855-738-2784 to connect with our QB Technical Professionals Team. Important Files & Services That Won’t Move to the New System by Using the ‘QB Migrator Tool’
It is crucial to grasp the real extent of the technical problem, and you will need to thoroughly review the following points to understand that the following files & services don’t move to the new system even after deploying the ‘QB Migrator Tool’: 1. Firstly, you must note that only the last three QB Company files that have been accessed by the QB user get transferred to the new system by the ‘QB Migrator Tool’. All the remaining QB Company files should be transferred to the new system manually. 2. The ‘Intuit Data Protect (IDP) Setup’ won’t move to the new system through the ‘QB Migrator Tool’. You will have to remove IDP from the old system, after which you can finish the new IDP installation on the fresh computer. 3. Another service called the ‘QB Payroll Service’ will not move to the new system & you will need to utilize the manual procedure to install the payroll service in an effective manner.
4. If you have been utilizing the QB application on the old system via the multi-user configuration, you will have to perform a fresh setup of this configuration on the new computer. 5. No backup company file will be moved to the new computer from the old system through the use of the ‘QB Migrator Tool’. Common Causes That Are Behind the Occurrence of ‘QuickBooks Desktop Migration Unsuccessful Problem’ The points detailed here illustrate various technical causes that are behind the emergence of ‘QuickBooks Desktop Migration Unsuccessful Problem’: 1. If you don’t keep the latest Windows operating system installed on the new computer, you will definitely encounter this problem.
2. Internal defects situated in the ‘QB Migrator Tool’ will surely prevent the QB Company file migration to the new system from the old computer. 3. The incompatibility between the editions of QB Desktop on the new system & the QB Company files that you are attempting to migrate will also cause this issue. 4. Many users inadvertently erase some QB application files from the new system, thereby bumping into this technical problem. 5. Another common cause is the invasion of the new system by harmful malware programs. Troubleshooting Methods for the ‘QB Application Migration Not Successful Problem’ You can easily eradicate the ‘QB Application Migration Not Successful Problem’ through the following step-by-step troubleshooting methods:
Method 1: Instantly download & efficiently install the most recent edition of the Windows operating system on the new computer 1. In this method, the new computer should be launched & you must identify and open the ‘Start’ menu on the desktop screen, after which you must tap the ‘Settings’ tab. 2. Just after that, you will choose the ‘Windows Update’ icon present on the computer’s screen, following which you will promptly hit the ‘Check for updates’ button. 3. At this step, all the recently available updates of the Windows operating system will be displayed on the system’s screen, and you will need to click the ‘Download and Install Now’ button to start the download process in an effective manner. 4. After you have finished the precise download & installation process of all the fresh Windows operating system updates, you should re-launch the new computer, following which you can migrate all the data files successfully.
Method 2: Utilize the step-wise manual procedure to shift all the QB Company files to the new computer from the old system 1. Here, the first task is to open the old system, after which you must launch the QB Desktop window on the old system in single-user mode. 2. After that, you must jump forward to access the ‘File’ menu on the QB window, following which you can click the ‘Create Local Backup’ tab situated under the ‘Backup Company’ icon. 3. Next, instantly strike the ‘Local Backup’ option & you must shift to the ‘Local Backup Only’ section of the same window so that you can choose a location to save the backup company file. 4. Thereafter, just press the ‘OK’ button to finalize the selected folder, following which you must tap the ‘Save it Now’ button to create the backup company file on the old system.
5. Now, the newly created backup company file should be put inside any suitable device, such as the USB Flash Drive, following which you can move the same backup company file to the new computer. 6. On the new computer, the QB Desktop application window should be launched & you must hit the ‘Open or Restore Company’ tab provided under the ‘File’ menu. 7. You will click the ‘Restore a Backup Copy’ icon, and you must also tap the ‘Local Backup’ button so that you can eventually utilize the ‘Browse’ option to select the QB Backup Company file. 8. Thereafter, any relevant folder must be chosen via the ‘Open’ icon to save the restored company file, after which you can tap the ‘Save’ button to save the restored company file successfully. 9. Finally, you can utilize the newly restored company file very easily via the QB Desktop application installed on the new computer.
Method 3: Shift the entire QB Desktop Company file folder to the new computer from the old system 1. In this method, the idea is to first launch the old system, after which you will open the QB Desktop application window so that you can eventually tap the ‘F2’ key from the keyboard. 2. Next, jump ahead to reach the newly opened ‘Product Info’ window on the screen and swiftly identify the current location of the QB Company file through the ‘File Information’ section of the same window. 3. Thereafter, move back to the ‘Start’ menu provided on the desktop screen & instantly launch the ‘Start’ menu to obtain the ‘File Explorer’ window successfully. 4. Through the ‘File Explorer’ window, you will be able to reach the QB Company file folder, following which you must right-click the same folder’s icon.
5. Now, properly tap the ‘Copy’ option and launch the external USB flash drive attached to the old system so that you can eventually shift the copied QB Company file folder. 6. At this step, utilize the external USB flash drive to shift the copied QB Company file folder to the new computer, after which you will open the QB Desktop application window. 7. Finally, you can use the ‘Open or Restore Company File’ tab under the ‘File’ menu to launch the QB Company file on the new computer. Method 4: Open & install the fresh QB Desktop application updates on the new computer to comfortably tackle this problem 1. In this important method, you need to first launch the existing QB Desktop application window on the new computer, after which you can launch the ‘File’ menu very effectively.
2. Thereafter, identify & press the ‘Update QuickBooks Desktop’ icon via the ‘File’ menu to acquire another window having a new title called ‘Update QuickBooks’. 3. Through the recently opened ‘Update QuickBooks’ window, you can identify & tap the ‘Update Now’ menu, after which you need to carefully strike the ‘Get Updates’ button. 4. Next, the relevant download process for the fresh QB Desktop application updates will commence & you must allot sufficient time to the download process on the new computer. 5. After some time, the download process for the fresh QB Desktop application updates will be completed, and you will promptly re-open the QB Desktop application window on the new computer. 6. At this step, you must initiate the installation process for the fresh QB application updates by tapping the ‘Yes’ icon on the QB window, and you will eventually succeed in using the relevant process to migrate the QB Desktop data from the old system to the new computer.
By utilizing all the step-wise methods given above in a proper manner, you will surely achieve success in tackling the ‘QuickBooks Migration Failed Unexpectedly’ problem. If you need further technical help, you should dial +1-855-738-2784 to connect with our QB Experts Team.