Download
1 / 32
320 likes | 460 Views
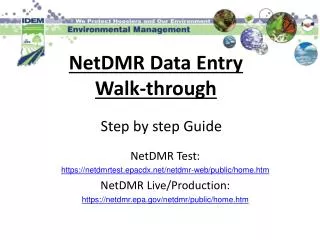
Creating a new Central Data Exchange (CDX) Account (to access NetDMR). In order to access NetDMR, you must first create an account in CDX. CDX Access & Authentication. NeT. LEAD. NetDMR. SSTS. https://netdmr.epa.gov. CDX login URL: https://netdmr.epa.gov

E N D
Creating a new Central Data Exchange (CDX) Account(to access NetDMR)
In order to access NetDMR, you must first create an account in CDX CDX Access & Authentication NeT LEAD NetDMR SSTS
https://netdmr.epa.gov • CDX login URL: https://netdmr.epa.gov • As soon as you type in the URL, you will be redirected to this NetDMR CDX log in page.
Create a New Account • Click on create a new account.
Selecting Program Service and Role • All * fields are required • Select State Agency or EPA Region (aka Instance Name) and User Type • Regulatory Agency where your DMRs are sent • Choose from the pull down menu
Select Programs Service (Formerly know as Instance) • Select your Regulatory Authority • For example: • Hawaii – DMRs are sent to state agency • Choose Hawaii Dept. of Health Instance • New Mexico facilities submit DMRs to EPA • Choose EPA Region 6 Instance 6
Select User Type • Select User Type • Permittee (signature) • Permittee (no signature) • Data Provider • Press NEXT to continue 7
Personal Information • Fill out required information • All boxes with asterisks * • For Permittee (signature), ensure First & Last Names are your legal names (e.g. Robert, not Bob) • Click NEXT when done. 9
Create a User ID and Password • Create User id & Password • Choose 3 Security questions, and enter an answer • Case Sensitive • Agree to the Terms and Conditions 10
Signatory Accounts • If requesting the CDX role of Permittee (signature) • Required to answer 5 additional questions for digitally signing documents • Electronic Signature Agreement (ESA) or Paper Signature Agreement is required 11
Electronic Signature Setup – Permittee (signature) Only • Select 5 security questions from the drop down list. • Enter an answer for each question selected. • Remember your answers! 12
Organizational Information • Search for your organization. • Organization name and State are required, other search fields are optional • This is the organization you work for (your employer) 13
Select Organization • Click on the Organization Id link to choose your facility 14
Organization • Confirm your Organization 15
Add Organization • Organization unavailable • “Request that we add your organization” 16
Add Organization – Continued • Fill out the required information for your organization • Noted with * • Click “Submit Request for Access” 17
Add Organization - Continued • Select your Organization • Enter your phone number 18
Contact Information • Enter required fields. • Click SEND VERIFICATION CODE. • A green pop-up note will appear on screen informing an email was sent to this email. • You will receive an email from CDX support with a Verification Code within a few minutes. 19
Contact Information/ Registration • After clicking SEND VERIFICATION CODE a verification box will appear • Enter Verification Code • You can COPY & PASTE code from email directly into box. • Click Register 21
Organization Registration Completed • After clicking on REGISTER, this pop-up will appear confirming completion. • Click CONTINUE 22
Registration Process • At this stage, Permittee (no signature) and Data Providers are finished and now have access to NetDMR 23
“Permittee (signature)” Additional Requirements • Permittee (signature) will need to continue as additional information is required • Identify Proofing • Electronic Signature Agreement (ESA) • Paper ESA option 24
IdentityProofing Click on white tab for paper option of Identity Proofing • Enter required fields with an asterisk • Agree Electronic Signature Agreement (ESA) • Verify and Sign • Paper option available • Click on white tab for paper 25
Identify Proofing • If Lexis Nexis is unable to verify your identity – Must Submit Paper Signature Agreement
RA Name Email Phone #
MyCDX • This is the landing page when logging into NetDMR • Clicking on your ROLE will take you to NetDMR • This link will be inactive (not clickable) if you have not been approved 29
NetDMR • Click on ‘Continue to NetDMR’ to continue. • Will need to continue by Requesting Access to specific NPDES ID(s) within NetDMR. 30
2 Ways to Access NetDMR • Go to NetDMR directly • url: https://netdmr.epa.gov • Go to NetDMR Zendesk website • url: https://netdmr.zendesk.com • Includes User Guides and on-line training