Download
1 / 9
160 likes | 1.15k Views
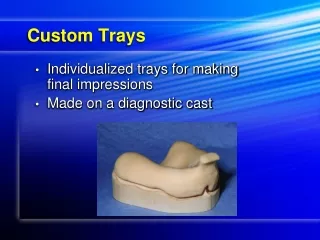
Custom Trays. DA122 Dental Materials. Why would one use a custom tray?. Patient’s mouth needs major adaptations Dimensions or anatomy will not allow use of stock tray custom tray be made to aid in impressing process

E N D
Custom Trays DA122 Dental Materials
Why would one use a custom tray? • Patient’s mouth needs major adaptations • Dimensions or anatomy will not allow use of stock tray • custom tray be made to aid in impressing process • Main reason for a custom tray is to get an ultra-accurate impression for a denture or a partial
How can custom trays be constructed? • Acrylic: • Consists of a two part system that self cures • Light Cure Resin: • A sheet of resin material is placed over the model and light cured to set. • It is then trimmed to the dimensions of the patients mouth • Vacuum-formed custom trays: • A sheet of acrylic resin is placed in a vacuum former and is dropped on top of the model; trimming will need to be done following the cool down process • Thermoplastic tray material: • Rounded beads are warmed in water and then can be pliable enough to form into a tray around the dentition. The material sets upon cooling
Steps of Construction: • Using an edentulous arch, take a pencil and outline the arch form into the mucco-gingival fold. (where attached gingiva and free gingiva meet) • Be sure to outline around specific muscle attachments. They will be captured in the impression, but we must not adapt their position due to the tray • Use foil to form around the model, or use a liquid foil separator • This will act as a barrier between the model and the wax, to ensure that the wax will not stick
Steps of construction: • Use a warm sheet of pink baseplate wax to form over the foil sheet (sometimes two maybe necessary) • This sheet allows enough room in the tray for impression material to flow easily • Use a warm wax spatula to trim excess around the model, using your pencil line as a gauge • Place a layer of liquid separator (or foil) on top of the wax. • This will prevent the sticking of the warm wax to the custom tray material
Steps of construction • Form custom tray material over the wax. Trim with a lab knife to edge of wax, use excess to form a handle that extends from midline to outside of the oral cavity • Allow material to set according what was used (we use the oven) • Trim and polish finished tray • It is now ready for use!