Download
1 / 15
150 likes | 341 Views
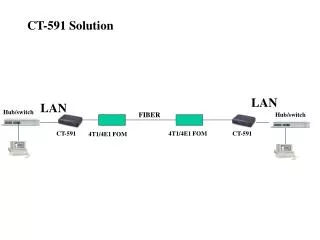
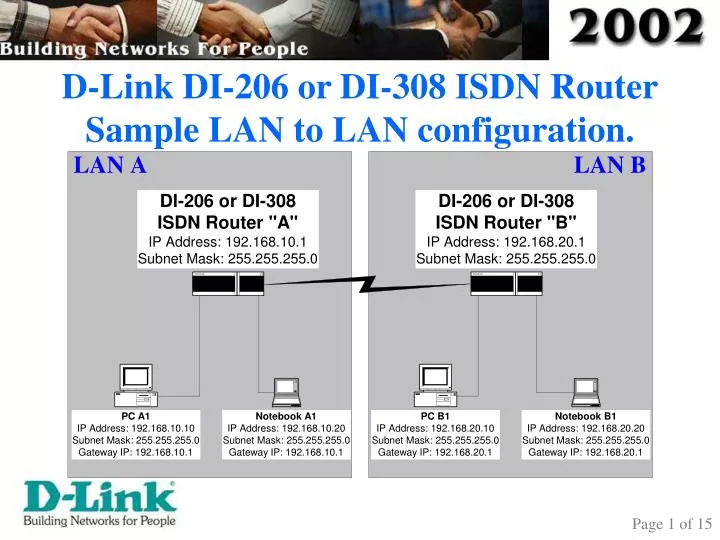
D-Link DI-206 or DI-308 ISDN Router Sample LAN to LAN configuration. 2.1) Execute the Routeman software. 2.2) Key in the Router’s IP address and Subnet Mask. * Example: 192.168.10.1 (IP address for Router “A” ). 2.3) Key in the Password when prompt. LAN to LAN Configuration.

E N D
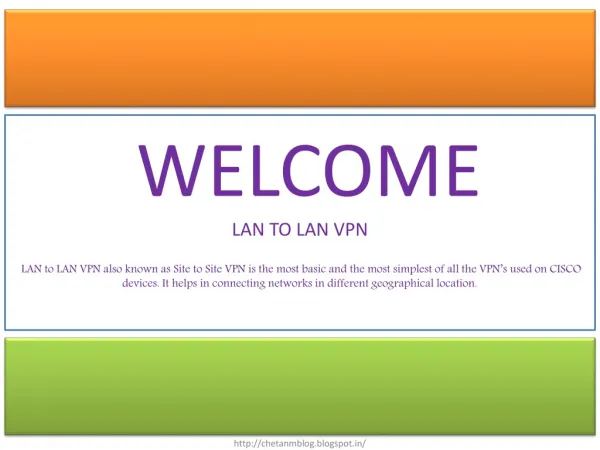
D-Link DI-206 or DI-308 ISDN RouterSample LAN to LAN configuration.
2.1) Execute the Routeman software. 2.2) Key in the Router’s IP address and Subnet Mask.* Example: 192.168.10.1 (IP address for Router “A”). 2.3) Key in the Password when prompt.
LAN to LAN Configuration 3.1) Click on <Wizard> icon.
LAN to LAN Configuration 4.1) Key in your own ISDN line number in the <ISDN DATA>. 4.2) Select the correct Country ID in the <Country ID>. 4.3) Click on the <Next> button.
LAN to LAN Configuration 5.1) Select <Remote Network Access>. 5.2) Click on the <Next> button.
LAN to LAN Configuration 6.1) Select <LAN to Remote LAN>.6.2) Select the row below the “ISP”, and key in “LAN2LAN”.* Ensure that the “ISP” entry (above) is still there, and its status is “disable”.6.3) Click on the <Next> button.
LAN to LAN Configuration 7.1) Select the <Unnumbered>. 7.2) Select the <ISDN-L1>. 7.3) Click on the <Next> button.
LAN to LAN Configuration 8.1) Key in the Remote LAN’s IP address-Subnet ID in the <Remote Network>.8.2) Key in the Remote LAN’s IP address-Subnet Mask in the <Remote Netmask>.8.3) Key in the Remote LAN Router’s LAN IP in the <Remote IP Address>. 8.4) Click on the <Next> button.
LAN to LAN Configuration 9.1) Select either of the following (option) for the <Multi-link PPP>:a) “Off” - Always 64Kbps (1 Channel) to Internet. b) “BOD” - Bandwidth on Demand.c) “Always” - Always 128Kbps (2 Channels) to Internet. 9.2) Click on the <Next> button.
LAN to LAN Configuration 10.1) Select the <Both>. 10.2) Click on the <Next> button.
LAN to LAN Configuration 11.1) Keep the default value.* That are “10” and “3”, in the <Dial out Retry Time> and <Dial out Retry Count> respectively. 11.2) Click on the <Next> button.
LAN to LAN Configuration 12.1) Key in the Incoming <Name> and <Password>.12.2) Key in the Outgoing <Name>, <Password> & Phone number to dial (LAN B’s [or Router B’s] ISDN number).* For the initial part of this LAN to LAN setup, its advisable to set the same Incoming & Outgoing <Name> & <Password>, in order to minimize the confusion. 12.3) Click on the <Next> button.
LAN to LAN Configuration 13.1) You will see the summary of your LAN to LAN configuration.* Check if all the settings are correct. If not, click on the <Back> button to modify the settings. 13.2) Click on the <Finish> button.
LAN to LAN Configuration 14.1) Select the <Perform the connection Test.>.* It is compulsory to “perform” the Connection Test.14.2) Click on the <OK> button.* First Router’s (Router “A”) configuration ends here.14.3) For the second Router (Router “B”), repeat Step 2.1 (page 2 of 15). For more information, please refer to page 15 of 15.
LAN to LAN Configuration The End forthe LAN to LAN configuration 15.1) For Router “B”, please repeat from Step 2.1 (page 2 of 15) to Step 14.2 (page 14 of 15), but please take note of the following: a) At Step 2.2: The IP address is 192.168.20.1 b) At Step 4.1: Key in the LAN B’s (or Router B’s) ISDN Line number. c) At Step 8.1: Key in “192.168.10.0” in the <Remote Network>.d) At Step 8.3: Key in “192.168.10.1” in the <Remote IP Address>. e) At Step 12.1 & 12.2: Swap the <Incoming> information with the <Outgoing> information for Router “B”. Key in the LAN A’s (or Router A’s) ISDN Line number.