Download
1 / 32
1.2k likes | 3.47k Views
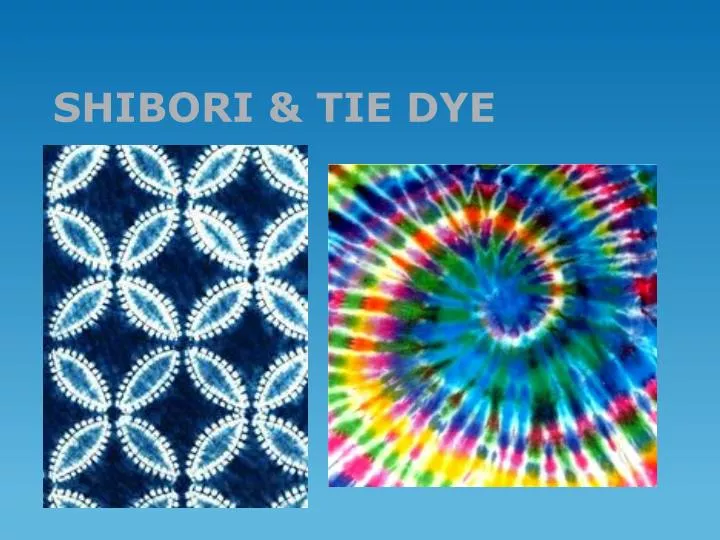
SHIBORI & TIE DYE. Dyeing Basics. Use good quality dye Use soft 100% cotton or linen fabric Prewash fabric Let dye soak for 24 hours in plastic before unwrapping Use a mordant and fixative. Mordants & Fixatives.

E N D
Dyeing Basics • Use good quality dye • Use soft 100% cotton or linen fabric • Prewash fabric • Let dye soak for 24 hours in plastic before unwrapping • Use a mordant and fixative
Mordants & Fixatives • Mordant: a substance, typically an inorganic oxide, that combines with a dye or stain and thereby fixes it in a material. Can be added to dye, but is better as a presoak for the fabric. • Dye Fix: used after dyeing to help link the dye to the fabric
Classroom Basics • Dye outside only. • Use gloves and smocks • Wrap freshly dyed fabric • Label fabrics clearly, so you remember which is yours • Store freshly dyed fabric on the plastic provided
DO NOT DRIP ON THE FLOOR • Put final fabrics on the rack to dry with newspaper to catch the drips • Put you gloves and plastic in the garbage • Clean your clamps and put them back in the bucket
Shibori • Shibori is the Japanese term (from the word ‘to squeeze or wring’) • It is a bit like tie dye, but more precise and geometric. • It is usually done with a single indigo(blue) dyebath
It uses a variety of resist techniques which prevent the dye from reaching certain parts of the fabric. The original fabric colour remains in resist areas. • Tyeing • Pleating • Clamping • Sewing • These fabrics have been sewn and tied.
3 things to remember: Thing 1 • The resist must be as tight as you can make it. It needs to be tight enough to prevent water and dye from traveling along the cloth
Thing 2 • The dye does not penetrate to the middle of the fabric if you are working with many layers of fabric
Thing 3 • Fabric should be wet or soaked in plain water after it is tied and before it is dyed.
CLAMPING • http://honestlywtf.com/diy/shibori-diy/
ORIGAMI • The key to an interesting design is precise geometric folding and tight resist.
TIE DYE • Tie-dye is a modern term coined in the mid-1960s in the United States for a set of ancient resist-dyeing techniques, and for the products of these processes.
In the 1960s, tie-dye was brought to America through the hippie movement, a youth movement that advocated the sexual revolution, psychedelic rock and protested the Vietnam War. Hippies wanted a way to escape from the strict social norm of the 50s, and tie-dye was just one way of expressing their free-spirited nature.
Before tie-dye became popular, the Rit Dye company was struggling. A company representative got two retired artists to create tie-dye pieces to show to designers and fashion editors and it was suddenly a hit.
After clothing designer Halston started using tie-dye in his designs, stars such as Janis Joplin were wearing it. Soon enough, tie-dye became a bandwagon the entire youth generation jumped on.
Stripes • scrunch fabric vertically. • Wrap rubber bands around the laces you want stripes. You will need two rubber bands for each stripe.
Bull's Eye • Place fabric on a flat surface. • Pinch and lift the center of your bull’s eye. • Place rubber bands along the section you lifted. The number of rubber bands you use depends on how many sections you want in your bull's eye.
Tye Dye • You need to produce a spiral and one tie dye of choice. • I will demonstrate additional folds for you to chose from