Download
1 / 9
90 likes | 294 Views
グラフの PLOT 方法. 連続系演習補助資料. グラフで表現する. 増加しているのか減少しているのかを明確に 問題点がどこにあるかを示すことに つながる 説得力 が 増す PLOT の方法によっては分かりやすくなったりする n^2 や n^3 に比例する 指数的に減少する 具体例で簡単に解説をする Gnuplot を用いた例を示す EXCEL とか OpenOffice の Calc を使って も良い 使い方聞かれても知らないけど. 線形に増加する例. ただ の 一次 関数の例. gnuplot > set xrange [0:10]

E N D
グラフのPLOT方法 連続系演習補助資料
グラフで表現する • 増加しているのか減少しているのかを明確に • 問題点がどこにあるかを示すことにつながる • 説得力が増す • PLOTの方法によっては分かりやすくなったりする • n^2やn^3に比例する • 指数的に減少する • 具体例で簡単に解説をする • Gnuplotを用いた例を示す • EXCELとかOpenOfficeのCalcを使っても良い • 使い方聞かれても知らないけど
線形に増加する例 • ただの一次関数の例 gnuplot> set xrange[0:10] gnuplot> set yrange[0:2000] gnuplot> plot "sample1.txt" gnuplot> plot "sample1.txt" [sample1.txt] 1 1100 2 1200 3 1300 4 1400 5 1500 6 1600 7 1700 8 1800 9 1900 10 2000 一番下が0じゃない! このように見えたほうが、正しく伝わる (ことが多い)
多項式で増加(または減少)する例 • O(n^2)とかO(n^3)とかの時間をPLOTする例 • そのままでは意味がわからないことも gnuplot> plot "benchmark.txt" using 1:2 notitle, "benchmark.txt" using 1:3 notitle これは実際のデータから 取っているものだが、 このグラフではよくわからない 時間(秒) サイズ(n)
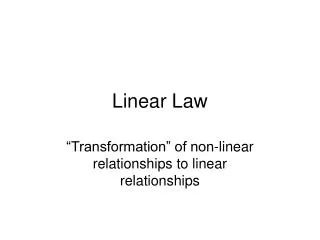
多項式で増加(または減少)する例 • こういうときには、指数プロットをするとよい • 傾きがaの直線ならば、y=O(x^a) gnuplot> set logscale x gnuplot> set logscale y この例だと、傾き=オーダーが 違うことがわかる =定数倍ではない
指数で増加または減少する例 • この場合には、y方向だけ指数を取ると直線になる gnuplot> set logscale y gnuplot> plot exp(x) gnuplot> plot exp(x)
Gnuplot補足 • ファイルに出力する方法 gnuplot> set terminal png //png形式にする gnuplot> set output "hoge.png" //hoge.pngに出力 gnuplot> plot .....//何かをplot gnuplot> set output //ファイルclose gnuplot> set terminal eps //eps形式にする gnuplot> set output "hoge.eps" //hoge.epsに出力 gnuplot> plot .....//何かをplot gnuplot> set output //ファイルclose gnuplot> set terminal eps color //色つきのeps形式にする gnuplot> set output "hoge.eps" //hoge.epsに出力 gnuplot> plot .....//何かをplot gnuplot> set output //ファイルclose
Gnuplot補足 • Windows版もちゃんとある • wgnuplot • コマンドラインからgnuplot hoge.txtとやると、hoge.txtの内容を実行してくれる(結構便利) • plot "hoge.txt" with linesと書くと、折れ線グラフを描画してくれる • その他もろもろについては自分で調べてください • http://www.gnuplot.info/ • デフォルトだとフォントが読めない可能性がある • 右クリックでフォントを選ぶ • gnuplot.iniを保存
TeXで画像を張り付ける方法 • 基本的にベクトルデータしか無理 • さっきの例だとEPS形式で出力したものを張り付ける • ちなみに、dvioutではcolor epsは白黒表示される • \usepackage{graphicx} • \documentclass{something}の直下あたりに書く • 日本語環境でなければ\ではなくてバックスラッシュ -90度回転させて、0.5倍にして張り付ける例 \begin{figure} \includegraphics[angle=-90, scale=0.5]{hoge.eps} \caption{この図はこういうものです} \end{figure}