Download

1 / 28
280 likes | 292 Views
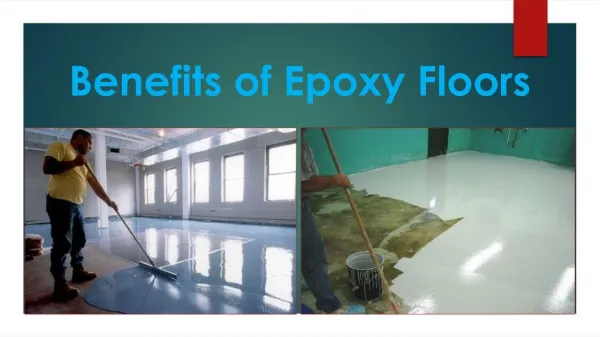
Seamless finish for floors with high traffic made with cement and epoxy resin.

E N D
Stucco Italiano srl Via Rovereto 20, Costabissara 36030, Italia EPOFLOOR Epoxy-cement system for floors
Technical Sheet EPOFLOOR Epoxy-cement System for Floor Name EpoFloor Description Seamless finish for floors with high traffic made with cement and epoxy resin. Composition It is a 3 component system: A is a water based epoxy resin; B is the water based hardner; C is a powder with cement and inerts of quartz and marble Where to apply All the building construction surfaces if solid, made of cement or other hard finish, like tiles or marble, horizontals or verticals. The material is a little breathable so it is possible to apply it also on surfaces with a weakly damping See below for more information Colour The material si creamy white color when the three components are mixed, but it can be colored in any color and 45 colors with our coloring system Certificates Hardness by pencil Test ASTM D3363 = 6H Hardness shore ASTM D 2240 = 71 Slip Resistance tests DIN 51097 (92) : Smooth Finish = Slip angle 27º Anti-slip property DIN51130 method ramp test, surface "Smooth"= angle 16.8 - R 10 Resistance to compression at 7 g UNI 13892-2; 2005> 71 Nmm2 ± 0,20 10.5 Ph after 30 days Packaging the material is sold per kg in any packaging required but with the following relation among the three components: A : 1; B : 2; C : 4
Comp.A: Epoxy Resin Comp. B: Curing Agent Comp. C: powders Components bisfenol-A-epicloridrina Epoxy ammine White cement and 1,6-EXANEDIOL GLYCIDYL ETHER Thickeners quartz and marble powders GAMMA- GLYCIDOXYPROPYLTRIMETHOXYSILANE Diluent water water - Viscosity at 25°C Pa.s=0,4-0,6 (ASTM D445) mPa·s=9500 ± 2500 - Color /Gardner Pt-Co 200 max (ASTM D1209) < 6 - Density at 25°C kg/l 1.10 (ASTM D4052) at 20°C g/cm3 1.08± 0.02 . Odour sweet low - Precauzioni per la manipolazione Keep away from flames and sparks. Do not smoke. Avoid skin, eye and clothes contact. Do not breathe vapours and powders. Keep away from flames and sparks. Do not smoke. Avoid skin, eye and clothes contact. Protect eye Irritant Irritant Do not breath the powder PH 10 Not applicable 11,3
Stucco Italiano – EPOFLOOR A. INTRODUCTION
EPOFLOOR is a professional epoxy-cement used to create floor surfaces. It is a strong, versatile, non-toxic coating with many finishing styles which are adaptable to a variety of environments. The system uses a mixture of three components to which other products can be added to obtain different finishes. The base is composed of: A – Epoxy binder B – Hardener for the epoxy binder C – Powder to add volume and strength These three components should be mixed in these proportions 1:2:4 to get a plaster that can be laid with a trowel. With this three-component base you can create finishes such as “Marmorino Fine- Stucco Veneziano”. A fourth component, a mixture of selected powders, can be added to this three-component base to create special floor finishes such as: ?TERRACOTTA: for a floor with the look of terracotta or “coccio pesto”, ground roof tiles, a flooring typical of an antique Venetian tradition. ?MARBLE: for a floor with the look of stone slabs or natural-colored marble. ?QUARTZ SAND: The EPOFLOOR system was design to be a simple, yet professional application which allows the plasterer to be creative. For this reason STUCCO ITALIANO has created a line of additives to achieve a variety of different of effects, namely: MOTHER OF PEARL, an inert base of ground shells with a range of grain sizes. This enriches the floor with small reflective flecks of color, from white to beige/brown; GLITTER, reflective silver or gold flakes that create a shiny effect when the light hits it; ?MARBLE GRAINS, give the flooring a speckled web of color which is more pronounced on the smoothest surfaces;
?METALLIC GEL, a cream made of two components which makes the surface look metallic. The EPOFLOOR System is completed with a surface treatment that to make it waterproof and easy to clean; the recommended treatment is one that STUCCO ITALIANO has found works the best, but EPOFLOOR can also be treated with linseed oil, transparent epoxy or polyurethane coatings, acrylic primers and any other product that the plasterer has tested and prefers. For this final treatment there are two products suitable for indoor flooring and one for outside: ?SEALER, impregnating, nanotechnological waterproofing; ?WAX, a self-shining acrylic wax available on request in three different finishes: matte, satin and glossy. ?MONOPOL, a high-strength, polyurethane-based product suitable for outdoor areas as well as indoor areas which tend to get greasy and dirty easily, like restaurants and bars. B_ APPLICATION Before getting into the details of how to apply the product, we need to talk about the surfaces EPOFLOOR can be applied upon. A careful analysis of the substrate to be coated will ensure an excellent end-result. EPOFLOOR, is a water-based epoxy cement which provides excellent adhesion to all types of media and high resistance to detachment because it’s a mix of two adhesive components, epoxy resin and cement. The epoxy resin guarantees adherence on all low-absorbent surfaces helping it to adhere to the substrate. The cement, besides giving strength to the material, binds all the inert components. Water distributes the binders and helps penetrate the pores. The surfaces that can be covered are all those that have high tear/detachment- resistance (solid substrate). You can apply EPOFLOOR on screed coats or cement plasters/slabs, ceramic or terracotta tiles, marble and granite, but it should never be applied on materials made of gypsum or containing lime. It can be applied on drywall or magnesite screed coat as long as a primer made out of the same components as EPOFLOOR is applied first.
If a surface is not suitable to apply this product on, it is best not to apply it since it will probably separate from the substrate after a few months. It is never advisable to apply a harder/stronger product on a weaker plaster. Even though EPOFLOOR can be walked on after 24-48 hours and is completely cured after 20-30 days, over this entire period there is internal movement and shrinkage that could compromise the job if done on a weaker substrate. It happened once that this product was applied on a cement plaster which itself had been applied on top of gypsum or lime, and after several months the hard/strong cement layer of the substrate tore away from the weaker plaster beneath. The application cycle instructions below are the same for all types of finishes; what changes is the mixture that will be applied which we will look at that later in the description of the finishes. b_1 Analysis of the substrate The first thing the plasterer must do is analyze and evaluate the substrate where EPOFLOOR will be applied to decide which application is best. It needs to be clarified at this point that EPOFLOOR is a coating for floors. It is not flooring with an independent structure. Even though it is abrasion resistant and is highly resistant to compression, because it is only 1 to 2/3 mm thick, the substrate on which it is applied gives it its true compression strength. As already mentioned, EPOFLOOR adheres to all types of surfaces, but the force it exerts during the curing phase can make it detach from weaker materials, therefore the materials that it can be applied on safely are: ?Magnesite screeds (slabs), (those used when applying under-floor heating) ? Premixed screeds for parquet; ?Industrial concrete floor with quartz finish; ?Floor tiles – stoneware, single- fired, ceramic, marble or granite; ?Cement plasters which have no gypsum or lime; ?Drywall.
Be sure that the material on which you are applying the product is fully cured to ensure there will be no movement after applying EPOFLOOR. Usually on a surface up to 40-50 m2, it is not necessary to create expansion joints. However, if there are cracks in the slab caused by constant movement of the structure, it is best to make expansion joints at those points. On surfaces that have lots of fissures or cracks, use polyester reinforcing mesh which will absorb any small movements instead of bringing them to the surface. The reinforcing mesh shouldn’t cover any underlying joints since the movement at those points would be so strong that there would be a risk of separating the coating from the substrate. It is also advisable to use reinforcing mesh on tile floors where you can see cracks in the gaps between the tiles. Another important factor when considering the substrate is its degree of absorption. As mentioned earlier, the EPOFLOOR mixture is in aqueous form and water transports the binders into the pores of the substrate. This guarantees a good grip on the substrate beyond the “suction” effect that using epoxy resin usually implies. So the porosity of the substrate is important and should be the right amount so that it doesn’t absorb too little or too much. If the substrate doesn’t absorb enough, you can solve the problem by sanding over the entire surface with diamond coated sandpaper disc. This is especially recommended for tile floors or concrete slabs which have been finished too smoothly with a trowel. Sanding the substrate is recommended in any case to remove imperfections and dirt. The substrate should then be vacuumed to remove all dust and dirt. If the surface is very absorbent or if it the temperature is so high that it could cause the water to evaporate too quickly, apply a primer to the sanded substrate. For best results, it is important that the surface to be coated is perfectly flat and has no dips (or depressions) or unevenness. Sanding should be enough to smooth it out, but if not, apply two coats of EPOFLOOR loaded ( filled) with German quartz. This should be sanded after hardening. After this step is complete, the normal EPOFLOOR application process can be done.
b_2 primer and polyester reinforcing mesh Normally EPOFLOOR doesn’t need a primer since the first coat acts as like a primer, but as in those cases described previously where the surface is still slightly dusty (after careful cleaning) or you want to be sure the substrate doesn’t absorb too much or you want to apply polyester reinforcing mesh ( better if it is a fiber glass mesh), you can apply the following EPOFLOOR mixture over the entire surface using a roller. Mix together: 1 part comp. A 2 parts comp. B 2 parts comp. C 6-10 parts water Apply this mixture over the entire surface, using a roller with long nap length. If you use reinforcing mesh, apply the mixture over the mesh to fix it to the surface. Wait 12-24 hours and apply one coat of the following EPOFLOOR mixture with a trowel: 1 part comp. A 2 parts comp. B 4 parts di comp.C 2 parts spheroidal German quartz - grain size 0.3-0.1 2 parts water (approx.) While it is still fresh, dust it with spheroidal German quartz 0.06-0.1until the entire surface is covered. This helps to cover the mesh network. The next day, sand the entire surface and remove all dust. If the mesh network is not visible and the surface is very smooth, you can begin the application cycle of EPOFLOOR. If the mesh is still visible, apply another coat as described above.
C_ Base and finish coat - application cycle We have shown how to prepare, when necessary, different surfaces for EPOFLOOR. Now we will describe the basic steps in the various application cycles to create the floor finish you desire. To understand how to get the best results, you need to understand about the curing process. Water is added to the mixture to bind the mixture and make it workable. As the product cures, the water evaporates causing the volume of the material to decrease. This decrease happens over time depending on climatic conditions and the substrate, and although 70% of it happens in the first few days after application, the remaining 30% will happen during the following month. When a lot of material is used, it will decrease even more. So you have to be sure the substrate is completely smooth and flat. When you have uneven substrates, for example, one made of tiles with wide or deep gaps between them, it is important to prepare the substrate with inert material that will limit shrinkage. One this is done, the entire surface can be sanded to even it out and make it flat. On cement slabs that have been created specifically to lay EPOFLOOR on, this isn’t necessary and therefore the basic cycle can be applied without any problems. It is important to remember that the application of the first coat is very important since its ‘design’ or imprint will be visible in the finished EPOFLOOR. C_1 “FINE MARMORINO” Flooring This is the simplest application. You will only need the Base Kit without other additives or materials. There are three versions of this application. ?MONOCOLOR: all three coats are the same color and the final effect when backlit, shows the pattern of the trowel strokes; ?LIGHT BICOLOR: the two basecoats are in one color, while the final coat is done using only 30% of the colorant suggested in the color system. The trowel strokes are accentuated by the lighter shades of color in the final coat. ?DARK BICOLOR is the exact opposite. The two basecoats are in a color using only 30% of the colorant suggested, while the final coat
has the full, more intense color. In this finish, the trowel strokes are very strong and defined. Light Bicolor Dark Bicolor c_1.a Application Cycle First Coat: Following the color system, add color to component B, and then mix the ingredients together in the following proportions: comp. A : ............................................................................................1 part comp. B : ...........................................................................................2 parts comp. C : ..........................................................................................4 parts quartz 0.06 – 0.1 : .............................................................................2 parts water:........................................................................ a little more than 1 part Apply the product with a metal trowel being careful to leave a design you want to have in the final look. Be sure the surface is not too uneven. After 12-
24 hours depending on atmospheric conditions, sand the surface using 60- grit sandpaper and vacuum well. Second coat: Following the color system, add color to component B, and mix the ingredients together in the following proportions: comp. A: .............................................................................................1 part comp. B: ...........................................................................................2 parts comp. C: ...........................................................................................4 parts water: ........................................................................ a little more than 1 part Apply the product with a metal trowel being careful to smooth out the material without leaving too many uneven areas. After 12-24 hours depending on atmospheric conditions, sand the surface using 80-grit sandpaper and vacuum up all the dust. Third coat: Following the color system, add the same amount of color for Monocolor or the correct percentage for the light or dark Bicolor and mix the ingredients together in the following proportions: comp. A: .............................................................................................1 part comp. B: ...........................................................................................2 parts comp. C: ...........................................................................................3 parts water: ........................................................................ a little more than 1 part Apply the product with a plastic trowel being careful to smooth out the material without leaving too many uneven areas. After 12-24 hours depending on atmospheric conditions, sand the surface using first 100-, then 120-grit sandpaper and vacuum up all the dust. C_2 “MARMORINO MEDIUM” Flooring This is the application procedure that will give the final surface a look with a more evident pattern enhanced by the quartz aggregate; the surface will
be slightly rough or non-slip. If you want to achieve the look of marmorino, it is recommended that you apply a fourth coat as you did the third one. You will need the Base Kit without other additives or materials. There are three versions of this application. ?MONOCOLOR: all three coats are the same color and the final effect when backlit, shows the pattern of the trowel strokes; ?LIGHT BICOLOR: the two basecoats are in one color, while the final coat is done using only 30% of the colorant suggested in the color system. The trowel strokes are accentuated by the lighter shades of color in the finish coat. ?DARK BICOLOR is the exact opposite. The two basecoats are in a color using only 30% of the colorant suggested, while the final coat has the full, more intense color. In this finish, the trowel strokes are very strong and defined. Light Bicolor Dark Bicolor c_2.a Application Cycle
First Coat: Following the color system, add color to component B, and mix the ingredients together in the following proportions: comp. A: .............................................................................................1 part comp. B: ...........................................................................................2 parts comp. C: ...........................................................................................4 parts quartz 0.3 – 0.1: ...............................................................................2 parts water: ........................................................................ a little more than 1 part Apply the product with a metal trowel being careful to leave the design you want to have in the final look. Be sure there are not too many uneven areas. After 12-24 hours depending on atmospheric conditions, sand the surface using 60-grit sandpaper and vacuum well. Second coat: Following the color system, add the same amount of color as you did in the first coat to component B, and mix the ingredients together in the following proportions: comp. A: .............................................................................................1 part comp. B: ...........................................................................................2 parts comp. C: ...........................................................................................4 parts quarzo 0.06 – 0.1 : ...........................................................................2 parts water: ........................................................................ a little more than 1 part Apply the product with a metal trowel being careful to smooth out the material without leaving too many uneven areas. After 12-24 hours depending on atmospheric conditions, sand the surface using 80-grit sandpaper and vacuum up all the dust. Third coat: Following the color system, add the same amount of color for Monocolor or the correct percentage for the light or dark Bicolor and mix the ingredients together in the following proportions.
comp. A: .............................................................................................1 part comp. B: ...........................................................................................2 parts comp. C: ...........................................................................................3 parts water: ........................................................................ a little more than 1 part Apply the product with a metal trowel being careful to smooth out the material without leaving too many uneven areas. After 12-24 hours depending on atmospheric conditions, sand the surface using first 100-, then 120-grit sandpaper and vacuum well. If the surface seems to rough, apply a fourth coat as you did for the third one. C_3 “TERRACOTTA” Flooring This is the application procedure that imitates antique “pastelloni”, the traditional Venetian flooring made with lime. You will only need the Base Kit with the addition of the “TERRACOTTA” component available in “FINE” and “COARSE”. There are two versions of this application: ?TRADITIONAL, made with fine terracotta alone; ?MARMORINO: in the first two coats both fine and coarse terracotta are added while in the final coat only fine terracotta is added. In TERRACOTTA MARMORINO, Mother of Pearl can be added which enriches the surface with shiny, reflections.
Terracotta with Mother Terracotta Fine of Pearl c_3.a TRADITIONAL terracotta application cycle First coat: Component B is colored with a yellow ochre/orange to give it the correct shade of terracotta. Then mix the ingredients together using the following proportions: comp. A: .............................................................................................1 part comp. B: ...........................................................................................2 parts comp. C: ...........................................................................................4 parts quartz 0.06 – 0.1 : ..............................................................................1 part TERRACOTTA FINE :.......................................................................3 parts water: ........................................................................ a little more than 1 part
Apply the product with a metal trowel being careful to leave he design you want to have in the final look. Be sure it is not too uneven. After 12-24 hours depending on atmospheric conditions, sand the surface using 60- grit sandpaper and vacuum up all the dust. Second coat: Add color to component B just as you did for the first coat and then mix the ingredients together using the following proportions: comp. A: .............................................................................................1 part comp. B: ...........................................................................................2 parts comp. C: ...........................................................................................4 parts TERRACOTTA FINE :.......................................................................3 parts water: ........................................................................ a little more than 1 part Apply the product with a metal trowel being careful to smooth out the material without leaving too many uneven areas. After 12-24 hours depending on atmospheric conditions, sand the surface using 80-grit sandpaper and vacuum up all the dust. Third coat: Add color to component B as you did for the first and second coats and mix the ingredients together in the following proportions: comp. A : ..........................................................................................1 parte comp. B : ............................................................................................2 parti comp. C : ...........................................................................................2 parti FINE TERRACOTTA:.........................................................................3 parti water: ….................................................................................about 1.5 parts Apply the product with a plastic trowel being careful to smooth out the material without leaving too many uneven areas. After 12-24 hours depending on atmospheric conditions, sand the surface using first 100-, then 120-grit sandpaper and vacuum up all the dust. c_3.b Terracotta MARMORINO application cycle:
First coat: Component B is colored with a yellow ochre/orange to give it the correct shade of terracotta. Then mix the ingredients together using the following proportions: comp. A: .............................................................................................1 part comp. B: ...........................................................................................2 parts comp. C: ...........................................................................................4 parts COARSE TERRACOTTA: ................................................................2 parts FINE TERRACOTTA:........................................................................2 parts water: ….................................................................................about 1.5 parts Apply the product with a plastic trowel being careful to leave a design you want to have in the final look. Be sure it is not too uneven. After 12-24 hours depending on atmospheric conditions, sand the surface using 60-grit sandpaper and vacuum up all the dust. Second coat: Add color to component B just as you did for the first coat and mix the ingredients together in the following proportions: comp. A: .............................................................................................1 part comp. B: ...........................................................................................2 parts comp. C: ...........................................................................................4 parts COARSE TERRACOTTA: ................................................................2 parts FINE TERRACOTTA:........................................................................2 parts water: ….................................................................................about 1.5 parts Apply the product with a metal trowel being careful to smooth out the material without leaving too many uneven areas. After 12-24 hours depending on atmospheric conditions, sand the surface using 80-grit sandpaper and vacuum well. Third coat:
Add color to component B just as you did for the first and second coats and mix the ingredients together in the following proportions: comp. A: .............................................................................................1 part comp. B: ...........................................................................................2 parts comp. C: ...........................................................................................2 parts FINE TERRACOTTA:........................................................................2 parts water: ….................................................................................about 1.5 parts Apply the product with a plastic trowel being careful to smooth out the material without leaving too many uneven areas. After 12-24 hours depending on atmospheric conditions, sand the surface using first 100-, then 120-grit sandpaper and vacuum up all the dust. In this application, it’s important the amount of fine terracotta used is always the same in each coat since it will affect the final color of the product. C_3.c Terracotta MARMORINO with MOTHER OF PEARL - application cycle: This is the same application procedure as that for TERRACOTTA MARMORINO, with the addition of Mother of Pearl to the first and second mixtures. You can add 10-20% of the amount of coarse terracotta used depending on the desired effect. C_4 “MARBLEIZED” - 3 MARBLES FLOORING In this flooring, inert marble and rock are added. This gives the effect of split stone and brings out the granules of the inert material. The beauty of this product comes from the fact that it doesn’t come from adding color, but from the inert marble and rock used. At the present time, it is available in three colors which can be mixed to achieve different shades of color: ?straw
?yellow ochre ?gray In marbleized flooring, inert ingredients such as mica, mother of pearl, or marble are added. Besides creating a smooth surface with the pattern of the trowel strokes, it can be worked with special tools to create a scratched two- tone look. With Dark Marble grain With Mica c_4.a MARBLEIZED – Application Cycle First Coat: Component B is colored with a yellow ochre/orange to give it the correct shade of terracotta. Then the ingredients are mixed together in the following proportions: comp. A: .............................................................................................1 part
comp. B: ...........................................................................................2 parts comp. C: ...........................................................................................4 parts INERT MARBLE:...............................................................................2 parts water: ….................................................................................about 1.5 parts Apply the product with a metal trowel being careful to leave the design you want to have in the final look. Be sure it is not too uneven. After 12-24 hours depending on atmospheric conditions, sand the surface using 60-grit sandpaper and vacuum up all the dust. Second coat: Add color to component B as you did for the first coat and mix the ingredients together in the following proportions: comp. A: .............................................................................................1 part comp.B : ...........................................................................................2 parts comp.C : ...........................................................................................4 parts INERT MARBLE:...............................................................................2 parts water: ….................................................................................about 1.5 parts Apply the product with a metal trowel being careful to smooth out the material without leaving too many uneven areas. In this phase, the empty spaces on the surface of the first coat tend to get filled in. After 12-24 hours depending on atmospheric conditions, sand the surface using 80-grit sandpaper and vacuum up all the dust. Third coat: Add color to component B as you did before and mix the ingredients together in the following proportions: comp. A: .............................................................................................1 part comp. B: ...........................................................................................2 parts comp. C: ...........................................................................................2 parts INERT MARBLE:...............................................................................2 parts
water: ….................................................................................about 1.5 parts Apply the product with a plastic trowel being careful to smooth out the material without leaving too many uneven areas. Every once in a while remove the material from the trowel when it becomes to full of the inert marble, and replace it with new material. After 12-24 hours depending on atmospheric conditions, sand the surface using first 100-, then 120-grit sandpaper and vacuum well. With Marble - Yellow c_4.b Terracotta MARMORINO scratched effect –Application cycle: First coat: Mix the ingredients together in the following proportions: comp. A: .............................................................................................1 part comp. B: ............................................................................................2 pars comp. C: ...........................................................................................4 parts INERT MARBLE :..............................................................................2 parts water: ........................................................................ a little more than 1 part
Apply the product with a metal trowel being careful to smooth out the material so that the thickness is even across the surface; on fresh material use the special tool to scratch the surface to leave some grooves. After 12-24 hours, depending on atmospheric conditions, sand the surface using 60-grit sandpaper or better yet use a carbide grinder. Then vacuum thoroughly. Second coat: Add color to lighten or darken the mixture depending on the final effect desired, and then mix the ingredients together in the following proportions: comp. A: .............................................................................................1 part comp. B: ...........................................................................................2 parts comp. C: ...........................................................................................4 parts INERT MARBLE:...............................................................................2 parts water: ........................................................................ a little more than 1 part Apply the product with a metal trowel being careful to fill in the empty spaces left in the first coat, being careful to smooth out the material without leaving too many uneven spots. After 12-24 hours depending on atmospheric conditions, sand the surface using 60- 80-grit sandpaper and vacuum up all the dust. Third coat: Add color as you did in the second coat and mix the ingredients together in the following proportions: comp. A: …........................................................................................1 part comp. B: ...........................................................................................2 parts comp. C: ...........................................................................................2 parts FINE TERRACOTTA :.......................................................................2 parts water: ........................................................................ a little more than 1 part Apply the product with a plastic trowel being careful to fill in all the enpty spaces and make the surface as smooth as possible. After 12-24 hours
depending on atmospheric conditions, sand the surface using first 100-, then 120-grit sandpaper and vacuum up all the dust. c_4.c Terracotta MARMORINO with inert MOTHER OF PEARL – Application cycle: You can add Mother of Pearl to the first mixture - from10-20% of the amount of inert marble depending on the desired effect. C_5 “SPONGED” To understand how versatile EPOFLOOR is and how many ways it can be applied, the following application process will be described to achieve a variety of artistic results. The number of different results are only limited by the artisan’s imagination. Once the entire cycle of monocolor MARMORINO FINE has been applied, a design can be created on the dry, smooth surface using a sponge, brush, rag or any other tool that you are used to using colored EPOFLOOR diluted with abundant water. First Coat: Following the color system, add color to component B, and then mix the ingredients together in the following proportions: comp. A : ............................................................................................1 part comp. B : ...........................................................................................2 parts comp. C : ..........................................................................................4 parts quarztz 0.06 – 0.1 : ...........................................................................2 parts water:........................................................................ a little more than 1 part
Apply the product with a metal trowel being careful to leave a design you want to have in the final look. Be sure it is not too uneven. After 12-24 hours depending on atmospheric conditions, sand the surface using 60-grit sandpaper and vacuum up all the dust. Second coat: Following the color system, add color to component B, and then mix the ingredients together in the following proportions: comp. A: .............................................................................................1 part comp. B: ...........................................................................................2 parts comp. C: ...........................................................................................4 parts water: ........................................................................ a little more than 1 part Apply the product with a metal trowel being careful to smooth out the material without leaving too many uneven areas. After 12-24 hours depending on atmospheric conditions, sand the surface using 80-grit sandpaper and vacuum up all the dust. Third coat: Following the color system, add the same amount of color for or reduce or increase the color to achieve the effect you want and then mix the ingredients together in the following proportions: comp. A: .............................................................................................1 part comp. B: ...........................................................................................2 parts comp. C: ...........................................................................................3 parts water: ........................................................................ a little more than 1 part Apply the product with a plastic trowel being careful to smooth out the material without leaving too many uneven areas. After 12-24 hours depending on atmospheric conditions, sand the surface using first 100-, then 120-grit sandpaper and vacuum up all the dust. Finishing:
Prepare containers of EPOFLOOR with different colors mixed in the following proportions: comp. A: .............................................................................................1 part comp. B: ...........................................................................................2 parts comp. C: ….......................................................................................2-3 parts water: .............................................................................................3-4 parts With a natural sponge or other tool, dab on alternating colors, overlapping edges of color until the entire surface is covered in the desired design. After 12-24 hours lightly sand the surface with 180/200 grit or finer sandpaper. D_Color System EPOFLOOR can be colored with water-based colorants. Stucco Italiano’s color catalog gives instructions on how much colorant to mix into the product to obtain a homogeneous color. The catalog lists colors that are suitable both for indoor and for outdoor environments. Remember that under sunlight the epoxy in EPOFLOOR tends to take on a straw-yellow tone.
It is very important to use the right colors since not all of those available on the market go well with EPOFLOOR; some may react negatively with EPOFLOOR to compromise the final strength of the product. Usually when you want to obtain a gradated effect, in the last coat reduce the amount of color use in the previous coats by 70%. E_ PROTECTIVE TREATMENT The final protective treatment for EPOFLOOR can be done with products each artisan is familiar with from linseed oil to acrylic wax. It is recommended in indoor environments to use a good waterproofing product and later treat it with acrylic wax that will keep the dirt on the surface making the floor easier to clean. Stucco Italiano suggests using a waterproofing SEALER as a base.This will limit the absorption of liquids. Apply two coats, wet on wet. For finishing, apply two to three coats of our self-shining acrylic wax. The wax comes in three finishes: matte, satin or glossy. In exterior environments or where there will be heavy foot traffic, it is recommended to use a waterproofing sealer and later finish it with a water- based, transparent, single-component polyurethane varnish. F_ PRODUCTS 1. EPOFLOOR BASE KIT: comp. A......................................................................................epoxy resin comp. B..........................................................................................hardener comp.C.............................................................................................powder 2. Fine SPHEROIDAL GERMAN QUARTZ 3. Medium SPHEROIDAL GERMAN QUARTZ 4. Coarse SPHEROIDAL GERMAN QUARTZ 5. FineTERRACOTTA
6. CoarseTERRACOTTA 7. Beige- White MARBLE 8. Yellow MARBLE 9. Gray MARBLE 10...........................................................................MOTHER-OF PEARL 11...................................................................................Silver GLITTER 12....................................................................................Gold GLITTER 13....................................................................................................MICA 14...............................................................................................SEALER 15...........................................................................................Matte WAX 16............................................................................................Satin WAX 17.........................................................................................Glossy WAX 18.................................Single-component POLYURETHANE VARNISH