Download
1 / 81
810 likes | 842 Views
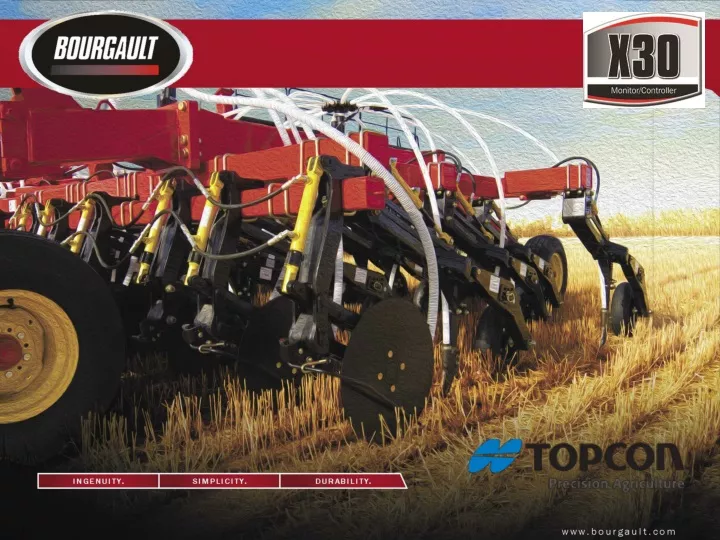
A comprehensive guide on how to operate the X30 System Monitor with details on functions, settings, system shutdown, turning on, and more. Follow step-by-step instructions for optimal use.

E N D
X30 Monitor • Monitor is 12.1 inches • LINUX operating system – not windows • Can-based communication. No serial ports • New part number 3132-10
Note: please follow the shut down procedure and DO NOT hold button until display shuts down. Reset Button Next to the green power button there is a red button, that is used to reset the console when it freezes or can not be turned off in the normal way. Only use this method as a last resort. Shutting Down To shut down the console, briefly press the green ON/OFF button. The system will ask if you want to power down. Select YES to turn off or No to continue working Turning On To turn on the X30 console, press and hold green power button (approximately 3 sec), located on the back of the console in the lower left corner.
LED Light Bar Battery Status LED Light Sensor Supply Status LED
Before removing the USB, always disconnect first by touching the USB Eject icon on the base of the console. A message will display that it is safe to remove the USB. Topcon Logo can perform one of the following functions: take a screen shot or save/load global home screen. Brightness Control adjusts the brightness of the display. Use plus or minus to adjust display. Day/Night mode changes the brightness of the display. Settings are Day, Night and Auto. Auto light mode will set the mode automatically depending on light conditions
Setup • All configuring and parameter entry is completed in the setup menu • To toggle though the screens use the wrench on the guidance screen and • the running man on the settings page
Language • Language: change the operating language • Decimal point format: Period or coma
Time/Date • Just touch each bar to • Set the Date format: the way it shows • Set the Time format: 12hrs or 24hrs • Set the current time: this will set itself when • you hook to GPS signal. With out GPS signal the time will be incorrect.
Units • Units: imperial (US) • Latitude: DMS • Pressure: PSI • Short Distance Units: Inches • Area: acre • Dry Product: bushels • Dry Density: pounds per cubic foot • Liquid units: Gallons • Application Rate: fixed rate
Environment Setup • Audio Volume % • The volume of the audio and button clicks. • - Button Clicks on/off • Clicking sound every time you touch a button. • Alarm Audio on/off • Whether or not you want the audio part of the • alarm • Touchscreen Calibration • If the screen is out of calibration. Restart required • Sensitivity of touchscreen • Change the sensitivity. Restart required • - Multi-function region mode- assigns the function to the Topcon icon button on the screen • System transfer Not used • Steering status Topcon steering • Toolbar Button Size allows to select button • size for mini-view and job/guidance menu • options that appear on the right and left sides • of the operating screen.
Map • Point of focus: Allows you to set the point • focus either the vehicle or the implement • Map Planning: allow you to pan though the • map with your finger and drag it to where ever • you like. So you can see parts of the map that • aren't on the screen • - Map focus auto shift: if this is enabled it will • automatically refit the map in the guidance • screen when you have any mini views out. • Highlight loaded coverage: when enabled, as • product is being applied covered area will be in • green and the previously covered will be yellow. • - Pause boundary recording with master: allows to enable or disable pausing of boundary recording with the master switch. • Visual reference line length:allows you to • Set a visual reference line length
Access Level • Allows for access to some feature • (like diagnostics) not accessible at the • Operator level • Provision USB for Upgrade: this will unlock the thumbdrive to prepare for software upgrade
Console Universal terminal: Not used File server: enabled for upgrading firmware on ECU’s Cameras: Not used Per-point Data logging: Not used Wireless Network: connect to a wireless network for remote support. Remote Assistance: team viewer remote support from the dealer. Cloud Based Service: Not used VDC Support: Not used
Guidance • Guidance (this is always enabled) • Auto Steer (used with Topcon Steer) • Controlled Traffic (Topcon Steer) • Job helper mode Job assist or Quick Start Job Assist - when job assist icon on the guidance/coverage map screen selected, it will bring up a window, that will automatically display some brief instructions as different job and field related menus are selected. Quick Start - when quick start icon on the guidance/coverage map screen selected, it will prompt the operator to perform an action or enter information that is required to start/ continue with a job.
Implements • Auto Sectional Control: ON if you want • the guidance to turn the clutches on and off. • Or if your using sectional control NH3 or • Liquid. • Variable Rate Control if using a VR map • Task Data (not used) • Area Counters on or off • Reset Job Area Counters • - Never - never reset area counters • - Prompt - prompt before resetting area • counters • - Auto - automatically reset area counters. • Water conservation Not Used
Quick Start When Job Helper mode set to Quick Start prompts for specific jobs that will be carried out, can be customized under System/Features/Quick Start. There are several options that can be enabled or disabled. Green checkmark beside the option indicates that option is enabled, red cross indicates that option is disabled. Note: please refer to our web site for more instruction on this.
GPS Receiver • GPS Receiver use Other for non Topcon • WAAS or Omnistar. • Baud Rate needs to match what your receiver is outputting • Please refer to the website for help with GPS connections and setup
GPS Output NOT USED
Radar NOT USED
Serial Ports GPS receiver com; this can be set the either 1 or 2, depends on how you are connected into the main X30 harness. Units that are 2016 or newer they will only be able to come in on Com 1 GPS Output Com: must be set to something different then the receiver coms Please refer to the website for help with GPS connections and setup
Alarms • Alarms that deal with the console, GPS • or Steering. All can be disabled.
Seeder Alarms • All the alarms for the seeder, can be • turned on or off individually.
Flag Points • With all the flag points you can change the • description or name of the point
Universal Terminal Setup - Not used
Select Vehicle • You can change between different vehicles • that you have created • You can load a vehicle from another monitor • through a USB • If you change the vehicle in this page it will • restart the monitor
New Vehicle • This is were you can go in and create a new • vehicle by selecting the proper manufacture. • Then it will ask you to pick the model of the • unit if its not there pick a model that is close to • right one.
Vehicle Geometry • - After the unit is picked you will have to • come in and adjust the measurements specific • to each vehicle • Ensure distance from receiver to rear axle • and rear axle to the hitch are accurate as this will • affect ASC/Mapping • The rest are primarily for steering application • If using Topcon steering some systems require odd dimensions to steer. PLAESE REFER TO YOUR LOCAL TOPCON DEALER • Please make sure all measurements match up to your tractor and receiver positioning
Select Implement • This is were you will pick the machine • that you are operating • Every time you create a new profile it will • appear here
Factory Profile Follow though a few steps to configure your monitor to the machine you are working with. -Start by picking the series of tank that you have. Touch and highlight the proper one then press the arrow. -Setting up a profile for both 6000/7000 is basically the same as you go though
Factory Profile Select the model for tank by highlighting it then press the arrow to move on.
Factory Profile This is were you pick how your machine is configured. How many meters and whether or not you have sectional control granular or NH3/LIQ. Find the one that fits your tank and highlight it and press the check mark. NOTE: you will see in a four tank configuration that it has a T3 or a T5. T3 - means that the fourth meter is on tank three. T5 – means that the fourth meter is on the saddle tank.
Factory Profile This is asking you what ECU type your machine is. IB-1 is tanks built before May of 2014 and will have white box in cab Apollo tanks built after May of 2014 will have the ISO connection to tractor
Factory Profile • Pick Bourgault then go ahead and press the check mark.
Factory Profile • Highlight the machine that you will be using. Then press the check mark to proceed.
Factory Profile • Find the machine that fits then highlight it and hit the check mark to move on
Factory Profile • Pick the one that matches your machine, highlight and pick the check mark to move on. • HF High flotation • Gran Scn Granular sectional control
Factory Profile • On this screen it allows you to the name the unit simply by touching on the box with the name in it. • Then a key pad will come up for you to type the name. • When finished then touch the green check mark to move on • The monitor will then restart
ECU SETUP Please refer to our website for more information on ECU setup.
A - Swath Width - working width of the implement. B - Overlap - the width of the overlap between two adjacent swathes. It is mostly used for auto steer and guidance. This value is typically set to 0. C – Not used D - Implement Wheels Offset - distance from pivot point of the drill to front row of openers. Enter: - negative number for standard machine as pivot point is back tires. - positive number for High Flotation machine as pivot point is front tires. E - Implement Offset - distance from the front hitch to pivot point of the drill. - regular drill, pivot point is back tires. - high flotation drill, pivot point is front tires. H - Working Length - depth of boom (distance from the front row of openers to the back row of openers).
Section Setup • Enter # of section and the width of each for the • Multi-section boom • It can be set all the same or individually • If using multi-section the total width will auto • Populate into the geometry screen
TIMING This will set times for product to get from the section control valves to the openers. 1. Select boom from the tabs on the left side, the name of that boom will be shown in the title bar. 2. ON time - it should be the time from when the section control valve opens until product is flowing at the exit of the opener. 3. OFF time - it should be the time from when the section control valve closes until product stops flowing at the exit of the opener. All sections can be set to have the same on/off time (the worst case) or they can have individual times for granular sections to have even less overlap. Since the product for the inner sections has less distance to travel they don't need to start as soon or stop as late so can have a shorter on/ off time. Note: please refer to the website for more on section control timing.
Section Switch • Enable a virtual switchbox so that you can manually • control sections on screen • This virtual switchbox will show up on the guidance • Page • - Only works if your using sectional control
MASTER SWITCH • - Virtual - use this selection if you do not • have a cabin switchbox connected and only • want the master switch to be controlled • from the X30 console screen. • - External Console Input - allows use of • remote mapping connector on the X30 • harness as an alternative master signal. • Apollo CM-40 - not used • - Implement - use this selection if you want • the auto clutch switch on your drill to act • as the master switch • Keypad - use this selection if a cabin switchbox connected and you want to use • the master switch on the switchbox. • Keypad and Virtual - use this selection • if you want to control the master switch • from the X30 console as well as the in-cab • switchbox. • Implement Master Switch - allows use of • auto clutch as a secondary along with the other Master switch selection. Note: IF DRILL CONTROL IS ENABLED DO NOT USE IMPLEMENT SWITCH AS MASTER OR AS SECONDARY MASTER.
KEYPAD This menu option will allow you to identify and assign the right in-cab and on-frame switchbox, assign functions to the buttons that have no functions assigned to them (A, B & C buttons), select how you prefer to control tanks. There are two tabs, one for the in-cab switchbox and the other for the switchbox on the frame of the air seeder.
GRANULAR SETUP Name as Bin or Tank - select Bin or Tank, depending on how you would like the individual compartments of your air seeder to be referred to. Use Product as Name - if enabled, name of the product that is assigned to the tank will be used as a name for that Bin/Tank. If no product assigned to the tank, the tank name will correspond to the tank number. Preload time – this setting only effective for 7000 AS with hydraulic drive. This is time that meters will run when master is switched on while stationary Preload time is also the length of time that the meters will run when the “prime” button on the on-frame switchbox is pushed. Fan Speed to Start This prevents the possibility of running meters without fans engaged and subsequent plugging of the distribution pipes.
INDIVIDUAL TANK SETUP Name - here you can enter the name for the specific tank of the air seeder. Capacity - tank volume is factory preset and loaded from the implement profiles. Status - this setting will be shown only for the tanks which have drive assigned to them according to the air seeder tank model that was selected during the implement setup. Set status to "enable" if this tank will be metered from. Section Control (7000AS) - these settings appear only if granular section control is enabled in the profile. Sectional Boom: On Time to SC location - it should be the time from when meter starts until product is at the section valve. Off Time to SC location - it should be the time from when meter stops turning until product stop flowing through section valve. Full Width Boom: On Time to Ground - it should be the time from when meter starts until product is at the opener on longest run. Off Time to Ground - it should be the time from when meter stops turning until product stop flowing through the opener at shortest run. HINT: if tank is not being used disable it otherwise system won’t allow you to start applying. All enabled tanks need a cal factor even if the switched off
Tank Grouping - Groupings are pre-set from the factory use the arrows on the right hand side to scroll though them - Tank volumes update automatically
Drive Setup • Toggle between the tanks with the tabs on the left • Hand side • Drive type – proportional for 7000 AS • -linear for 6000 AS • Pulses/ Revolution – 32 for 7000 AS • 16 for 6000 AS • Minimum RPM set at 10 • Maximum RPM set at 1000 • Metering Auger pick corresponding augers to • each tank