Download
1 / 21
210 likes | 305 Views
More Advanced AWT. Last week, you learned about Applets, Lists, and Buttons AWT provides several other “widgets” and tools: Labels Choice boxes Check boxes Radio buttons Text boxes Frames Layout Managers. Note.

E N D
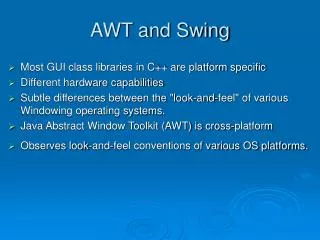
More Advanced AWT • Last week, you learned about Applets, Lists, and Buttons • AWT provides several other “widgets” and tools: • Labels • Choice boxes • Check boxes • Radio buttons • Text boxes • Frames • Layout Managers
Note • None of the code on these slides is meant to be copied & pasted, it’s for example only. (Showing the full code would take too much space). • See the Microwave.java. All of these things are in there.
Microwave Example • A silly implementation of a Microwave
Layout • You’ve used FlowLayout: • FlowLayout is the default • Just lays the controls out in a line,and wraps when necessary, basedon window shape
Grid Layout • GridLayout creates a grid and puts each component in the grid, left to right, top to bottom
Grid Layout Cont. • Layout managers manage the layout for canvases, like Frame or Applet: • setLayout(new GridLayout(rows, cols)) • Note the widgets grow to fit the cells by default… there are many options to control formatting • Entering a blank space in the grid: • Give it an empty Label: • component.add(new Label()); • Add components like usual: • this.add(Button)
Border Layout • Border Layout creates five areas on the screen, “North”, “South”, “East”, “West”, and “Center”, and puts components in those areas. • This screen shot put things in “North”, “Center”, and “South”; you can experiment with “East” and “West” • Checkbox: North • Choice: Center • Radio buttons: South
Border Layout Cont. • setLayout(new BorderLayout()) • add() like usual • Widgets don’t grow to fill available space
Frames • Frames are separate dialog boxes, complete with closing button, maximize, minimize, etc.
Creating/Using a Frame frame = new Frame(); frame.add(some_widget); // adds a widget frame.setVisible(true); //shows the frame frame.setLayout(new BorderLayout()); // uses the BorderLayout manager frame.setSize(400,125); //width, height
Frame Events • The widgets so far do not need event listeners (though they all can have listeners attached to them), but a Frame needs a WindowListener attached to it. • Without a listener, the window will never close! frame.addWindowListener(new minimalFrameListener()); // see next slide for minimalFrameListener // change “name” at the bottom to your Frame’s name
Minimal Frame Listener public class minimalFrameListener implements WindowListener{ public void windowDeactivated(WindowEvent e) { } public void windowClosed(WindowEvent e) { } public void windowDeiconified(WindowEvent e) { } public void windowOpened(WindowEvent e) { } public void windowIconified(WindowEvent e) { } public void windowActivated(WindowEvent e) { } public void windowClosing(WindowEvent e) { name.setVisible(false); } }
Panels • These layouts are only rarely enough • Panels can hold components and organized by the layout managers • Panels can even hold other panels! • Nest panels in panels to create relatively complicated UI’s.
Panel Code • panel = new Panel() • Example: • This is actually a panel that contains a label and a choice, and was added to the “Center” of the border layout panel.add(new Label(“Set Heat Level”)); panel.add(powerSetting); this.add(“Center”, panel)
Nesting Panels • Layouts too complicated for the simple managers can usually be created by creating several panels and composing them together • Each panel can have its own Layout manager
More Widgets • The toolkit you are using, “Abstract Window Toolkit” (AWT), has several more “widgets” • “Widgets” are the things you interact with, like buttons, choice boxes, or radio buttons
Checkboxes • Checkboxes are appropriate for Boolean questions: Yes or no. • checkbox = new Checkbox(“Output result to stdout?”); • Inside parameter is the label on the Checkbox • Getting/Setting the state: Checkbox.setState(true); // checks the checkbox Checkbox.getState(); // returns true or false if checkbox.getState() { System.out.println(“It was checked.”); }
RadioButtons • Radio Buttons are checkboxes bundled into a group, Appropriate when only one choice of many is valid at a time • Create a “CheckboxGroup” and pass it to each Checkbox in the constructor wavelengthGroup = new CheckboxGroup(); // no arguments microwave = new Checkbox(“Microwave”, wavelengthGroup, true); // last argument controls initial status infrared = new Checkbox(“Infrared”, wavelengthGroup, false); • Getting the selected Checkbox: Checkbox selected = wavelengthGroup.getSelectedCheckbox() // note that returns a Checkbox reference
Choice Boxes • Choice boxes are appropriate for when thereare more then a few choices and only one isappropriate • Do not use radio buttons for more than threeor four choices. Use Choice boxes. • Choice boxes can multi-select, but it issignificantly more complicated to program. powerSetting = new Choice(); powerSetting.add(“Carbonize”); powerSetting.add(“Sear”); powerSetting.select(“Sear”); //selects a choice programmatically System.out.println(powerSetting.getSelectedItem()); // prints the item text
TextField • Freeform text entry text = new TextField(“initial contents”, width); System.out.println(text.getText()); Text.setText(“Something.”);
MultiThreading • Microwave sample has a countdown timer in a separate thread • To create a thread: • create a class that extends Thread, and override “public void run()” • Instantiate that class • Call “start()” method • See Microwave.java for example (too long to add here) • Also see Timer in Counter thread