Download
1 / 44
450 likes | 602 Views
Android Application Development. Lecture I: Startup. Purpose. 1) -- EDE project 2) -- EDE project -- EDE project Technical abilities: Objective C を用いたオブジェクト指向プログラミング (Object Oriented Programming by Objective C)

E N D
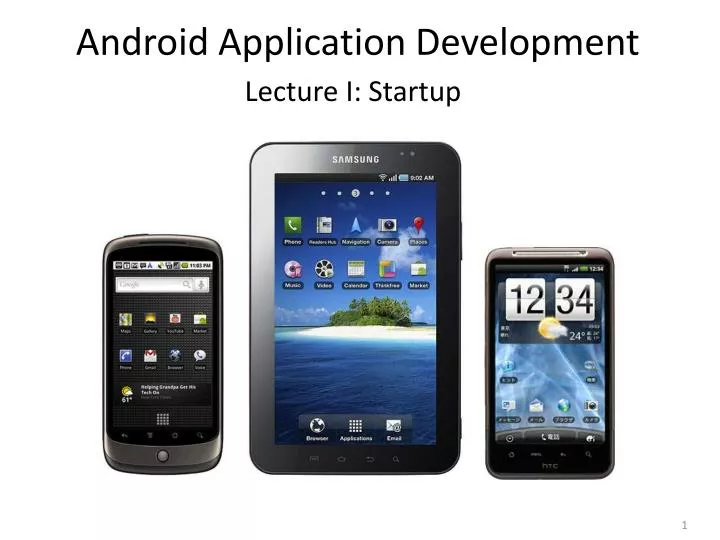
Android Application Development • Lecture I: Startup
Purpose • 1) -- EDE project • 2) -- EDE project • -- EDE project • Technicalabilities: • Objective C を用いたオブジェクト指向プログラミング (Object Oriented Programming by Objective C) • iOSプログラミング入門 (Getting started with iOS programming) • エディタ、コンパイラ、デバッガなどが融合された統合開発環境-xcodeによる実践 (Experience in coding and debugging the source code in an Integrated Development Environment – xcode)
Purpose • 自律性(A-1, A-2)グループの目標を揚げ、その目標に向かい計画的かつ継続的に行動する • 協調性(B-3) チームの共通目標に向かい、全体の進捗に合わせ、常に他のメンバーとコミュニケーションとりながら作業を進める • コミュニケーション能力 (C-2) モデルの設計や共同開発を通し,自分の意見をメンバーに適切に伝え、他のメンバーの意見もしっかりと聞く • 問題解決能力 (G-1, G-2) 問題を分析し、モデル化を行い、課題を適切に設定する。また、与えられた制約条件の下での解決方法を複数検討し、相互評価を行い、最終的に1つの解決方法を実装する。 • 実践性(F-1,F-2) 課題を行うことで、モデリング能力・プログラミング能力・設計から検証までに関する実践的な能力を身につける • Androidプログラミング入門 • モデリングからコーディング、そして検証までの実践
Information • Requirements: • JavaやOOPプログラミングの基本知識 (Basic knowledge of Java and OOP programming) • ハードウェア (OS: Mac OS X 10.5.8, Windows XP or later, RAM >= 2GB) • ソフトウェア (Eclipse with Android Development Tools (ADT) plug-in) • Communications and Materials: • Book: (1) Google Androidプログラミング入門 • (2) 入門 Android 2 プログラミング • The online Dev Guide http://developer.android.com/guide/ • Recommended web site: • 逆引きAndroid入門http://www.adakoda.com/android/ • 日本Androidの会http://www.android-group.jp/ • ソフトウェア設計のためのモデルの開発 • http://msdn.microsoft.com/ja-jp/library/dd409436.aspx
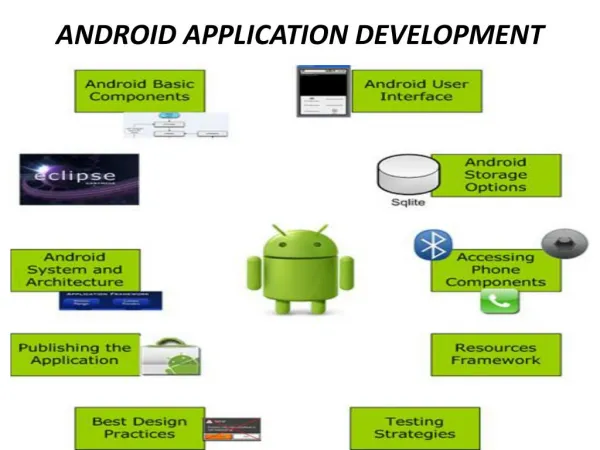
Contents - Lectures I. Startup I - 1. What is Android? I - 2. Download and install I - 3. The first android application I - 4. Other attempts II. Application Fundamentals III. UI and data control IV. Provider/service/location/map
Contents - Lecture I I - 1. What is Android? I - 1.1. Android icon I - 1.2. Market share I - 1.3. Android architecture I - 2. Download and install I - 3. The first android application I - 4. Other attempts
I - 1.1. Android とは Googleが開発した、携帯端末用のオープソースのプラットフォーム Nexus one Galaxy tab htc Design HD IS03
I - 1.2. Android: market share http://en.wikipedia.org/wiki/Smartphone
I - 1.2. Android: market share http://en.wikipedia.org/wiki/Smartphone http://www.gartner.com/it/page.jsp?id=1466313
I - 1.3. Android Architecture – Linux kernel • Android is based on Linux kernel, but is not a Linux • The Linux kernel provides Display Driver, Camera Driver, Flash Memory Driver, Binder (IPC) Driver, Keypad Driver, Wifi Driver, Audio Drivers, Power Management. • It doesn’t include all of the Linux kernel
I - 1.3. Android Architecture – Libraries • Bionic libc • Media framework (support standard audio and video) • Web kit: open source, support CSS, Javascript, DOM, Ajax • SQLite: embedded relational database • 2D/3D graphic libraries
I - 1.3. Android Architecture – Android Runtime • Development language: Java • Dalvik Virtual Machine (DVM) • Instructions: Dalvik executable (dex format) • Different from Java Virtual Machine (JVM) • JVM instructions: Java bytecode (.class)
I - 1.3. Android Architecture – DVM http://itpro.nikkeibp.co.jp/article/COLUMN/20091208/341738/
I - 1.3. Android Architecture – DVM • Java VMに似た仮想マシン、ARMプロセッサ向けに最適化 • Javaのクラスファイルから変換したDEXフォーマットのバイナリコードで実行 • JVMは“スタック・ベース”で、データをスタックに格納して演算処理を実行する。レジスタ・ベースのDVMはCPU内部のレジスタにデータを格納して演算処理を実行し、より高速に動作する。 • JNI (Java Native Interface) をサポートしているため、CやC++ のコードで連携可能 • Android 2.2はJITコンパイラ搭載、従来より2-5倍の処理速度
I - 1.3. Android Architecture – Android Runtime • Activity Manager • Content Provider • Resource Manager • Notification Manager • View System • Location Manager • GPS, car navigation, map…
I - 1.3. Android Architecture – Applications • Development language: Java
Contents I - 1. What is Android? I - 2. Download and install I - 2.1. Preparation I - 2.2. Install Android SDK and ADT I - 2.3. Add Android platforms I - 2.4. Exploring SDK directory I - 3. The first android application I - 4. Other attempts
I - 2.1. Preparation Step 1. Preparing your development computer Open http://developer.android.com/sdk/installing.html (a) Check your System Requirements --> confirm the version by the following commands: $java -version java version "1.6.0_20” $ which javac /usr/bin/javac $ ls -al /System/Library/Frameworks/JavaVM.framework/Versions lrwxr-xr-x 1 root wheel 3 May 20 15:21 CurrentJDK -> 1.6 (b) Eclipse Classic 3.5.2 (162 MB), The classic Eclipse download: the Eclipse Platform, Java Development Tools, and Plug-in Development Environment http://www.eclipse.org/downloads/
I - 2.2. Install SDK and ADT • Step 2. Downloading the SDK Starter Package • Download the Android SDK. • Move it to $HOME/Library/ • edit your ~/.bash_profileand set the PATH environment variable • export PATH=$PATH:$HOME/Library/android-sdk-mac_86/tools • test: • $android • Step 3. Installing the ADT Plugin for Eclipse • Android Development Tools plugin (optional) • https://dl-ssl.google.com/android/eclipse/
I - 2.3. Install Android platforms and other components Step 4. Adding Android Platforms and Other Components $android or open Eclipse or Select Window > Android SDK and AVD Manager.
I - 2.4. Exploring SDK directory Step 5. Exploring the SDK. Please explore the SDK directory.
Contents I - 1. What is Android? I - 2. Download and install I - 3. Build your first android application I - 3.1. Create an AVD I - 3.2. Create new Android project I - 3.3. Project files (1) I - 3.4. Run the app I - 3.5. Entry of the app I - 3.6. Project files (2) I - 3.7. Resource file I - 4. Other attempts
I - 3.1. The first android app – Create an AVD • http://developer.android.com/resources/tutorials/hello-world.html • Step 1. Skip the step of “Install a Platform” • Step 2. Create an AVD • In Eclipse, choose Window > Android SDK and AVD Manager. • Select Virtual Devices in the left panel and click New, The Create New AVD dialog appears. • Type the name of the AVD, such as ”gavd". • Choose a target. The target is the platform (that is, the version of the Android SDK, such as 2.2) you want to run on the emulator. • You can ignore the rest of the fields for now. • Click Create AVD.
I - 3.2. The first android app – New android project Step 3. Create a new android project From Eclipse, select File > New > Project, select “Android project” and click Next
I - 3.2. The first android app – New android project Input the project details Project name: HelloOkinawa-proj Application name: Hello, Okinawa Package name: com.ede.hellookinawa Create Activity: HelloOkinawa_Activity Min SDK Version: nothing
I - 3.3. The first android app – Project files (1) Step 4. Browse the created files in your project
I - 3.4. The first android app – Run the app Step 5. Run the application Select Run > Run > "Android Application". Notice: The Android emulator might take several minutes to boot
I - 3.5. What is the entry of the application? Entry: HelloOkinawa_activity.java, please change the code as the following, and run the application again. Hit: Command + Shift + O: import the system package automatically
I - 3.6. Project files (2) - contents or responsibilities Project name: same as the root folder name of the project The entry of the application is here Auto-compiled resources IDs, don’t change this Application icon, you can change it as your own icon file The layout of the main window String variables Application configuration Some properties
I - 3.7. Resource file – Strings and R (XML format) Strings.xml <?xml version="1.0" encoding="utf-8"?> <resources> <string name="hello">My first android application, Hello Okinawa!</string> <string name="app_name">Hello, Okinawa</string> </resources> R.java packagecom.example.hellookinawa; publicfinalclassR { publicstaticfinalclassattr { } … publicstaticfinalclassstring { publicstaticfinalintapp_name=0x7f040001; publicstaticfinalinthello=0x7f040000; } }
I - 3.7. Resource file - The main window: main.xml main.xml <?xml version="1.0" encoding="utf-8"?> <TextViewxmlns:android="http://schemas.android.com/apk/res/android" android:id="@+id/textview" android:background="#ffffff" android:layout_width="fill_parent" android:layout_height="fill_parent" android:text="@string/hello"/> Point to hello in strings.xml R.java … publicstaticfinalclassid { publicstaticfinalinttextview=0x7f050000; } publicstaticfinalclasslayout { publicstaticfinalintmain=0x7f030000; } Point to main.xml
I - 3.7. Resource file - in Java source HelloOkinawa_activity.java publicclassHelloOkinawa_activityextendsActivity { @Override publicvoidonCreate(BundlesavedInstanceState) { super.onCreate(savedInstanceState); setContentView(R.layout.main); } } R.java … publicstaticfinalclassid { publicstaticfinalinttextview=0x7f050000; } publicstaticfinalclasslayout { publicstaticfinalintmain=0x7f030000; } Point to main.xml
3.7. Resource file - Configurations of your application AndroidManifest.xml <?xml version="1.0" encoding="utf-8"?> <manifest xmlns:android="http://schemas.android.com/apk/res/android" package="com.example.hellookinawa" android:versionCode="1" android:versionName="1.0"> <application android:icon="@drawable/icon" android:label="@string/app_name" android:debuggable="true"> <activity android:name=".HelloOkinawa_activity" android:label="@string/app_name"> <intent-filter> <action android:name="android.intent.action.MAIN" /> <category android:name="android.intent.category.LAUNCHER" /> </intent-filter> </activity> </application> <uses-sdkandroid:minSdkVersion="8" /> </manifest> Set debuggableto true If you have many activities classes, define them here. Specify the entry activity by <intent-filter>
Contents I - 1. What is Android? I - 2. Download and install I - 3. Build your first android application I - 4. Other attempts I - 4.1. Debug /adb /ddms I - 4.2. Log in ddms I - 4.3. Connect to android device by IP I - 4.4. Project files in the release version I - 4.5. Files in the release version - .apk I - 4.6. Locale and text
I - 4.1. Debug /adb /ddms Debug your application Add some code the OnCreate method of class HelloOkinawa_activity, set the breakpoint and debug it Command line tools: adb [mbp:~/Downloads/apks]$ adb devices List of devices attached [mbp:~/Downloads/apks]$ adb -s emulator-5554 install “hello.apk” [mbp:~/Downloads/apks]$ adb -s emulator-5554 uninstall “hello.apk” [mbp:~/Downloads/apks]$ adb shell #ls –l >>>>>>>>>>>>>>>> check the files of android emulator or devices. … Open the perspective ddmsfrom eclipse • Browse the folders and files in the emulator. • Copy the files between the emulator and PC
I - 4.2. Log in ddms View the running log (ddms) – you can find the running error or system message here . // Append Log.v() to OnCreate() and OnStart() method of class HelloOkinawa_activity, @Override public void onCreate(BundlesavedInstanceState) { super.onCreate(savedInstanceState); setContentView(R.layout.main); Log.v("TEST", "in onCreate method..."); } @Override protected void onStart() { super.onStart(); Log.v("TEST", "in onStart method..."); } Specify a filter “TEST” here Emulator Control • Telephony actions, Location controls • Switch layout orientation (CTRL+ F11, CTRL + F12)
I - 4.3. Connect to android device by IP - adb Command line tools: adb Assign an IP address to the android device, and connect it to the network. Confirm the reachability by the following command $ ping IP IP address of the android device $ export ADBHOST=IP set ADBHOST=IP for windows $ adb kill-server $ adbstart-server $ adbdevices
I - 4.4. Project files in the release version (on the emulator) From the command line: $adb shell or open the perspective ddmsfrom eclipse The setting or data of the application is here.
I - 4.5. Files in the release version - .apk .apk is in .zip format Pull down your .apk file from the simulator or device to your PC, rename and extract it
I - 4.6. Locale and text res/drawable-xx-ryy res/values-xx 言語xx: ISO-639-1 http://en.wikipedia.org/wiki/ List_of_ISO_639-1_codes 地域yy: ISO-3166-alpha-1 http://en.wikipedia.org/wiki/ISO_3166-1 参考例:Hello, L10N http://developer.android.com/intl/ja/resources/tutorials/localization/index.html or http://goo.gl/iZdJ5