Download

1 / 7
70 likes | 88 Views
Learn how to upload your website to Webs.com in easy steps. Create an account, upload your HTML files, and personalize your site quickly. Follow the detailed instructions to get your website up and running smoothly.

E N D
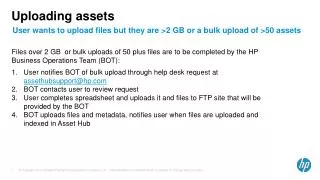
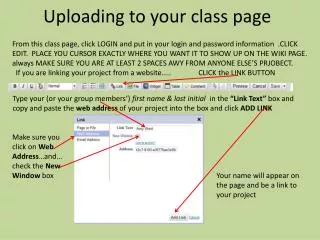
Uploading your website to webs.com
Steps • create an account on webs.com • have HTML files ready to upload
First Steps First... • Open webs.com • Select website type Personal • Click on Get started.
Sign up • Fill in your email address and any password you choose. • Fill in anymore details if asked • when you reach step 2 click on HTML mode on the right of the screen.
HTML MODE • Choose your website address: your-website-name.webs.com • Type in the letters you see. • press on Next Step • skip any offers you see. (No Thanks)
Preparing your files • Rename your main html page to index.html • upload index.html from single file uploader • delete the original index.htm • upload any other images or files
Last Steps • click on index.html • e Voila, that is your website! • send me the link in an email link: websitename.webs.comMy email:mary.victor@stfatimaschool.com • Thank you!