Download
1 / 7
80 likes | 275 Views
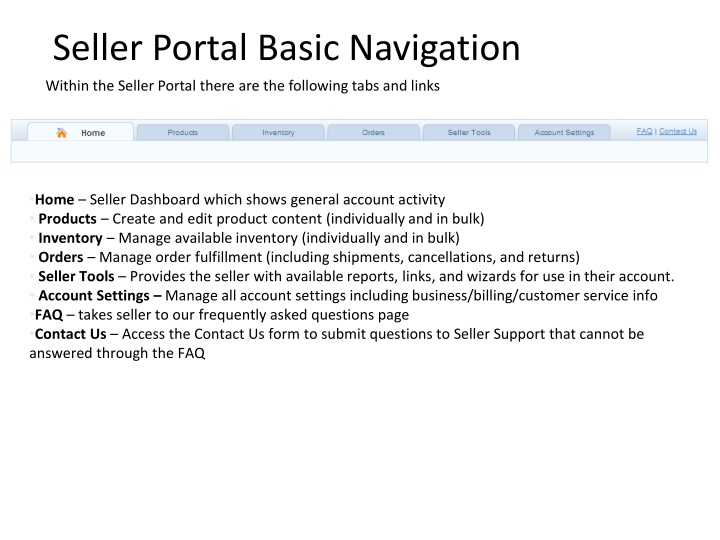
Seller Portal Basic Navigation. Home – Seller Dashboard which shows general account activity Products – Create and edit product content (individually and in bulk) Inventory – Manage available inventory (individually and in bulk)

E N D
Seller Portal Basic Navigation • Home – Seller Dashboard which shows general account activity • Products – Create and edit product content (individually and in bulk) • Inventory – Manage available inventory (individually and in bulk) • Orders – Manage order fulfillment (including shipments, cancellations, and returns) • Seller Tools – Provides the seller with available reports, links, and wizards for use in their account. • Account Settings – Manage all account settings including business/billing/customer service info • FAQ – takes seller to our frequently asked questions page • Contact Us – Access the Contact Us form to submit questions to Seller Support that cannot be answered through the FAQ Within the Seller Portal there are the following tabs and links
Seller Portal ‘Products’ Tab INDIVIDUAL ITEM CREATION To create product individually on screen, navigate to Products > Create > Single This launches a wizard to walk the seller through the item setup. Choose ‘Regular’ if the item doesn’t vary (for example a flat screen TV) Choose ‘Variation’ if you have an item that varies by some characteristic (for example a shirt would vary by size and/or color) Fill in all required information (hover over the question marks to learn more about each field) ON-SCREEN ITEM CREATION
Seller Portal ‘Products’ Tab INDIVIDUAL ITEM CREATION Provide an initial inventory quantity for each location. Check the “Always available” box if the item will always be in stock You can also be able to set the item level Order Prep time for the item. If left blank it will be set to the default NOTE: If you have also entered a ‘pickup’ location under Account Settings > Fulfillment Locations you’ll be able to add inventory for that location as well ON-SCREEN ITEM CREATION (Inventory)
Seller Portal ReportingAvailable Reports to Sellers To assist in managing sellers accounts there are a variety of reports available • Billing - This report shows all activity related to your credit card on file • Remittance - To assist in reconciling payments, please review the 'Remittance' report under Seller Tools>Reports • Removed Items - This report will list any items removed from sears.com • Mis-categorized Items - This report will show any items that are potentially categorized in the wrong place on Sears.com • Re-categorized Items - This report will show any items that have been re-categorized systematically
Seller Portal ‘Orders’ TabFINDING ORDERS Locate any new orders from within the Orders tab, with the Filter set to Active. You can also search for an order by using the PO Number, PO # with Date, Customer Order #, Item Name, Date Range, or Customer’s full name Orders that are no longer open and are older than 30 days will appear on the ‘Older Orders’ Filter. When you have found the order you’d like to take action on (ship/cancel/return) click on the PO number link.
Seller Portal ‘Orders’ TabSHIPPING ORDERS To ship an order (or prepare it for pickup): If you have more than one package, click the ‘Add a Package’ button until you have the correct number of packages. Check the items being added to each package and the qty. When finished adding items/quantities, complete the order by generating an ASN. Print the Packing Slip(s) (and box label if it is a pickup order. *If you’re account is not setup for automatic invoicing, complete the Invoice step.
Seller Portal Extras • Additional ways sellers can upload products include: • Bulk Item Creation utilizing excel templates • http://searsmarketplace.force.com/articles/FAQ/How-do-I-create-items-in-bulk? • Using XML to create items • http://searsmarketplace.force.com/knowledgeProduct?c=XML&k= • Within the Seller Portal, sellers now have two separated links. • The ‘FAQ’ link will direct sellers to the pre-existing FAQ site hosted by Salesforce. • The ‘Contact Us’ link will direct sellers to a form for case submission.