Download
1 / 25
250 likes | 395 Views
Kurzweil 3000 version 11. Using Digital Talking Books with Kurzweil 3000. Supported Formats. All tools in Kurzweil are available. Kurzweil Format (.kes) Rich Text Format (.rtf) DAISY Format (.opf) DAISY Format (.xml) Web format (.html). Highlighting and notes, but no bookmarking.

E N D
Kurzweil 3000 version 11 Using Digital Talking Books with Kurzweil 3000
Supported Formats All tools in Kurzweil are available Kurzweil Format (.kes) Rich Text Format (.rtf) DAISY Format (.opf) DAISY Format (.xml) Web format (.html) Highlighting and notes, but no bookmarking NO tools available NO tools available, but may be converted to .kes All tools available
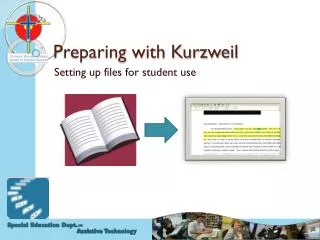
Saving as a Kurzweil (.kes) file Once you open a book, it is best to immediately save it in the Kurzweil format (.kes) and then use the Kurzweil file rather than the original. Once converted to .kes, all of the Kurzweil tools (e.g. highlighting, bookmarking, note-taking) will be available. • From the File menu, choose “Save as..” • Choose a location for your book to be saved in. • Give your book a name you’ll recognize • In the “Save as type:” box, choose KESI (.kes) • Click the Save button
Kurzweil toolbars and toggles Click once on a colored toggle to open or close any toolbar Toggles
Main Toolbar (red toggle) Document management tools Reference tools Reading tools
Reading toolbar (yellow toggle) Zoom in or out – text size Change reader voice Change reading unit Change mode of reading Change reading speed Page navigation
Study toolbar (green toggle) Add/find bookmarks Text Highlighters Add column notes Add voice note
Writing toolbar (blue toggle) Spell check Change text Word Prediction
Click the Open button in the red toolbar Opening a book Navigate to the folder containing the book you want Highlight the title Click Open Be sure to choose “Supported Files” as the File of type here
Closing a book NOTE: Large textbooks could take up to a few minutes to open. from Google Image Search In the File menu Choose Close
Starting and pausing the reader voice To start reading the text aloud: • Click on any passage of text, then • Click the Read button in the Main (red) toolbar • Click Pause to stop the reading Use the Back and Forward buttons to read previous and next sentences/paragraphs
Changing the reading speaker voice Use the drop-down arrow in the yellow toolbar to change voices
Changing the Reading Speed Use the arrows in the yellow toolbar (shown here) to increase or decrease reading speed
Choosing the reading unit Reading Unit How much will be highlighted when text is being read
Changing the reading mode Continuous = reads until you stop it. Self-paced = reads one unit (sentence, paragraph, etc), then you must click the Read button to continue. Word by word = must click the Read button to read each word, one at a time. Reading mode (in the yellow reading toolbar)
Text View options Use the Zoom tool in the yellow reading toolbar for bigger or smaller text. To change text and background colors: From the Tools menu, choose Options Highlight Text In the “Colors” section, use drop-down menus
Navigation by… • Scrolling using up/down arrows, or click-hold on slide bar. • Page by page (use arrows in the yellow toolbar) • Go To Page (CONTROL-G). Type page number and click OK
Highlighting text To highlight a section of text: • Click once on a highlighting pen in the green study toolbar. • Click-hold-drag through a section of text. Sample
Using bookmarks • Click anywhere in the book at the spot to be bookmarked. • Click the bookmark tool (green toolbar) • In the Bookmarks dialog box, fill in the description (bookmark label) • Click the Add button To find an existing bookmark, click the Bookmark tool, highlight a bookmark in the list, then click the “Go To” button.
Bubble notes To add a bubble note: • Click on a passage of text • In the Tools menu, choose “Add bubble note” • Fill in the bubble note dialog box. True/false, multiple-choice and text answer questions may be put in bubble notes by teachers to check student comprehension
Voice notes To add voice notes, set up a microphone on your computer, then: • Click the Voice tool in the green toolbar • Use the record button to start and stop recording • Use the Play button to listen
Column notes 1. Click the Column Notes tool in the yellow toolbar 2. Choose a new/blank note, or existing note 3. Type notes in the columns Close/Save the column note
Find a book (online) • In the Online menu, choose “Search for Books” • Type in the author or title information • Click the online Sites to search in • Click OK To open a downloaded book, use the Open tool
Useful Shortcuts • F3: Read/Pause F7: Zoom in • F8: Zoom out F11: Read faster • F12: Read slower CTRL+F4: Close book • CTRL+E: Next page CTRL+G: Go To Page • CTRL+F12: Bookmarks Shift+F7: Voice note Many more shortcuts are available – see the Quick Reference Guide
The development of this project by the AIM Consortium and the Michigan Department of Education was funded by Grant # H327S070003 from the U. S. Department of Education, Office of Special Education Programs. The contents of this project are not exhaustive and inclusion does not imply endorsement by the U.S. Department of Education, the Michigan Department of Education or the Center for Applied Special Technology (CAST)