Download
1 / 42
430 likes | 558 Views
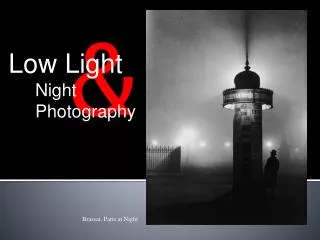
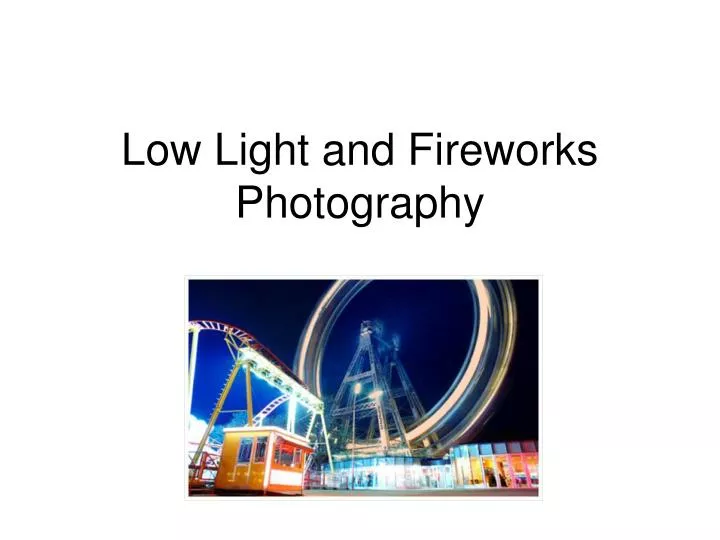
Low Light and Fireworks Photography. Quiz. For those who were here at the last tutorial…. Quiz. Which f numbers indicate a small aperture? What size aperture is required for a shallow depth of field?. Quiz. What shutter speeds are required to freeze motion? What is reciprocity?.

E N D
Quiz For those who were here at the last tutorial….
Quiz • Which f numbers indicate a small aperture? • What size aperture is required for a shallow depth of field?
Quiz • What shutter speeds are required to freeze motion? • What is reciprocity?
Low Light Photography Equipment • Camera + lens • Tripod • Shutter Release cable (SLR) • Remote control (Digital) • For those without shutter release cable or remote control – an on-camera self timer
Camera Exposure Modes • Auto / Program – Not the best for low light • Shutter Priority – Manually set shutter speed to blur or freeze movement • Aperture priority – Good for low light photography, as allows long exposure by setting small aperture. Also used for flash photography. • Manual – Full creative control! :)
Compact Camera Modes • Portrait – large aperture, small DOF • Landscape / Mountains – small aperture, large DOF, focused around infinity • Sports – Short shutter speeds to freeze movement, probably large aperture • Night Landscape – Long shutter speed, probably small aperture for large DOF, focused around infinity • Night Portrait – Long shutter speed, fill-in (slow sync) flash to balance foreground exposure with background
ISO for Low Light Photography Similar to reciprocity, ISO numbers either halve or double the sensitivity to light i.e. 1/30s shutter speed @ 100 ISO = 1/60s shutter speed @ 200 ISO • (ISO = 25, 50, 64 (half stop), 100, 160(half stop), 200, 400, 800, 1600, 3200) • Film • Higher ISO “fast” films are more sensitive to light • “fast” films have larger grain sizes when developed, so cannot be enlarged as big.
ISO for Low Light Photography • Digital Cameras • Long exposures = high “dark current” noise due to heat in the sensor • Increasing the ISO (gain) setting (allowing a shorter exposure) amplifies any background electrical noise Methods of digital noise reduction: In Camera Algorithms • Some SLRs have built in noise reduction algorithms Dark frame subtraction • Take another shot of same length exposure with lens cap + subtract in Photoshop Stacking • Averaging multiple images in Photoshop can increase sensitivity and reduce noise but your camera must not move between frames.
What, no tripod? • What shutter speeds can you hand-hold a camera at without getting a blurred image due to camera shake? • Rule of Thumb – use a maximum shutter speed of one over the focal length of the lens. • i.e. for a 200mm lens = 1/250s • 50mm lens = 1/60s (Possible shutter speeds = 1/1000, 1/500, 1/250, 1/125, 1/60, 1/30, 1/15, 1/8, 1/4, 1/2, 1…)
What, no tripod? • How to hold an SLR camera to minimise shake • Brace your arms against your body for extra support • Crouch and use legs and left arm to support camera • Try to use fixed objects around you to brace your camera (e.g. hold camera against a lamppost, or on a railing)
Moving Object Shutter Speeds - NO Blur • Which shutter speed to use for subjects depends on 3 factors: • How big the object appear in the frame • Which direction it is moving • How fast it is moving
Moving Object Shutter Speeds – For Blur • Blur can be used to emphasise movement • Amount of blur depends on speed of movement of subject and shutter speed
Flash Photography • Flash creates a very bright light for a very short time • Generally around 1/1000 second duration, capable of freezing most motion • Because the light is such a short duration, we cannot use camera shutter speed to control exposure – we can only use the aperture. • TTL flashes can also fire pre-flashes to enable automatic light metering through the lens
Flash Photography • Slow Sync flash can be used to freeze an instant of motion, but also get a sense of colour and movement • Slow sync = flash + long shutter speed
Flash Photography • Rear curtain (2nd curtain) flash makes a moving object’s light trails appear behind them, rather than in front as with front (1st) curtain flash / slow sync.
When to take Photos • Don’t wait until its totally dark or your background will be totally black and the picture will look dead. • Take photos at twilight, just after dusk, when there is still colour in the sky - It is easier to get a better balanced exposure
Night Exposure Guide • This is only a guide – bracket shots at least +/- 1 stop to be sure
Bracketing • If you want to make sure you get a perfectly exposed shot, take multiple photos and vary the exposure • Take an image at the metered exposure, followed by exposures over and under the metered exposure. • Underexposure is most likely with low light photography, as • E.g. bracket in +/- 1/3 stop (EV) or +/- ½ stop if you are reasonably sure of a correct exposure • Bracket +/- 1 stop if you are guessing exposure! • Film: Different films have different exposure latitudes (ranges) where a good exposure can be recorded: Black and White : around 6 stops (+/-3),
Traffic Trails • Long exposure, large depth of field
Light Explosion • Light Explosion / Motion blur With an SLR – zoom the lens during a long exposure
Out of Focus • Bright, colourful pinpoint light sources work best (try illuminations?)
Use a small torch or sparkler to “draw” on images. • A short burst of flash can also be used to illuminate objects / people if you draw around them
Funfairs • Use different shutter speeds for varying effects • Beware that bright lights against dark backgrounds can fool camera light meters into underexposing the image. • Bracket above the metered exposure…
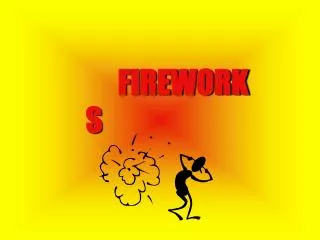
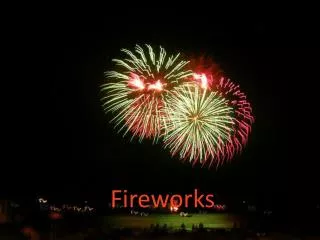
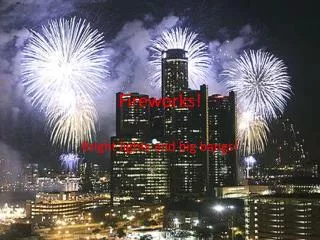
Fireworks • Concentrate on aerial rocket displays for best result • Best view is further back, behind the crowds. Elevated position good if you can find one. • Try to fill the frame as much as possible
Fireworks • Set small aperture, e.g. f/16 • Use a wide angle (28-35mm) to capture the whole of the display • Use a telephoto (50mm+) to fill the frame with firework explosions • Using the Bulb setting, open the shutter for 2-60 seconds - hopefully to capture multiple fireworks • Can open the shutter for longer if you block the light with your hand or a black card between fireworks – longer gives a much more impressive picture
Night Photography Tips • Get there early, for sunset so you have time to set up • Use a tripod at all times so you don’t have to worry about camera shake • Bracket exposures to record at least one good image • Experiment – Digital is good for this! • Don’t limit yourself to urban/street photography – landscapes and coastal shots can be good too
Blackpool • Coach leaves around 1pm (13:00) from the University Underpass – meet at 12:50 • Coach will depart Blackpool around 9pm (21:00) • We will tell you a meeting point when we arrive • We will also provide you with a map. • Don’t be late!
Things to take • Warm clothing – essential in November! • Waterproofs – Showers have been forecast • Money (for food / shopping / Pleasure Beach) • Camera • Tripod (if you have one) • Shutter Release / Remote Control • Film (slow and fast) / Memory cards (Downloading images to a laptop maybe a possibility if your card fills up while we are there) • Small Torch
Things to look out for in Blackpool • Tower • Piers • People
Things to look out for in Blackpool • Sculptures – down the sea front promenade
Things to look out for in Blackpool • Pleasure Beach – illuminated at night
Things to look out for in Blackpool • Illuminations – from around 6pm
Things to look out for in Blackpool • Fireworks at the Pleasure Beach on Saturday • Starting around 7:30-8pm
Positioning for Fireworks • Sunset will be around 16:35 on the 5th November • Tide Predictions for 5th • High Water around noon, and midnight • Low Water around 6pm • Should be able to walk out on the sands if you want more distance between yourself and the fireworks. • But don’t expect a reflectionlike this photo unless youhave a boat ;)
For those not going to Blackpool… • Fireworks at Lancaster Castle, Saturday 5th Nov • Starts around 8pm • Good view of rockets from near the Millennium Bridge