Download

1 / 15
150 likes | 175 Views
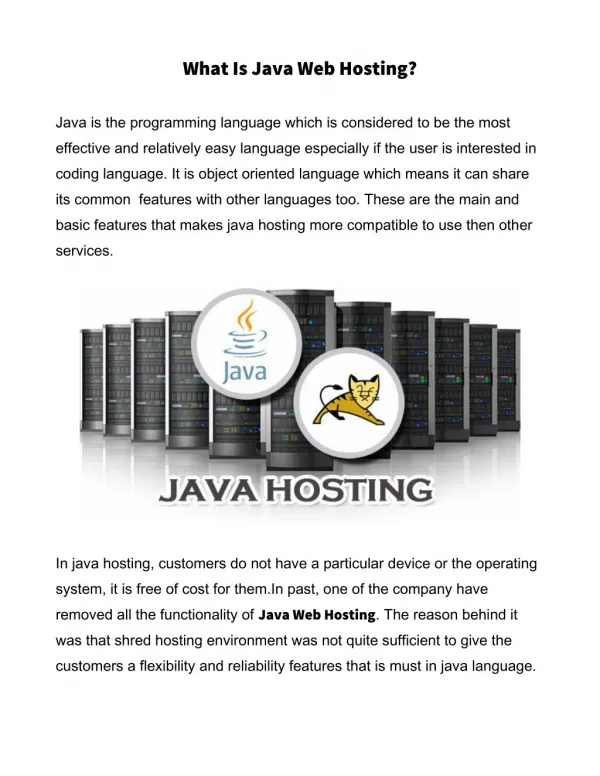
Tomcat refers to an open-source, free implementation of the Java Servlet, JavaServer pages, Java Expression language, and WebSocket technologies. It enables a user to serve applications that are Java-based.

E N D
Table of Contents • Default Configuration • Configure Crontab Access • Add Tomcat Support for a User • Custom Configurations • Differences between Tomcat in EasyApache 3 and EasyApache 4 • Tomcat • Important Facts • Tomcat Installation Requirements • Installation of Tomcat • Uninstallation of Tomcat • Configuration
Tomcat • The information provided here applies to Tomcat in the version 76 and the later versions of cPanel & WHM. • Apache Tomcat enables you to serve applications that are Java-based. The option to install Tomcat 8.5 is provided by EasyApache 4, which lets a user install and update PHP, Apache, and other components of a web server. • Tomcat is an open-source and free implementation of the Java Expression language, JavaServer pages, Java Servlet, and WebSocket technologies. Such a HTTP web server environment is provided by Tomcat in which Java code can run. An open community of developers maintain as well as develop Tomcat.
Important Facts • Only those Tomcat administrators should install Tomcat, who have extensive experience. • There can be security issues due to Tomcat on systems that are used by multiple users. • It is recommended that a user understands the risks associated with this feature prior to using it.
Tomcat Installation Requirements • In order to install Tomcat, root-level access is needed. Tomcat is not supported by cPanel & WHM on servers which run CentOS 8 or AlmaLinux 8. • To digress, cPanel is a web hosting control panel. Web hosting is the service provided by web hosting companies to render websites accessible. The “Best Linux Shared Hosting Company”, the “Best Windows Dedicated Hosting Company”, the “Best Cloud Hosting Company”, etc. are the terms that are used to refer to the most popular web hosting companies, such as HTS Hosting.
1-800-123 -8156 Whoa! That’s a big number, aren’t you proud?
Installation of Tomcat • In the Interface For installing Tomcat, you should use EasyApache 4 interface of WHM. Tomcat will appear in the Additional Packages section. WHM >> Home >> Software > EasyApache 4 • On the Command Line For installing Tomcat, you need to run the following command on the command line. It needs to be done as the root user. yum install
Uninstallation of Tomcat • In the Interface The EasyApache 4 interface in WHM is used to uninstall Tomcat. Tomcat will appear in the Additional Packages section. WHM >> Home >> Software > EasyApache 4 • On the Command Line Run the following command on the command line to uninstall Tomcat. This needs to be done as the root user. yum remove ea-tomcat85
Configuration • It is as a per-user private instance that Tomcat runs in EasyApache 4. This aids in enhancing security and enables a user to manage his/her Tomcat services. The flip side is that it increases memory load on the server. • It is recommended that the server’s configuration be considered carefully prior to enabling Tomcat for many users. • The configuration files of Tomcat 8.5 are placed in the following location: • /home/user/ea-tomcat85/conf • In it, the term “user” represents the user’s name for whom Tomcat has been installed.
Default Configuration • The below-mentioned configuration changes are made by EasyApache 4 to the default Tomcat 8.5 behaviour in the file, ~/ea-tomcat85/conf/server.xml • Disabling of the shutdown port by default. • Setting the xpoweredBy attribute of all Connectors to a false value. • Removal of the redirectPort attribute. • Adding the ErrorReportValue class to all Hosts that have the showServerInfo value set to a false value. • Setting the below-mentioned Host attributes to a false value. • autoDeploy • deployOnStartup • deployXML • There might be the need to make additional security changes. This will depend on the Tomcat requirements of your system.
Configure Crontab Access • Tomcat users need to be granted crontab access in order to be able to use Tomcat. • If the /etc/cron.allow file exists, then the user needs to be present in that file. • If the /etc/cron.deny file exists, then it needs to be ensured that the user is not present in the file. • The following steps need to be carried out to determine if a user has crontab access: • Navigate to the List Accounts interface in WHM. • WHM >> Home >> Account Information >> List Accounts • Log in to the account as the user by clicking the cPanel logo. • Navigate to the Terminal interface in cPanel • cPanel >> Home >> Advanced Terminal • Run the crontab -l command. • If an error is received, then crontab access must be granted to Tomcat users. You will need to remove and add again the user to Tomcat after granting crontab access to the user.
Add Tomcat Support for a User • In the Interface- You need to use the Tomcat Manager interface in WHM in order to add Tomcat 8.5 support to a user. • WHM >> Home >> Software >> Tomcat Manager • On the Command Line – You need to run the below-mentioned command in order to add Tomcat 8.5 support to a user. This needs to be done as the root user. • /usr/local/cpanel/scripts/ea-tomcat85 [argument] [option]
Custom Configurations • An environment that can be configured by the user for his/her unique requirements can be created in either of the following ways: • By adding a user via the Tomcat Manager interface in WHM. • WHM >> Home >> Software >> Tomcat Manager • By adding a user via the script, /usr/local/cpanel/scripts/ea-tomcat85 • When Tomcat access is assigned to a cPanel user, two ports are assigned by the script to the user. These port assignments could be found in the file, /etc/cpanel/cpuser_port_authority.json and in the user’s file, ~/ea-tomcat85/conf/server.xml • Any custom behaviour must be configured manually. If you want to change how Tomcat interacts with Apache, you need to create or edit the appropriate file in the directory, /etc/apache2/conf.d/userdata/
Differences between Tomcat in EasyApache 3 and EasyApache 4 • Tomcat is handled differently by both, EasyApache 3 and EasyApache 4. Instead of Tomcat 7, EasyApache 4 provides Tomcat 8.5. • EasyApache 3 – In it, Tomcat existed in the form of a shared service. All applications ran as the tomcat user. A container is created by the server within a shared server.xml file. • EasyApache 4 – In it, Tomcat runs as a per-user private instance. It allows the user to configure his/her instance. Tomcat runs as an individual user, and not as the tomcat user. This enhances security as well as places the Tomcat instance’s management in the control of the user. It might affect the performance of your server owing to memory requirements. The mod_proxy_ajp Apache module is provided rather than the mod_jk connector.
Thanks! ANY QUESTIONS? www.htshosting.org