Download
1 / 37
1.25k likes | 4.81k Views
Impression Materials. Chapter 8 DAE/DHE 203. Impression Materials:. Used to make replicas of oral structures “ Negative ” replica made by impression Cast material is placed into impression to yield a “ positive ” replica of the oral tissue

E N D
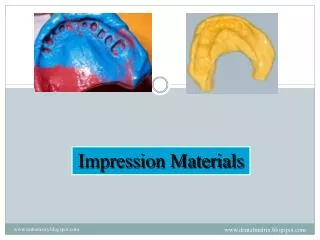
Impression Materials Chapter 8 DAE/DHE 203
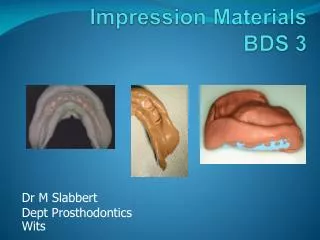
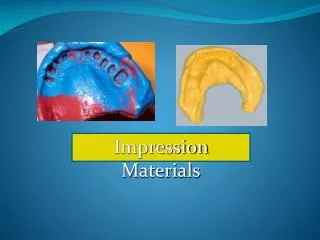
Impression Materials: • Used to make replicas of oral structures • “Negative” replica made by impression • Cast material is placed into impression to yield a “positive” replica of the oral tissue • Allows for the indirect restoration or dental appliance to be fabricated without the patient present • Variety of materials for a variety of applications
Uses of Impression Materials: Used in the fabrication of: • Indirect restorations: • Crowns & bridges • Dental prosthetics • Temporary crowns • Orthodontic & Dental appliances • Acrylic trays • Bite registration • Study models
Characteristics of Impression Materials: • Fluid enough to flow around area of interest • Must “set” in reasonable amount of time • Can remove from mouth without distortion • No harmful effects on tissues • Relatively tasteless & odorless • Dimensionallystable until a cast is created • Give detailed reproduction • Compatible with cast materials
Impression Trays: • Used to carry the material to pt’s mouth • Must be sturdy enough to support the material • Need to be disposed of or sterilized after use • Metallic trays are autoclavable • Stock trays available: full arch, quadrant • Custom trays made of acrylic for most accuracy • Triple trays takes impression of opposing teeth, occlusal registration, and prep site • Perforated trays have holes for retention of material
INELASTIC Rigid Cannot be used with undercuts For edentulous or bite registration ELASTIC Flexible & “rubbery” Used with undercuts Generally used today Two subcategories: Hydrocolloids (Aqueous) Elastomers Categories of Impression Materials:
Inelastic Impression Materials: • Impression Compound • ZOE Impression Paste • Plaster
Inelastic Impression Materials: Impression Compound: • Resins + wax • Thermoplastic, solid material • Heat to soften material • Cool to set material • Physical change only; NO chemical reaction • Forms: plates and sticks • Soften in water bath (10° warmer than body) • Applied to tray and inserted in mouth to cool • Used as a custom tray
Inelastic Impression Materials: ZOE Impression Paste: • Similar formulation as ZOE cements • Pastes mixed together – chemical reaction • BASE + CATALYST • Applied in thin layer in custom tray for edentulous arch; or to occlusal surfaces • Sets in 4 – 5 minutes
Elastic Impression Materials: • Hydrocolloids: • Reversible Hydrocolloids • Irreversible Hydrocolloids • Elastomers: • Polysulfides • Polyethers • Condensation Silicones • Addition Silicones - Polyvinylsiloxanes
Elastic Impression Materials: HYDROCOLLOIDS – • “water-based” impression materials • Colloid – liquid suspension of particles • Particles derived from seaweed & kelp • Liquid = water • GEL – the rubber-like form of the material • SOL – the material in liquid solution • Not dimensionally stable – must be “poured” immediately
Hydrocolloids: Reversible Hydrocolloid: • Agar – a gelatinous material + water • Thermoplastic – NO chemical reaction • “Reversible” – Goes from gel, to sol, and back to gel, by raising and lowering temperature • Dispensed in tubes & syringes • Very accurate final impression material
Hydrocolloids: Handling Reversible Hydrocolloid: Special water baths with 3 chambers are used 1) Material is immersed in boiling tank (212°F) for 10-20 minutes; turns from gel to sol 2) Place in storage bath (150°F); 10 minutes to few days; remains sol 3) Load tray; immerse in the tempering bath (110°F); 5-10 minutes; lowers temp for pt comfort
Hydrocolloids: Handling Reversible Hydrocolloid: 4) Load syringe; extrude onto prep site 5) Seat tray in mouth 6) Attach coolinghoses to tray 7) Hold firmly in pt’s mouth until cooled and transformed to gel state 8) Remove from pt’s mouth and pour immediately
Advantages: Very accurate Excellent compatibility with gypsum Disadvantages: Labor-intensive Poor tear resistance Poor stability Need equipment space and very organized staff Reversible Hydrocolloid:
Hydrocolloids: Irreversible Hydrocolloid: • ALGINATE impression material • Formed by chemical reaction • Powder + water; mixed • NOT reversible; SOL to GEL only • Protect from inhalation • Dispensed in cans or bulk packages • Used when less detail is required
Hydrocolloids: “What are indications for alginate impressions?” • Study models • Opposing models of final casts • Casts for mouthguards, whitening trays, custom trays, orthodontic appliances, provisional crowns, etc. • To fabricate a direct provisional crown
Hydrocolloids: Handling Alginate: • Fluff powder and measure accurately • Measure water – temp! • Mix in a flexible, rubber bowl • Stir to wet powder • Strop mixture against side of bowl to eliminate airbubbles • Mix until creamy & homogeneous; 60 sec.
Hydrocolloids: Handling Alginate: • Load alginate into tray from posterior • Press material into tray to eliminate voids • Smooth & indent alginate with wet finger • Use extra alginate to wipe onto occlusal surfaces of teeth
Taking an Alginate Impression: • Bead the tray as necessary • Stand behind patient for maxillary (11:00) • Center tray above teeth and seat posterior • Press tray down & toward anterior and allow lip to cover tray; material should fill vestibule • Holdtray in patient’s mouth until set (2 - 3 min) • Loosen cheeks and lips with finger • Remove occlusally with a firm snap
Evaluating an Alginate Impression: • Full coverage, including retromolar area • Tray centered • Clear & sharp impression • No voids, air bubbles, or tears • Has a “peripheral roll” (vestibular area) If all is OK, rinse & disinfect impression, pour-up in stone/plaster, or store in humid bag.
Advantages: Easy & economical Many applications Patient comfort Excellent wetting by gypsum Disposable tray Disadvantages: Not enough detail for final impression Must be poured immediately Irreversible Hydrocolloid:
Hydrocolloids: • SYNERESIS – shrinkage in impression due to loss of water from heat or exposure to air. • IMBIBITION – swelling of impression due to taking up moisture To avoid these conditions (dimensional distortion), pour-up immediately!
Elastomers: • Two-paste systems: • Two tubes – pastes mixed by hand • Two putties – mixed/kneaded by hand • Cartridge & Extruder Gun – automix tips used • Cartridge & Motor-driven Mixer – automix tips used • Set by chemicalreaction • Warmth and moisture may slow setting • Must use a tray adhesive(if tray not perforated) • Latex may inhibit set of polyvinylsiloxanes
Elastomers: Elastomers are used in a two-step process: • Preliminary Impression - the material used to form the base or the “tray” material used in an impression; usually more viscous or heavy-body • Secondary or “Wash” Impression – the material applied through a syringe around the prep site for detail; usually less viscous; light or medium -body.
Elastomers: POLYSULFIDE: • Oldest elastomeric used in dentistry • Two pastes – mix base with catalyst • Liquid polymer with “sulfhydryl” group – contains sulfur • “rubber-base” impression material • Used best with custom trays • Other materials have replaced this one
Elastomers: Handling Polysulfides: • Equal lengths of pastes on pad • Pastes are “swirled” together, then stropped • Material placed in custom tray • Take impression – hold in place for up to 15 min. • Remove from pt’s mouth slow & steady force • Rinse & disinfect • Pour-up impression within several hours
Advantages: Economical Good tear resistance Good compatibility with gypsum Disadvantages: Malodor Stains clothing Long setting time Fair stability Less accurate Polysulfides:
Elastomers: Condensation Silicones: • Similar to silicone rubber products (but non-toxic) • Setting by-product of alcohol • “Hydrophobic” – results in voids in stone • Shrinkage occurs as it sets • Must be poured immediately • Accurate, but slow setting time • Replaced by improved products
Elastomers: POLYETHERS: • Developed in 1960’s • No reaction by-product produced • Shorter working and setting time • Only come in a single viscosity • Stiff material – can use a triple tray • Very popular – “Impregum” • No need to pour-up immediately
Elastomers: Handling Polyether: • Mix equal lengths of paste; or extrude through the automix cartridge tip • Load syringe and apply to tooth thru tip • Load tray and invert over area for impression • Allow to set; 4 – 5 minutes • Remove from mouth • Rinse & disinfect
Advantages: Short setting time Single viscosity Good stability Good tear strength Clean & easy to use Disadvantages: Bad taste Most difficult to remove from mouth Polyether:
Elastomers: ADDITION SILICONES: • “Polyvinylsiloxanes” – silicone polymer • Two pastes or two putties • Hydrophobic by nature – manufacturers adding components to increase wettability • Very accurate & fast setting • Avoid contact with latex (gloves, rubber dams) • Low setting shrinkage & very stable
Elastomers: Handling Addition Silicone: • Mix equal lengths of pastes, or automix • Apply light-body material to tooth thru syringe • Load tray with heavy-body • Set tray over prep site • Set in 4 – 5 minutes • Rinse & disinfect
Advantages: Very stable Short setting time Good tear resistance Great accuracy No bad taste Disadvantages: May have poor wettability Two pastes to mix Addition Silicone: Polyvinylsiloxane