Download
1 / 33
330 likes | 464 Views
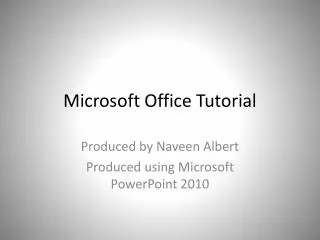
Microsoft Project Tutorial for Chapters 6 & 7. This Tutorial explains how to: Reflect A Crashed Project in the Gantt Chart Resource Loading Create a Resource Calendar Use MSP Auto Resource Leveling Project Status and the Earned Value Report * Click on above link to skip to that Section.

E N D
Microsoft Project Tutorial for Chapters 6 & 7 This Tutorial explains how to: • Reflect A Crashed Project in the Gantt Chart • Resource Loading • Create a Resource Calendar • Use MSP Auto Resource Leveling • Project Status and the Earned Value Report * Click on above link to skip to that Section *clicking on the light bulb will take you directly to the software tutorial for that lesson *clicking on Home will take you directly back to the first slide
The Gantt Chart for Table 6-1 reflects a change in working schedule to a 7-day work week. Reflecting a Crashed Project in the Gantt Chart
*To do this (review): • Go to Tools • Select Change Working Time Reflecting a Crashed Project in the Gantt Chart • In the Change Working Time Box: • Click on the Work Weeks Tab • Click Details • Select all seven days • Set days to specific Working Times • Set the whole week to an 8 hour shift • Press OK
To adjust the expediting of a project, simply change the duration of the Critical Task’s duration in the Gantt table (20-day solution) • By Changing the duration of task a: • The Finish Date of task a has updated automatically • The Finish Date of the Project and the Gantt Chart have updated accordingly: Reflecting a Crashed Project in the Gantt Chart
Take the same approach to adjust the Project even further (19-day solution) • After Changing task a, change task f’s duration to 8 days • The Finish Date of task a has updated automatically • The Finish Date of the Project and the Gantt Chart have updated accordingly: Reflecting a Crashed Project in the Gantt Chart
The Gantt Chart will adjust automatically for all crashed adjustments (18-day & 16-day) Reflecting a Crashed Project in the Gantt Chart
First, Build your Gantt Chart to resemble figure 6-10, exclude resources for now. Resource Loading • Be sure to: • Mark “Scheduling Shoots” a summary task • Use the Gantt Chart Wizard to Show Finish dates of tasks & Milestones • Add WBS Codes
Now Create a Resource list • Go to the View Bar • Select Resource Sheet Resource Loading A chart will appear:
Creating a Resource list • First, enter in each individual Resource Name from the Action Plan (figure 6-10) • Assign Each individual Resource a Unique Initial • Transfer Standard & Overtime Rates from Table 6-5 to appropriate Resource, Table should resemble below: Resource Loading
Assigning a Resource to a Task • Refer back to Gantt View • Under WBS 2 (Scriptwriting), Go to Resource Names • There is now a drop down with Resource Names, select Scriptwriter Resource Loading
Assigning Multiple Resources to a Task • Double click anywhere on the appropriate task row (propose shoots) • The Task Information Box will appear: • Select the Resources Tab Resource Loading
Assigning Multiple Resources to a Task • Under Resource Name, add each Resource Needed • Then select OK Resource Loading
Assigning Multiple Resources to a Task • Under Resource Name, add each Resource Needed • Then select OK The Gantt Table should now looks as follows: Resource Loading * Task 11 shooting, should include the Editor, not scriptwriter(typo)
Creating a Resource Calendar • As mentioned in the text, some of the resources have a schedule that does not follow MSP’s Standard Calendar. We can create a resource Calendar for these Resources. (Refer to Table 6-4) • Go to Tools • Select Change Working Time… Resource Calendars • In the Change Working Time Box, under the For calendar dropdown, notice that each Resource Name has been added. First Select Scriptwriter
Creating a Resource Calendar • The Scriptwriter works one hour later (6: 00 p.m.) and one extra day of the week (Saturday) • Select the Work Weeks Tab • With Default Line 1 selected, click details Resource Calendars • Highlight all working days (Monday-Saturday) • Set Days to the Specific work times • Change to end at 6:00 p.m. • Click OK
Creating a Resource Calendar Resource Calendars • A warning that the fixed-duration of tasks assigned to this resource will be changed. Click ok
Creating a Resource Calendar • The Client works a standard schedule except for a vacation scheduled for March 13-March 26. Create a calendar for this Resource: • Go to Tools, Select Change Working Time, and select Client from the “For Calendar” Dropdown • Choose the Exceptions Tab • Enter in Vacation • Include Start and Finish Dates • Click OK Resource Calendars
Creating a Resource Calendar Resource Calendars • A warning that the fixed-duration of tasks assigned to this resource will be changed. Click ok
Creating a Resource Calendar • Create a calendar for the Editing Room • Under Working Weeks Tab • Set days Monday- Friday • Set Times from 9:30 a.m. – 3 p.m. • Select OK to the same • warning about changes in • duration Resource Calendars
Creating a Resource Calendar • In the Gantt Chart View, we can see that the end date has been changed to 5/17 to accommodate for new resource calendars. Resource Calendars
View the Resource Loading Chart • To view the Resource Loading Chart: • On the View bar click Resource Usage Resource Leveling • Resource Loading Chart • Timescale can be adjusted just as the Gantt Chart was. • Resources in bold are over-allocated.
View Over-Allocated resources • To view Resources that are over-allocated: • Click on the More Views button on the View Bar • Choose Resource Allocation • Select an over-allocated resource (Scriptwriter) Resource Leveling
View Over-Allocated resources • Filter for only Over allocated Resources • Go to Project, Filtered for: • Select Over allocated Resources Resource Leveling
View Over-Allocated resources • Viewing Over-allocated resources graphically: • Click on Resource Graph • Adjust the Timescale for the graph as we did with the Gantt chart Resource Leveling
Leveling Resources • To Level Resources: • Go to Tools • Select Level Resources Resource Leveling • This will bring up the Resource Leveling Dialogue box
Leveling Resources • To Level Resources: • Select Automatic Leveling Calculations • For this example, we want to Look for over-allocations on a Day by Day basis. • Level entire project • Level only within available slack Resource Leveling
Leveling Resources • This particular project has been leveled for all tasks but individual tasks can also be leveled over the entire project or over a designated time span. Resource Leveling
Project Status & The Earned Value Report • Entering Actuals into our report to track project status • *Before Tracking a Project’s Status, save it, this will be your “Baseline” or snapshot or project Plan Project Status • Set Baseline: • Tools • Tracking • Set Baseline • Set Baseline to Entire Project
Project Status & The Earned Value Report • Entering “Actuals” into our report to track project status Project Status • Select Tracking Gantt from View Bar: • Insert the Actual & Baseline Start & Finish Columns if needed. • Also insert Actual & Baseline Duration if needed. • Plug in Actual Start & Finish Dates, Actual Duration, Cost, and Work should adjust accordingly.
Project Status & The Earned Value Report • Viewing the Earned Value Report of a Project Project Status • Click on the upper left corner of the Task Sheet so the entire project is highlighted • Right Click • Select More Tables from the menu • Select Earned Value • Click Apply
Project Status & The Earned Value Report • Viewing the Earned Value Report of a Project Project Status • Your Earned Value Report can be given from your Project Status and will adjust according to the actuals you put it.
The Earned Value Report can also be exported to an Excel Graph • Go to Report • Choose Visual Reports… Project Status • On the Visual Reports dialogue box • Select the Expected Value Over Time Report • Click View
The auto-leveling and tracking options are an effective tool for Project Managers and should be explored further. Project Status