Download

1 / 48
570 likes | 1.09k Views
Knife Sharpening. Sheldon Becker Southern Qld Institute of TAFE. Poultry Processing Using knives continuously relates up to 50% of injuries (lacerations or muscle strains). Meat processing. In the red meat industry up to 68% of injuries Of which 32% is cuts & lacerations.

E N D
Knife Sharpening Sheldon Becker Southern Qld Institute of TAFE
Poultry Processing Using knives continuously relates up to 50% of injuries (lacerations or muscle strains)
Meat processing In the red meat industry up to 68% of injuries Of which 32% is cuts & lacerations
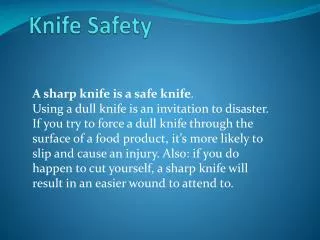
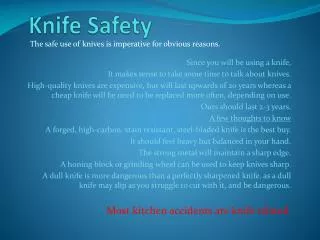
Blunt Knives - are frustrating to use - can lower the quality of the product - often the cause of accidents - can be responsible for Occupational Overuse Syndrome (OCC) type injuries Who likes sharpening knives?
Blunt knives can lead to unsafe practices • Poor running point – Running hand up blade • Pushing when blunt– Physically pushing and dragging the knife • Over stretching – Not maintaining balance properly, not keeping up • Violent or sudden movements – Stabbing or hacking at the product • Deterioration – Tiredness, hands and arms are can cramp up & get sore • Emotional and Physical well being – Facing another day with a blunt knife is not fun, social issues impacting on your work • Incorrect steeling practices – Back steeling, uneven angles, not checking steeling action, grip on knife, and steel is incorrect • Repetition work – Continuously making additional cuts or doing same task
How have most people here learnt how to sharpen a knife? • Maybe from a fellow worker • Some workplaces have a mentor/ trainer • Watching others sharpen their knives • Taught themselves through trail and error
Benefits of Knife Sharpening training Would see a reduction in: • Knife related injuries • Tendonitis • Carpel Tunnel • Tennis Elbow • Musculoskeletal injuries • Time off work • Improved production • Job becomes easier
Training Who to start with: • staff new to the plant or industry • all staff demonstrating poor technique • staff with high incidents of knife injuries • staff struggling with the job • staff open to change
Key points to lessen knife injuries • Warm up before starting – Follow recommended stretching practices. • Use a good shape blade – Choose the correct knife for the job. • Work with a rhythm – Minimise your blows or cuts and work more efficiently • Take breaks – Do not work through breaks - Take breaks as required
Identifying the symptoms of musculoskeletal injuries • Muscle discomfort • Fatigue • Aches and pains • Soreness • Hot feelings • Cold feelings • Muscle tightness • Numbness tingling • Muscle weakness
Occupational Overuse Syndrome (OOS) • OOS usually develops over a period of time. • Caused or aggravated by :- - sustained or constrained postures - repetitive movements • One explanations for OOS is that it is caused by the muscles being held too tight for long periods of time
NZ Grip force study Independent study found • 20% of the process workers have a reasonably good knife • 40% had an average knife • 40% had a knife that was insufficient for the task
NZ Grip force study • Study also found the tighter the grip on the knife the less blood flow in the hand and arm. • The size of the hand holding the knife is also a factor on grip force.
The knife length The length and weight test used to determine grip force • Place a 0.5 kg weight 13 cm, 15 cm, 17 cm distances along the steel or bar. • The grip force has increased as the length of each knife increases. • Longer blades require a greater grip force than shorter blades.
Cutting Force • A sharp knife requires 30% less force to cut than an average knife • A sharp knife also enables a task to be performed 30% faster, and requires 30% less grip force • A processing room with consistently sharp knives produced a 1 to 3 % greater yield than the same room with normal levels of sharpness • By testing a knife we can now tell how much cutting force is required to cut with that knife • We can now calculate how much cutting force a worker is using over a days work
Example • A worker boning forequarters all day would use approx6400 cutting strokes a day • A sharp knife has a cutting force of 1.1kg per cutting stroke • 1.1kg x 6400 strokes = 7.40 tons of daily force • If we multiply 6400 strokes with a 15kg blunt knife, we end up with a daily force of 96 ton • This equates to 88.6 tons more cutting force than a sharp knife
NZ experience Photo courtesy of Anago Ltd
Equipment use to sharpen and maintain knives • Knives and their correct storage equipment • PPE (cut resistant gloves, safety glasses) • Grinding wheels (grinders) • Sharpening stones • Steels • Washing & sterilising facilities
Safety Equipment used when sharpening a knife Cut resistant Safety glasses
Choose a knife suitable for the task. Skinning Knife Curved boning knife Straight boning knife Slicing knife
Knife Shapes Convex Flat Hollow Concave
Equipment used to shape/sharpen knives Sandstone wheel Belt Grinders
Sharpening the knife Sharpening or honing stone are used to establish a sharp edge on a knife.
Methods used to sharpen a knife Setter Sharpening stone
Issues • Evenly grinding of knives to the correct shape - both sides - from tip to heel • Evenly sharpening knives (correct edge) - both sides - from tip to heel • Evenly & effectively steeling knives “It all about the correct angles”
Hollow Grinders Used by authorised personal only
Creating a feather Stand on handle side of knife when stoning. Place thumb and forefinger on stoning rod & other hand on stoning bar. Work from tip to heel, then heel to tip to develop a feather. Turn knife over & repeat process
Removing feather Start by placing heel of stone on the knife tip. Pull the stoning rod straight back over the cutting edge overlapping the stone on each stroke. Turn knife over & repeat Run the knife through a plastic block (Feathering Block)
Finishing strokes Place the heel of the stone on the tip of the knife and pull stoning rod back toward the knife handle 6 times. Turn knife over and repeat process
Steeling a knife • To remove any burrs from the edge • To straighten (centre) the edge
Holding a knife Make sure you tuck your little finger on the side of the handle Make sure the knife butt sits in the groove of your thumb and forefinger palm The knife should be in a straight line with your arm
Steeling a knife Check arm, steel and knife are square and in line. Knife handle centre of wrist Hold steel as above with the thumb tucked behind steel
Storing Knives Knives must be stored in the pouch when not in use
Testing bite Bites left Bites right Bite Stick Stick Both sides of the knife are sharp
Testing bite Bites left Slides right Bite Stick Stick Bite left only knife is turned to the left Steel left side of knife the bite side.
Testing bite Slides left Bites right Bite Stick Stick Bite right only knife is turned to the right Steel right side of knife the bite side
Testing bite Slides right Slides left Bite Stick Stick Slides both ways, there is no bite, knife will need to be steeled again or sharpened
Safety Equipment when using a knife Cut resistant Mesh
Acknowledgements Southern Qld Institute of TAFE would like to acknowledge contributions by:- • Big Bay Skills Training Ltd • Argus Realcold Limited • Teys Bros Pty Ltd
Question? Thankyou