Download

1 / 12
120 likes | 319 Views
Tables. Microsoft Word. Center Table on the Page. File Menu Page Setup Layout Tab Page Subsection – Vertical Alignment Choose Center from Drop down menu Change Left/Right Margins to 1” File – Page Setup – Margins Tab. Header.

E N D
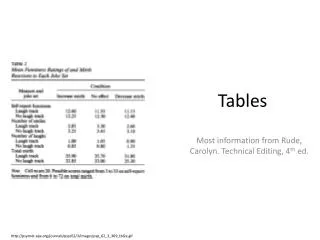
Tables Microsoft Word
Center Table on the Page • File Menu • Page Setup • Layout Tab • Page Subsection – Vertical Alignment • Choose Center from Drop down menu • Change Left/Right Margins to 1” • File – Page Setup – Margins Tab
Header • The header is where you will include your name, class, assignment & date for each activity. • View menu – header & footer • Type your name at left margin. Strike the tab key twice type the assignment – enter. • Type your class id. Strike the tab key twice type the date – close the header.
Create a Table • Tables button on toolbar • Choose columns and rows from drop down menu • Table Menu > Insert > Table • Choose columns and rows from menu
Adding Text to a Table • Add text to a table by first clicking in the cell you would like to add text to and begin typing
Formatting Text • Formatting is done just as it would be if you were not using a table. • Set the formatting options and begin typing. • If you have already typed the text – then first highlight all text you would like to format and then choose formatting options
Moving from Cell to Cell • You can move from cell to cell by simply using your mouse to click in the cell you would like to move to • You can also use your tab key to move from one cell to the next across rows. • You can also use your arrow keys to move from cell to cell in any direction
Inserting Rows/Columns • Highlight the column or row where you would like the new blank column/row to be placed. • Highlight from the left side of the row or from above the column • Right click > Insert Rows/Columns • Or use the tab key from the bottom right cell to add another row
Center Table - Horizontal • Highlight the entire table from the left side of the table (DO NOT move your mouse over the table) • Click the Center Align button on the toolbar
Using Decimal Tabs in Columns • Before entering any text first highlight the column which will need a tab (highlight from the top so the entire column is highlighted) • Insert the tab on the ruler bar • When you move into the cell it will automatically move the center for the decimal tab
Adjusting Column Width • Manual: Move mouse between two columns. When curser switches to two lines up and down (parallel) with an arrow on each side hold the left mouse button down and slide to the left or right. • Using Menu: Highlight the column (from top) Table Menu >Table Properties > Column Tab > adjust width
Borders • By default the table will print showing the borders • Remove the borders by first highlighting the table from the left side • Click the borders button on the toolbar and choose no borders or another border type