Download
1 / 41
410 likes | 428 Views
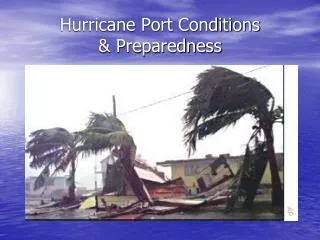
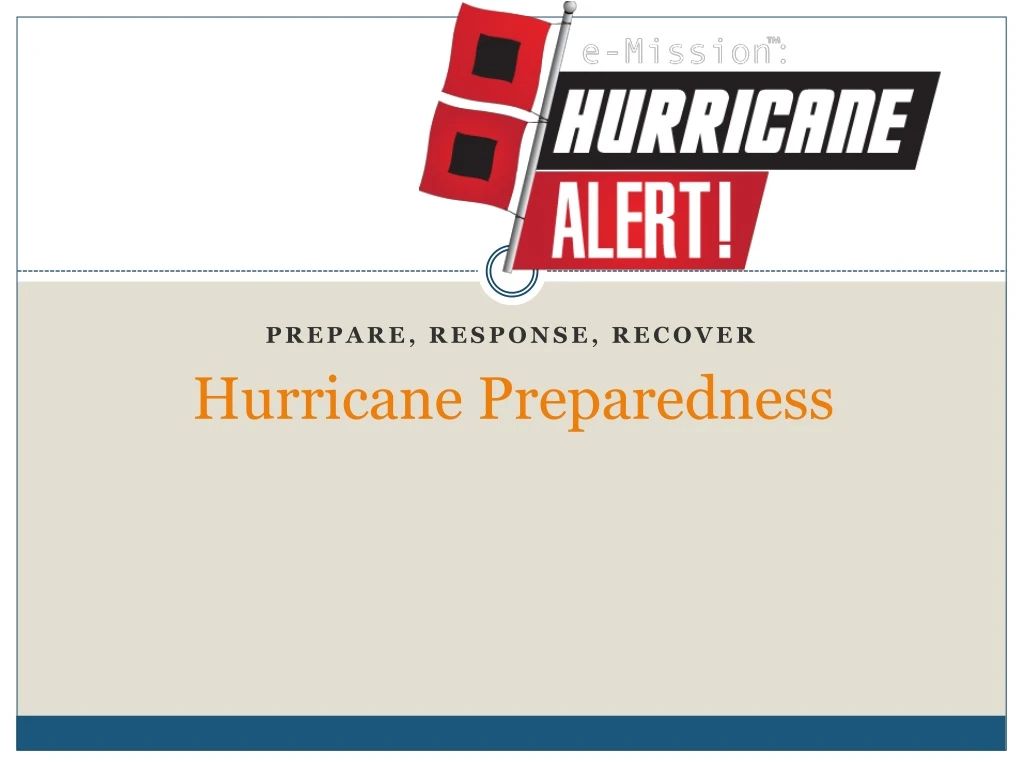
Hurricane Preparedness. Prepare, Response, Recover. Disclaimer. This in-service is meant to be informative and does not change the policies, procedure or protocols set forth by your facility. Hurricane Preparedness. Potential 5 day Forecast Watch: Hurricane may pose a threat in 36 hours

E N D
Hurricane Preparedness Prepare, Response, Recover
Disclaimer This in-service is meant to be informative and does not change the policies, procedure or protocols set forth by your facility.
Hurricane Preparedness • Potential 5 day Forecast • Watch: Hurricane may pose a threat in 36 hours • Tropical Storm or Hurricane Force winds • Warning: Expected to strike in 12 to 24 hours • Post Threat
You do not have to be in the warning or watch area to be impacted. The storm is not always the worse part…stay prepared to address flooding and staffing issues for a week after the event. Even though you may not have significant impacts remember pharmacy and medical supplies are in Whiteville and corporate is in Wilmington
State of Emergency ALL facilities in the area are expected to prepare EVERYONE will be expected to implement sheltering in place plans regardless of track You need to contact local EMS…are you part of their surge plan? Need designated Incident Commander until declaration is lifted for your area
Communication with DHHS • Identify who will coordinate communication. • Daily by a designated time. Include: • Current census • General facility and staffing update • Injuries and fatalities associated with storm • Generator utilization and fuel status
Preparation • Administrator is Command Person • During the event if the administrator leaves then someone must be designated to be IC and must know what they need to do! • Rapid response guidelines should be discussed with them • Talk to local EMS. Keep communication active • Verify contracts for water, transportation, and evacuation locations.
Mitigation Strategies Each facility should have developed their own set of mitigation strategies Things that you need to do to prepare the facility
Resources Using Checklist as an overview and to get you started. Sheltering in place will have different tasks and supply lists. Surge assessment will help you reevaluate what you do to take patients.
Resources that will be needed • Assess needs of residents during potential storm and 1 week after • Medical Supplies, Oxygen, Ivs, Meds, Linen, Food and Clothes • ORDER TODAY!!!! Once they are under warning they cannot deliver. • Ensure phone list of RP: One Call • Weather radio working? • Rain Gear • Elopement update • If you agree to shelter non residents, communicate
Employee Preparation • Get updated employee contact information. You should have a form in your policy for directions to their homes • Gazetteer. Cell phone GPS will be sketchy. • Inclement Weather policy. Post memo for staff encouraging them to be safe and communicate with facility • Tell them to bring all meds and toiletries • Will you have family areas for children of employees? • Talk about transportation especially if public transportation may be cancelled in your area • May even want to refer them to resources about preparing their home and family • https://www2.ncdps.gov/div/pao/HurrGuideFront08.pdf • https://www.readync.org/EN/Index.html
Preparation for other events • Review other relevant policies and make sure you have copies of rapid response at nursing station • Tornado: Move to center locations, cover with blankets • Emergency shut down: know how to shut off gas, electric, water, boilers ect • Loss of phones: Cell phones are charged • Financial: Increase credit card limit, petty cash • Heat and Humidity: Water, fans generator utilization • Emergency water and hot water policies: Use paper products, fill tubs with non potable water, have drinking water on hand • Volunteer policy • Emergency admissions
Surge Assessment We had to do a surge assessment but we are not allowed to increase our licensed capacity unless truly life and death Do not accept more than you care for If you accept patients that are storm related please communicate to the state and local authorities We do want to assist local home care and hospice first but they need to understand your generator situation
HIM Reminders • HIM Office Disaster Kit Supplies: • Large Ziplock bag for laptop & power cord • Plastic/waterproof drop-cloth(s) large enough to cover open chart shelving, office printer/copier, extra monitor • Roll(s) of duct tape to secure the above • Gallon size Ziplock bags to use for active Resident Identity Bags • Badge clips to use for attaching Resident ID bags to resident (optional) • Armbands to use for active residents • Several black fine and heavy tip permanent markers • Large plastic totes or plastic bags to store active chart binders in • 2 extra packs of copy paper • Extra printer cartridge/toner
HIM Reminders • Upon Evacuation: Nursing Station/Unit Involvement: • Utilize plastic tote(s)/plastic bags to store active chart binders and label ‘Clinical Charts – xxx Facility Name’. These totes/bags should never be used for any other function and ready for any disaster preparation. • -Upon evacuation: place active charts in tote(s) and secure • Upon Evacuation: HIM Office Checklist • Laptop is safely in ziplock bag with power cord and labeled • Print facesheets and MAR/TAR or Transfer Discharge Report New • Every resident has their identity bag which includes their facesheet and MAR/TAR or Transfer Discharge Report • Every resident must have an armband secured to them. Each armband should reflect the resident’s full name, date of birth, Diet, facility name and contact number. • Active charts are in tote(s) covered with lid/bag closed and labeled to reflect facility name and contact number • Discharge charts/resident documentation are covered with plastic cloth • Printer/copier/extra monitor covered with plastic cloth • Report to Administrator or DON with above items for next steps
Staffing Update phone contact list of all employees Employees will be on alert if the disaster is pending and will be notified to report for duty when notified. Remind staff to keep cell phones charged Remind staff to bring their medications in case they are required to stay over at facility
Emergency Water and Ice • 1 gallon of potable water/resident/day is required. Additional potable water is to be available for cooking and staff use. • 1 gallon per resident is kept on site at all times – review vendor agreements and have contact numbers readily available to have water delivered within 24 hours, if necessary. • Follow Emergency Water Supply Policy (DP-120) • Freeze as many zip lock bags of water as possible to use as ice • Fill all coolers with ice/ice packs when power outage is suspected • Fill all resident water pitchers
Food & Supplies Contact Food Vendors regarding any change to routine delivery schedules Keep Emergency Contact List of Vendor phone numbers available 3 day supply of disposables - use disposables for preparation (foil pans) and for meal service if ware washing equipment / three compartment sink cannot be used. 3 day supply of food/fluids for residents, staff & possible visitors
Therapeutic Diets Follow LCS/NAS diet and Renal diets only for residents with severe problems Alter textures as necessary – Canned pureed foods/jar baby food may be used All other residents will receive the same menu Print electronic resident tray tickets for multiple days; have resident details page printed for all residents (traycard program) as reference.
Disaster Menus Evaluate equipment availability based on utilities available prior to onset of event Know which equipment/refrigeration will be on generator power Pre-prepare / cook foods, especially for mechanically altered diets, if there will be a means of holding food safely & reheating foods Use Perishable Foods First Follow disaster menu ( Policy DIP-145 or Disaster menu from Food Vendor) Nourishments will be available at nursing stations
Emergency Water • Procedure: 4-48 hours of water loss is expected • Notify the Health Department anytime water supply is interrupted for more than 4 hours. • If tap water is determined not to be safe for use then sources shall be prominently labeled or hooded to restrict use. • Contact shall be made with Dairy/Food vendors to provide 1 gallon of drinkable water per day per resident and staff in the event of an emergency. • If there is knowledge that water supplies will be lost or if the facility is under a disaster warning, all water pitchers and other containers shall be filled with water. This water can be used for cooking and dishwashing. • All resident water pitchers shall be filled up for drinking and g-tube flushes. • All whirlpools/bathtubs shall be filled with water for non-potable uses such as flushing toilets. • All laundry will be on hold until services can be restored or until evacuation is arranged. If laundry is necessary then outside sources such as laundry mats can be utilized. • Disposable dishware will be used until water supply is returned. • Bathing and incontinence care will be performed using incontinence wipes. Small amounts of water may be used if deemed necessary. • Water distribution will be determined by the administrator and dietary services manager. • Alcohol gels will be used for hand hygiene during water loss. • Save drained juices from fruits and vegetables to use in cooking and reconstituting juices and drink mixes.
Emergency Hot Water • Procedure of loss of Hot water only: • Notify Health Department of the situation. Also notify DFS if loss is expected to continue more than 24 hours. • Notify the NC Department of Labor if boiler is involved. • Implement the following: • Provide hand sanitizers for staff and in public rest rooms • Order bath wipes for bathing needs • Utilize disposables in the kitchen for serving meals • Utilize warm water sanitizers to clean kitchen cookware. Water will have to be boiled for warm water use. • e. Use cold water chemicals for laundry • 4. Notify residents and families • 5. Make needed arrangements for repairs/replacements
Nursing Reminders • Nursing • Know what will work in case you are on generator power. (IV and Tube Feeding pumps, air mattresses, oxygen, etc). • Be Prepared to calculate drip factors or get an order to switch continuous tube feedings to bolus feedings for prolonged power outages. • Bring mattresses inside to replace low air loss mattresses • Keep lift batteries charging when not in use • Order supplies: Alcohol gels, incontinence wipes • Make sure that needed supplies such as extra linen, tube feeding supplies, and IV fluids are ordered. • Obtain coolers and ice packs for medications if refrigerators are not red plugged • Make sure needed medications are in the facility. 7 days worth for most patients. Make sure that emergency boxes are fully stocked. • Fill tubs with water for non potable use • Talk to dialysis centers about emergency plans…what if we can’t transport?
Emergency Documentation • Check EMAR back up: Working, Paper, Toner • Prepare for transfer out without power: Where will they print and will it connect. May need cable to connect computer to printer • Remember we can connect toughbooks to verizon cards. Keep them charged • Paper for POC if power goes out longer than 4 hours: you should have these forms • Other Nurses Documentation: • Have progress notes available for them to use if needed. Instead of skilled UDA use the progress notes. • Make some copies of incident reports and neurochecks
Maintenance • Prepare to Secure facility if needed: • Plywood coverings- A minimum of ½ inch thick and anchored at least 1 ½ deep every 12 inches.OR Acrylic sheets. • Braces behind doors- This takes the pressure off latches. Double doors with pins top and bottom are especially vulnerable. • Hardening a specific area of the facility- This would become a place of last refuge. This should be an area with minimal outside exposure, structurally the strongest part of the building, usually in the center. • Sandbags and tarps • Make sure that all facility vehicles have gas. Fill any additional tanks • Test Generator on full load and make sure gas and oil are adequate. • Check flashlights to make sure that they are functioning. • Obtain supplies: extension cords, batteries, flashlights, chain saw with fuel • Make rounds ensuring that all life sustaining equipment is plugged into red plugs. • Conduct outside rounds to see if trees are near power lines or at higher risk for damaging the building • Check valves in sewer traps • Flood prep
Social and Activities • Social Services and Activities • Reassure and calm residents who are aware of what is going on. Don’t tell them that everything will be the same because it may be different. Baths may not be given as scheduled, activities may be canceled, and meals may be cold plates served on Styrofoam. But we will make every effort to keep them safe.
HK and Laundry • Check the status of laundry and make sure that appropriate levels are available. • During power outages suspend routine changing of sheets and preserve linens. Use incontinence wipes and disposable pads. • Clean off windows seals in residents’ rooms. • Make sure all trash cans are emptied as weather permits. • Have big trash cans emptied and available if needed for water. • Obtain supplies: Soap, garbage bags, cleaning supplies/bleach
Preparation: 24 hours prior • Look at schedule and try and anticipate plan! • Make reasonable accommodations for care needs based on resources and staff. • Check supplies again. Make sure that you have enough supplies in the facility. You do not want to have to go and get supplies in the storm. • Charge cell phones in case phone lines go out. • Look at resident’s rooms make sure that items stored on window seals are put away. You may want to consider moving residents away from windows. Depending on what type of storm you are expecting. • Check all life sustaining equipment to make sure it is working. • Make sure you have access to TV and radio for updates. • Make sure to protect computers • Have a sign in sheet available in case the time clock goes out. • Remind staff to park on high ground, if your are prone to flooding. • Move outside furniture to a secure location • Move as many of the supplies inside as possible: mattresses, laundry, disposable products • Cover medical records and equipment • What staff will you need: Who is essential • Close all blinds
Transportation Do not transport during the storm. Make sure vehicles are in good repair and full of fuel.
Response • Shelter in place: • Round Frequently • Look for early signs of water damage • Be safe when it comes to repairs and outdoor inspections during the event • Don’t allow patients or staff outside unless absolutely necessary • Remember nursing staff may need assistance. They still have to provide care
Pharmacy Make sure to ask staff to order meds when advised to do so by pharmacy. They will send out an email Make sure to have adequate stock on OTCs Check your med dispense and order items that may be necessary Remember we need to be prepared to treat in house if we cannot transport during the storm…do you have what you might need.
Generator Maximize fuel prior to the storm Contact your vendors and make sure they know you will need fuel if generators go down Make sure to know what generators will and will not run Secure refrigerator trailers if needed Keep NHA & DON appraised of concerns with generator and/or fuel
Pets We would prefer to limit staff brining pets to the facility If they are allowed they must provide vaccination records, food, water, and ways to limit their access around the facility.
During the event Will EMS be transporting? Probably not…be prepared to treat medical emergencies in house…. IV and med dispense Again look at your checklist for shelter in place Emergency admits…look at policy
Recover • Nursing staff will check all residents and staff for injury and provide first aid as necessary and move them away from any hazardous areas. • Check for fires in your area and follow fire procedures if there is a fire. • Maintenance Supervisor/ Designee will restore utilities one at time, checking that each one is working properly before returning another utility into service. • Command Person/Designee will check the building itself for structural damage. Follow Evacuation Plan as directed by “Command Person”. • CONTACT 911 AS NEEDED. • Report all information to the “Command Person”. Notify and update the Medical Director. • Pictures of damage to corporate
Primary vs Secondary • Primary Location • Local • Would be used in an emergency evacuation that would be short term: Churches, School etc • Secondary Location • Pre event evacuation • Post emergency evacuation is more long term solution is needed
Evacuations 1. All nursing and ancillary department personnel assigned to resident evacuation will be allocated to the following duties by DON or designee: • Stock drugs, reserve resident medications, emergency drug kits and treatment boxes will be boxed and shipped under the control of a licensed nurse. • Two e tanks for oxygen with two facemask, two nasal cannulas and two boxes of medical supplies will be shipped under the control of a nursing assistant. 2. Identify the resident unit order of evacuation. Prepare a list of residents and where they are evacuating to so assigned nursing staff can prepare care group. 3. Each care group will be controlled by a nurse assisted by nursing assistants and ancillary personnel. Complete the Resident Evacuation Tracking Log for a Relocation Evacuation (see intranet Forms Section) Chart and other medical records will be evacuated with the care group. 4. The medication cart will be evacuated with the care group under the control of the Care Group Leader. 5. The ambulatory residents or each care group will be loaded and unloaded first to and from vehicles. If a resident is in immediate danger or high acuity requiring ambulance they shall be transferred first. 6. Each care group will have one blood pressure cuff, stethoscope, scissors and writing materials. Additionally, extra blankets, incontinence care products, wash basins, urinals and bedpans should also be taken. Resident Evacuation Checklist can be completed on each resident as needed during discharge process.
Preparing Pt for Evacuation • Conduct yourself in a calm and efficient manner. • Dress as many of you residents as possible • Assure residents have name bands on and/or photo identification with correct information. Attach Resident’s Face Sheets to individual carry bags for each resident’s supplies. • Remove all resident from bed if possible and place in wheelchairs, Geri chairs, etc. • Gather 3 days of personal clothing, gowns/pajamas, shoes, slipper socks, and underwear to accompany the resident. Also bring essential items such as bedpans, in continent supplies, pillows, glasses, dentures, or hearing aids. Ensure all items are labeled with resident’s name. Place in individual carry bags for transport. • Safeguard all medical records and release charts with the evacuating residents. • Assist in the movement of resident from rooms to departure areas for transport. • Assist in transferring resident into transport vehicles. • Accompany assigned residents to receiving facility and serve in nursing capacity. • Remain with residents and tend to their needs while in the receiving facility.
Death during evacuation • In the event of Resident’s death • Follow Nursing Procedure notify MD, RP and Administrator/Designee. Provide Post Mortem care for Resident and release body to Mortuary. • In the event this is not possible resident may be released to a facility/Mortuary as designated by State or Local Emergency Management. • Should resident remain in the facility for a period of time. The facility will designate a holding room and to the best of their ability provide cooled ventilation. • Resident Name should be listed on Resident Evacuation Tracking Log indicating resident is deceased and current destination/location or to who resident was released including date and time.