Download
1 / 4
0 likes | 2 Views
Sealcoating is essential for asphalt driveways to prevent oxidation and deterioration. Our professional sealcoating service provides a protective layer that enhances durability and boosts curb appeal

E N D
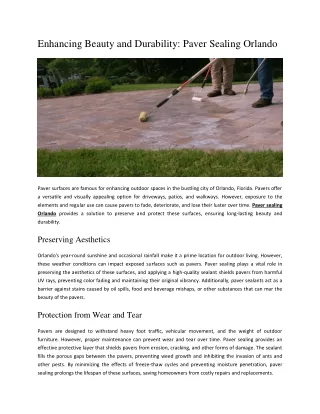
Introduction Outdoor spaces are more than just extensions of our homes; they are sanctuaries where we unwind, entertain guests, and create lasting memories. However, over time, even the most beautiful outdoor areas can succumb to the elements. One of the best ways to rejuvenate your outdoor space is through paver repair and sealing. This process not only enhances the aesthetic appeal but also significantly extends the lifespan of your pavers. In this comprehensive guide titled Revive Your Outdoor Space: Mastering Paver Repair and Sealing for a Stunning Finish, we'll delve into everything you need to know about maintaining your pavers. From understanding what paver sealing entails to learning how to perform effective paver repairs, we've got you covered! Understanding Paver Sealing What is Paver Sealing? Paver sealing is a protective treatment applied to interlocking concrete, brick, or stone pavers. This process helps lock in color, prevent stains, and protect pool deck cleaning solutions against weather damage. Essentially, sealing enhances the overall durability while providing a glossy finish that elevates your outdoor space's visual appeal. Driveway Paver Sealing Orlando Florida Driveway Paver Sealing Orlando Florida Why is Paver Sealing Important? Protection Against Stains: Food spills or oil leaks can leave unsightly marks on your driveway or patio. A good sealant acts as a barrier against these stains. Prevention of Weeds: Regular sealing minimizes weed growth between pavers by preventing moisture from penetrating these gaps. Color Retention: UV rays can fade the vibrant colors of your pavers over time. Sealing helps maintain that fresh look. Extended Lifespan: By protecting against cracking and erosion, sealing can significantly extend the life of your pavers. Types of Sealers Available Film-forming Sealers: These create a protective film on top of the surface but may require reapplication every few years. Penetrating Sealers: These absorb into the paver material itself and offer long-lasting protection without altering appearance. Enhancing Sealers: Specifically designed to bring out color while providing adequate protection.
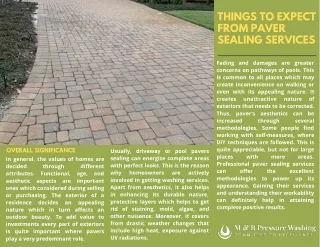
Eco-Friendly Options: For those concerned about environmental impact, there are sealers made from sustainable materials. The Benefits of Paver Repair Why You Should Prioritize Paver Repair Paving stones can shift or crack due to various reasons including ground movement, heavy traffic, or freezing and thawing cycles. Prompt repair is essential for several reasons: Safety Concerns: Uneven or cracked surfaces can pose tripping hazards for family members and guests. Cost-Efficiency: Addressing small issues promptly prevents them from escalating into larger problems that could be costly to fix later. Aesthetic Appeal: Damaged pavers detract from your outdoor area's overall beauty; timely repair restores its charm. Common Signs You Need Paver Repair Cracks Settling Discoloration Loose Pavers Weed Growth Assessing Your Paving Stones Inspecting for Damage Before jumping into repairs or sealing, it's crucial to assess your paving stones thoroughly: Start by visually inspecting each section. Check for any cracks or shifting stones. Take note of any discoloration or signs of mildew. Tools You'll Need for Assessment | Tool | Purpose | |-------------------|------------------------------------| | Flashlight | To inspect hard-to-see areas | | Tape Measure | To measure gaps between stones | | Level | To check if any stones are uneven | | Notepad | For taking notes on damage | Paver Repair Techniques DIY vs Professional Help While some homeowners may prefer DIY repairs, others might opt for professional assistance depending on their comfort level with tools and techniques involved. When to Go DIY? Minor surface cracks Loose stones that can be reset easily Small weed infestations When to Call a Professional? Major structural issues Extensive staining requiring specialized equipment Complex designs needing expert handling Step-by-Step Guide to DIY Paver Repair Tools Required:
Joint sand Trowel Leveling compound (if needed) Rubber mallet Broom & vacuum cleaner (for debris removal) Repair Steps: Clear debris between pavers with a broom and vacuum. Remove loose or damaged pieces using a trowel. Replace any broken pavers with new ones that match in size and color. Use joint sand between each stone then compact using a rubber mallet. Allow everything to settle before proceeding with sealing. The Art of Paver Sealing Preparing Your Surface for Sealing Before applying sealant, preparation is critical: Clean all surfaces thoroughly using water and mild detergent. Rinse off any soap residue completely. Allow ample drying time (at least 24 hours) before applying sealant. Choosing the Right Weather Conditions For optimal results: Avoid rainy days; moisture interferes with adhesion. Choose temperatures between 50°F - 90°F for application. Applying The Sealant Follow these steps: Shake well before use; always read manufacturer instructions carefully! Use a roller or sprayer for an even application over all surfaces. Ensure even coverage by working in sections—don’t forget corners! Allow sufficient drying time as recommended by the manufacturer before using the area again. Maintaining Your Sealed Pavers Regular Cleaning Schedule To keep your paved area looking pristine after sealing: Sweep regularly—don’t let debris accumulate! Wash occasionally with soap solution; avoid harsh chemicals that can degrade sealants. 3.. Rinse off thoroughly post-cleaning. When Should You Reseal? Typically every 2–5 years depending on wear patterns observed during regular inspections! Driveway Sealing Considerations Importance of Driveway Sealing Your driveway often experiences more wear than other areas due its high traffic exposure—proper sealing here cannot be overlooked! Benefits Specific To Driveway Enhances curb appeal tremendously! Acts as protection against oil stains—a common nuisance! How To Prepare Driveway For Sealant?
Follow similar steps outlined earlier but ensure thorough cleaning since driveways attract more grime! FAQs About Paver Repair and Sealing 1) How often should I seal my pavers? You should consider resealing every 2–5 years based on wear patterns observed during regular inspections. 2) Can I seal my own driveway? Yes! With proper preparations outlined above along with suitable weather conditions you certainly can! 3) Is it necessary to repair cracks before sealing? Absolutely! Any existing damages should be addressed prior—to ensure effective adhesion when applying sealant! 4) What’s better—film-forming sealers versus penetrating ones? It depends! Film-forming provides visible gloss but may require more frequent upkeep compared to penetrating options which last longer without altering appearance drastically. 5) Will weeds still grow after I seal my patio? While sealing reduces moisture penetration—some stubborn weeds might find ways through tiny openings; regular maintenance further helps mitigate this issue! 6) Can I apply sealer in cold weather? Ideally no—temperature should remain within optimal range (50°F -90°F) during application processes! Conclusion In conclusion, revitalizing your outdoor space requires diligence in both repair work and timely sealing applications! As we’ve explored through this detailed guide titled Revive Your Outdoor Space: Mastering Paver Repair and Sealing for a Stunning Finish, understanding how best to approach these tasks doesn’t just enhance aesthetics but prolongs longevity significantly too! So roll up those sleeves—your dream patio awaits transformation!