Download
1 / 57
580 likes | 639 Views
Selecting & Setting Denture Teeth. Rola M. Shadid, BDS, MSc, m(AAID ). The task of selecting teeth is the responsibility of the dentist and should not be left to others All the teeth from a particular mode will have the same size & shape. Selection criteria for anterior teeth.

E N D
Selecting & Setting Denture Teeth Rola M. Shadid, BDS, MSc, m(AAID)
The task of selecting teeth is the responsibility of the dentist and should not be left to others • All the teeth from a particular mode will have the same size & shape
Selection criteria for anterior teeth • Selection of tooth size • Selection of tooth shape • Selection of tooth shade • Selection of tooth material
Selection of tooth size • Height (occluogingival) • Width (mesiodistal) • Thickness (faciolingual)
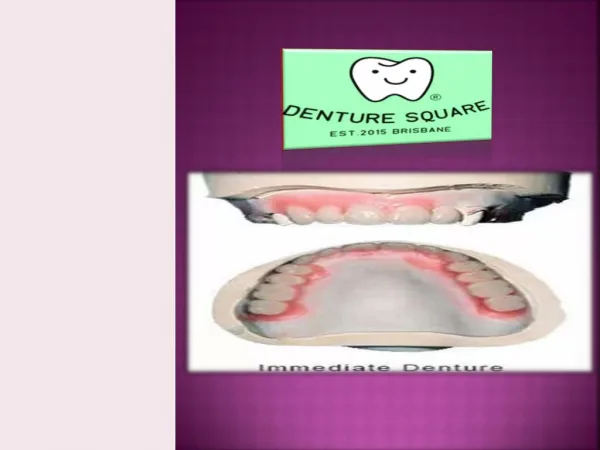
Selection of tooth size • Preextraction guides • Diagnostic guides are the most reliable guides in the selection of size & form • Extracted teeth • Previous dentures especially if they are immediate dentures • Postextraction methods
Determining Tooth Width • Preextraction guide • Bizygomatic width • Cranial circumference • Corners of the mouth • Ala of nose
Determining Tooth Width • Bizygomatic width: the greatest bizygomatic width measured by facebow divided by 16= width of the central incisor; divided by 3.3 = approximate width of the six upper anterior teeth • Cranial circumference: the ratio of the cranial circumference to the combined upper anterior teeth width is 10 to 1.
Determining Tooth Width • Corners of mouth at rest • coincide with distal of canines • Or ala of nose coincides • with canine cusp tip
Guide to vertical height of the tooth • High lip • (smile) line • Interarch space *
Guide to vertical height of the tooth (High lip line) • Highest point of upper lip • when smiling • Cervical necks lie at • or above this line • If shorter teeth are selected, • esthetics compromised
Selection of tooth form • facial form • proximal form • incisal form
Selection of tooth form • Matching the tooth form to the face form (Leon Williams theory) * • The dentogenic concept in selecting teeth forms (proposed by Frush & Fisher) ¶ • Teeth are selected according to sex then to personality & finally the age
Selection of the color (shade) • An appropriate color of artificial tooth is selected from a shade guide. • When making the choice, it is advisable to moisten the teeth with water and hold them just inside the patient’s open mouth.
Selection of the color (shade) • Care should be taken to avoid letting the patient view the teeth against a light background such as the dentist’s white coat as this can be positively misleading. Under such conditions the shade will appear darker than it will when the denture is eventually in the mouth. As a result, the patient is likely to choose a shade that is too light.
Selection of the color • • Natural teeth tend to become darker with increasing age. It is, therefore, appropriate to choose a shade of denture tooth which is in keeping with the patient’s age. • • Correlation with skin and hair color is suspect
Selection of the color • Don’t show a patient all shades in the shade guide outside of the mouth – patients will almost always pick the whitest shade • Instead show patient 2 or 3 shades under lip and ask their opinion • Anterior and posterior tooth shades are the same (e.g. anterior shade P3.5 corresponds with posterior shade P3.5)
Patient Chooses Shade with Input from Dentist • Patient • owns the dentures • will look at them every day • Offer your opinion, don’t persuade
Selection of posterior teeth • Requirements of posterior teeth: • Chew food efficiently • Contribute to denture stability • Comfortable to underlying soft tissues • Should not cause any bone resorption • Should contribute to esthetics & not create any sound on impact
Selection criteria for posterior teeth • Color • Mesiodistal width • Buccolingual width • Occlusogingival length • Cuspal inclination • Material
Cuspal Inclination • Defined as the angle between the palatal incline of the mesiobuccal cusp & the horizontal • Classified: • Nonanatomic • Anatomic
30° 20° 10° Anatomic Teeth (10°, 20°, 33°) Advantages: • Easier to balance the occlusion • Better chewing efficiency • Better esthetics
30° 20° 10° Anatomic Teeth (10°, 20°, 33°) Use for patients with: • Esthetic concerns • Coordinated jaw movements • Denture opposing natural teeth • Well formed ridges • When possible to record & transfer accurate jaw relationship • When balanced occlusion is planned
Non-Anatomic Teeth(0°, Rational, Monoline, etc.) • Advantages: • Freedom of occlusal movement • Elimination of lateral forces • Lack of interferences & better able to accommodate positional changes of the dentures relative to the supporting tissues brought about by resorption of alveolar bone • Disadvantages: Not esthetic looking, lower shearing efficiency & difficult to balance
Non-Anatomic Teeth(0°, Rational, Monoline, etc.) Use for patients with: • Jaw size discrepancies (Class III) • Severe ridge resorption • Uncoordinated jaw movements • For elderly patients because an increased variation in occlusal contact positions is characteristic of this groupso it is difficult to record & transfer accurate jaw relationship
Denture Tooth Material • Acrylic resin • Porcelain teeth • Porcelain acrylic combination • Acrylic teeth with amalgam inserts or with cast gold occlusal surfaces
Denture Tooth Material • Porcelain teeth less common now • Acrylic easier to set and adjust • Last life of denture (5-7 years)
Porcelain-Acrylic Combination • Resin posteriors oppose porcelain posteriors * • Porcelain anteriors & resin posteriors Х
Selecting Posterior Tooth Size Determine distance from distal of canine to ascending ramus (29, 30 mm, etc.)
Selecting Posterior Tooth Size • Buccolingual size can affect the tongue space • smaller teeth if tongue space is limited
Summary Selecting denture teeth • advise patient don’t persuade • an art, minimal science • use common sense • use old denture as a starting point • look at dentate patient esthetics
Arranging Prosthetic Teeth • The goals of proper teeth selection and arranging are to construct complete dentures that: • Function well • Allow the patient to speak normally • Are esthetically pleasing • Will not abuse the tissues over residual ridges • Offer health & comfort to TMJ
Some guidelines for arranging artificial teeth • The artificial teeth should be placed as near as possible to the position occupied by natural teeth, with being compatible with surrounding musculature. • The preliminary position of both anterior & posterior teeth is determined during jaw relation appointment (Refer to the lecture)
Some guidelines for arranging artificial teeth • Regarding anteroposterior position of upper anterior teeth: fullness of the lips, phonetics (f & v sounds) as a guide, distance from incisive papilla, and relation to the residual alvealar ridge as to be placed anterior to it according to the amount of resorption; all guide their position. • Regarding superoinferior position of upper anterior teeth: preextraction records, former dentures, and visibility of the upper incisors are used as a guide.
Some guidelines for arranging artificial teeth • Inclination of the anterior teeth; there is an obtuse angle between the labial surface of bone & the labial surface of anterior teeth • Mediolateral position; midline & ala of nose are used as aguide • 0.5 mm vertical overlap of mandibular central and canine teeth with the maxillary central and canine teeth. • A 1-2 mm horizontal overlap must exist between the lingual surface of the maxillary anterior teeth and labial surface of the mandibular anterior teeth.
Some guidelines for arranging artificial teeth • The upper & lower posterior teeth are centered over the crest of the ridge whenever possible • Placing maxillary teeth over maxillary tuberosity should be avoided • Placing mandibular teeth over retromolar pad or over steep slopes should be avoided. • Placing posterior teeth too far buccally should be avoided
Some guidelines for arranging artificial teeth • Placing posterior teeth too far lingually should be avoided • The lingual cusps of mandibular posterior should be in alignment with mylohyoid ridge & never lingual to it • Regarding occlusal plane: • Interpupillary line & ala-tragus line • Corners of the mouth ( anterior occlusal plane is placed at or slightly below corners) & level with one-half to two-thirds of retromolar pad • Tongue (lateral borders of tongue should be just superior to occlusal plane)
Some guidelines for arranging artificial teeth • The lower posterior teeth are placed buccolingualy along a line extending from the tip of the canine to the middle of the retromolar pad. This line should pass through the central fossae of the premolars and molars.
Occlusal contacts between upper & lower posterior • The posterior teeth articulate in a cusp to fossa & cusp to marginal ridge relationships. • The figure shows the contacts of upper palatal cusps on lower posterior teeth. The contacts of upper second molar & mesiopalatal cusp of upper 1st molar are cusp-fossae relationships. The others are cusp-marginal ridges contacts.
Reference marks in maxilla a #7 Midline of the maxillary rim: score a line demarcating the position of the midline of philtrum of the lip. This is one of the most critical references to record. Ensure the mark is a line, not just a dot, which parallels the patients overall facial midline. Otherwise the incisors can be set at an angle, making the set up look off center. The mandibular midline can be marked at the same time.
Reference marks in maxilla Corners of the mouth - mark the corners of the patient’s mouth, when closed, at rest. This approximates where the distal of the canine teeth should terminate. Use the flexible Trubyte Auto-Rule to measure around the circumference of the rim between contralateral marks - tooth size of the six anterior teeth can be read off the ruler in mm or by the Dentsply letter code (A,B,C,etc.)
Reference marks in maxilla High Lip line - mark the highest point the upper lip reaches when the patient smiles. The maxillary anterior teeth should be selected so the cervical necks lie at or above this line. If shorter teeth are selected, the esthetic result will be compromised.
Reference marks in maxilla Palatal Midline - With a pencil and a straight edge, draw a line through the middle of the incisive papilla and the mid-palatal raphe, extending it onto the land area of the cast. Check your occlusal rim for symmetry about this important midline. If it is not symmetrical, adjust the rim prior to sending it to the lab for placement of teeth.
Reference marks in maxilla Distal aspect of the incisive papilla - In the edentulous maxilla, a line drawn perpendicular to the palatal midline, passing trough the distal aspect of the incisive papilla should normally intersect with the cusp tips of the canines. On average, the facial surface of the central incisors should be approximately 8-10 mm anterior to this line.