Download

1 / 17
170 likes | 350 Views
Flash Design for eLearning. ASTD Jacksonville - eSIG Chuck Belinski PRYORity Training and Development. Session Goal. Create a reusable structure for creating presentation and training modules. Setup a Flash file Create a Layout Create Navigation* (*switched order for instruction)

E N D
Flash Design for eLearning ASTD Jacksonville - eSIG Chuck Belinski PRYORity Training and Development
Session Goal • Create a reusable structure for creating presentation and training modules. • Setup a Flash file • Create a Layout • Create Navigation* (*switched order for instruction) • Add Content* • Add Frame Labels • Create a Menu
Flash Interface and Key Concepts • The Timeline, Stage, Toolbar, Properties Panel, and Library • The Stage - where your visual elements will appear • The Timeline - like a music score, read left to right by time • Frames - like frames of a movie or pages of a book • Keyframes - a frame in which something different happens • ActionScript - programming code that adds functionality
Walk-through of : myCourse
Getting Started • Open Flash • New File • Layout Setting • Publish Settings • Save file: • myCourse.fla
Set Our Work Area • Add Additional Frames • Add Additional Layers • Name the Layers • Create our Background • Create our Instructional Area
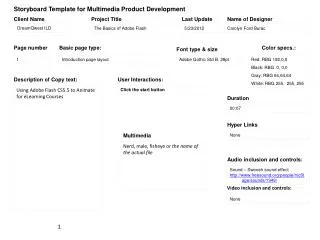
Begin to Add Instructional Content • Add a Heading • Add the Title Text • Add a Graphic to the Library • File/Import/Import to Library • Add a Title Page Graphic • Preview Our Course (Command/Control+Enter)
Introduction to ActionScript • Flash plays all the frames in our movie, we do not want that. • Add a “stop” command to the timeline. • Select the “actions” layer • Open the Actions Panel (F9, alt-F9, or Window+Actions) • Type: stop(); • Preview Our Course
Add Some Content • Add new Keyframes to the Content Layer (F6) • Delete any left over items from the previous keyframe • Add the text for the Menu Page • Copy and Paste the text for the Instructional Pages • (using NASA_Missions.rtf)
Add Navigation • Add our Navigation Buttons • Window/Common Library/Buttons • Classic Buttons/Playback • gel Left, gel Right, gel Stop • gel Left - name “back_btn” • gel Right - name “forward_btn” • gel Stop - name “menu_btn”
Create our Navigation ActionScript • First Frame - Actions • Just below the “stop();” code // code for forward button forward_btn.onRelease = function(){ nextFrame(); } • Also add code for: “back_btn” and “prevFrame”
Add Frame Labels • Select Frame 2 of the “Labels” Layer • Add a Keyframe (F6) • In the Properties Panel, add the Frame Label “menu” • Frame 3 - name label “sec1” • Frame 4 - name label “sec2” • Frame 6 - name label “sec3”
Add the Menu Buttons • On the Menu Page (Frame 2 - content layer) • Drag 3 “gel Stop” buttons from the library to the stage. • Align them with the section heading text • Name the buttons; “sec1_btn”, “sec2”_btn, and “sec3_btn”.
Add the Menu Actionscript • Frame 2 - Actions Layer //Menu Button Coding sec1_btn.onRelease = function(){ gotoAndStop("sec1"); } sec2_btn.onRelease = function(){ gotoAndStop("sec2"); } sec3_btn.onRelease = function(){ gotoAndStop("sec3"); }
Try and create the code yourself! • First frame - actions layer • The button name is " menu_btn " • We want it to react to something " .onRelease" • When the button is released, we want it to perform something " = function(){ " • What is that something " gotoAndStop("menu"); " • And to close our function " } ".
Add Some Additional Graphics • The library contains some graphics, add them to the appropriate pages. • Publish Your Course: • File/Publish Settings… • Flash Tab - select Flash and HTML • Press the “Publish” button.
For More Information: • Chuck Belinski • PRYORity Training and Development • 117 Centre Street, Suite #7 • Fernandina Beach, Florida 32034 • 904-491-5007 • chuck@pryoritytraining.com