Download
1 / 27
270 likes | 284 Views
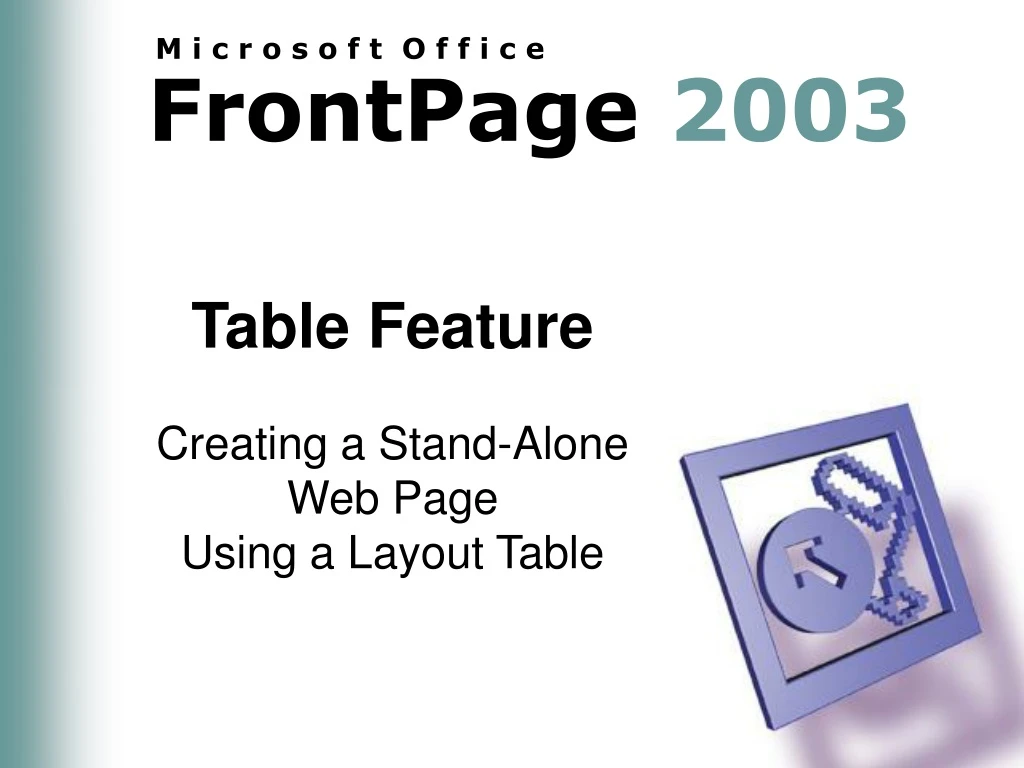
Learn how to create a stand-alone web page and design it using a layout table with rounded corners, shadows, and borders in FrontPage 2003.

E N D
Table Feature Creating a Stand-Alone Web Page Using a Layout Table
Objectives • Create a stand-alone Web page • Use a layout table to design a Web page • Format layout cells in a layout table with rounded corners, shadows, and borders
Starting FrontPage and Creating a New Web Page • Click the Start button on the Windows taskbar, point to All Programs on the Start menu, and then point to Microsoft Office on the All Programs submenu. • Click Microsoft Office FrontPage 2003 on the Microsoft Office submenu • If FrontPage opened a previously opened Web site, click File on the menu bar and then click Close Site • If a new Web page named new_page_1.htm is not displayed in Design view, click the Create a new normal page button on the Standard toolbar to create a new Web page • If a task pane appears, click the Close button on the task pane
Adding a Layout Table to a Web Page • Click Format on the menu bar • Click Theme • When FrontPage displays the Theme task pane, scroll to Global Marketing in the Select a theme list • Click Global Marketing in the Select a theme list • Click the task pane list arrow
Adding a Layout Table to a Web Page • Click Layout Tables and Cells • Click the task pane down scroll arrow to scroll through the task pane • Use the scroll bar on the Table layout list to scroll through the Table layout list until the Centered Header, and Centered Body table layout appears • Click Centered Header, and Centered Body • Click the Align Center button in the Table properties area
Resizing a Layout Cell • In Design view, use the scroll bar to scroll the Web page to the top of the Web page • Click the centered header layout cell • Click the <td> tag selector in the Quick Tag Selector toolbar • Position the mouse pointer over the left border of the centered header layout cell until the mouse pointer appears as the table repositioning pointer
Resizing a Layout Cell • Click and drag the left border of the centered header layout cell until it snaps into position in alignment with the left border of the centered body layout cell, and then release the mouse button • Repeat the previous step for the right border of the centered header layout cell • If necessary, use the task pane up scroll arrow to scroll to the top of the task pane
Changing the Background Color of a Layout Cell • Click the Cell Formatting link in the Layout Tables and Cells task pane • When FrontPage displays the Cell Formatting task pane, click the VAlign box arrow and select Middle in the VAlign list • Click the BgColor box arrow • Click More Colors • When FrontPage displays the More Colors dialog box, select the yellow color with the hex value of {FF, FF, CC} and then click the OK button
Adding Corners, Borders, and Shadows to a Layout Cell • Click the Apply above setting to all borders button in the Borders area • Click the Cell Corners and Shadows link at the top of the task pane • Type 10 in the Width text box in the Corners area • Type 10 in the Height text box in the Corners area • Click the Color box arrow
Adding Corners, Borders, and Shadows to a Layout Cell • Click the yellow color in the Document Colors area • Click the Apply above setting to all corners button in the Corners area of the task pane • Click the task pane down scroll arrow so that the bottom of the task pane appears • Click the Apply above settings to bottom and right shadows button in the Shadows area • Click anywhere in the centered header layout cell and type Responsibilities of the President of the and then press SHIFT+ENTER
Adding Corners, Borders, and Shadows to a Layout Cell • Type Future Entrepreneurs Honor Society • Select Heading 2 in the Style box on the Formatting toolbar • Click the Center button on the Formatting toolbar • Click the Apply above setting to bottom and right shadows button twice in the Shadows area in the Cell Formatting task pane
Formatting and Adding Content to the Second Layout Cell • Click anywhere in the centered body layout cell • Use the up scroll arrow of the task pane to scroll to the top of the task pane • Click the Cell Properties and Borders link • Click the BgColor box arrow to display the BgColor list, and click the yellow color in the Document Colors area • Click the Apply above settings to all borders button in the Borders area
Formatting and Adding Content to the Second Layout Cell • Click the Cell Corners and Shadows link at the top of the task pane • If necessary, click the Color box arrow and click the yellow color in the Document Colors area • Click the Apply above setting to all corners button in the Corners area of the task pane • Click the task pane down scroll arrow so that the bottom of the task pane appears • Click the Apply above setting to bottom and right shadows button in the Shadows area
Formatting and Adding Content to the Second Layout Cell • Click the Start button on the taskbar • Point to All Programs on the Start menu • Click Microsoft Office on the All Programs menu and then click Microsoft Office Word 2003 on the Microsoft Office submenu • Click the Open button on the Standard toolbar • When the Open dialog box is displayed, select the file, FEHSPresidentResponsibilities.doc, from the Feature1 folder on the Data Disk
Formatting and Adding Content to the Second Layout Cell • Click the Open button • If necessary, close the New Document task pane • Drag through all of the text after the first line in the document to select it and then press CTRL+C to copy it to the Clipboard • Click the Close button on the Microsoft Word title bar
Formatting and Adding Content to the Second Layout Cell • If necessary, click the Microsoft FrontPage button in the taskbar button area to switch to FrontPage • If necessary, click the centered body layout cell to position the insertion point • Press CTRL+V to paste the copied text from Word into the Web page • Click the Apply above setting to bottom and right shadows button twice in the Shadows area
Saving the Web Page, Previewing the Web Page, and Quitting FrontPage • Click the Close button on the Cell Formatting task pane • Click the Save button on the Standard toolbar • When FrontPage displays the Save As dialog box, select Local Disk (C:) in the Save in box • Click the Create New Folder button and type jkeelerHonorSociety in the Name box on the New Folder dialog box • Click the OK button
Saving the Web Page, Previewing the Web Page, and Quitting FrontPage • Type PresidentsResponsibilities in the File name text box and then click the Save button • When the Save Embedded Files dialog box appears, click the Change Folder button and select C:\jkeelerHonorSociety\images as the folder for the embedded images by clicking the Create New Folder button in the Change Folder dialog box • Click the OK button on the Save Embedded Files dialog box. • After FrontPage saves the files, click the Preview button
Saving the Web Page, Previewing the Web Page, and Quitting FrontPage • When the Web page appears in Preview view, use the scroll bar to view the entire page • Click the Design button to return to Design view • Click File on the menu bar and then click Close • Click the Close button on the right side of the FrontPage title bar
Saving the Web Page, Previewing the Web Page, and Quitting FrontPage
Feature Summary • Create a stand-alone Web page • Use a layout table to design a Web page • Format layout cells in a layout table with rounded corners, shadows, and borders