Download
1 / 83
830 likes | 847 Views
Learn to draw, edit polylines, arcs, and splines in AutoCAD with the PLINE command and PEDIT options. Discover techniques for creating polyline boundaries and continuous arcs effortlessly.

E N D
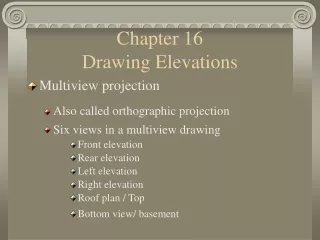
Drawing and Editing Polylines and SplinesChapter 16 Sacramento City College EDT 310 EDT 310 - Chapter 16 - Drawing and Editing Polylines and Splines
Objectives • Use the PLINE command to draw polylines and polyarcs. • Edit existing polylines with the PEDIT command. • Describe the function of each PEDIT command option. • Use the EXPLODE command to change polylines into individual line and arc segments. EDT 310 - Chapter 16 - Drawing and Editing Polylines and Splines
Objectives • Draw and edit spline curves. • Create a polyline boundary. EDT 310 - Chapter 16 - Drawing and Editing Polylines and Splines
The PLINE Command EDT 310 - Chapter 16 - Drawing and Editing Polylines and Splines
PLINE Command • The PLINE command can be accessed by: • Picking the Polyline button in the Drawtoolbar • OR • Selecting Polyline from the Drawpull-down menu • OR • Type PL or PLINE at the Command: prompt. EDT 310 - Chapter 16 - Drawing and Editing Polylines and Splines
PLINE Command - The Arc option EDT 310 - Chapter 16 - Drawing and Editing Polylines and Splines
PLINE Command • The Arc option of the PLINE command • Is similar to the ARC command • The PLINE Width and Halfwidth options can be used to set an arc width. • The arc width can range from 0 up to the radius of the arc. EDT 310 - Chapter 16 - Drawing and Editing Polylines and Splines
PLINE Command • A polyline arc with different end widths is drawn by • accessing the Width option and • changing the width values. EDT 310 - Chapter 16 - Drawing and Editing Polylines and Splines
Drawing a Continuous Polyline Arc • A polyline arccontinued from a previous line or polyline is tangent to the last object drawn. • The arc's center is determined automatically • You can pick a new center. EDT 310 - Chapter 16 - Drawing and Editing Polylines and Splines
Drawing a Continuous Polyline Arc • If a straight polyline is continued from a polyline arc, the arc's tangent direction remains the same as that of the previous line, arc, or polyline. • This may not be what you want. • Specify a different setting with one of the PLINEArcoptions. EDT 310 - Chapter 16 - Drawing and Editing Polylines and Splines
Drawing a Continuous Polyline Arc • Arc Options: • Angle • Center • Close • Direction • Radius • Second pt (second point). EDT 310 - Chapter 16 - Drawing and Editing Polylines and Splines
Specifying the Included Angle • Angle option • You can specify the angle for a PLINE arc by using the Angle option. EDT 310 - Chapter 16 - Drawing and Editing Polylines and Splines
EDT 310 - Chapter 16 - Drawing and Editing Polylines and Splines
Specifying the Included Angle • Center option • When a polyline arc is continued from a drawn object, the center point is calculated automatically. • You can to pick a new center point. • The CEnter option allows you to specify a new center point for the arc. EDT 310 - Chapter 16 - Drawing and Editing Polylines and Splines
Specifying the Included Angle • If A is entered, the next prompt is: • Specify included angle: (enter an included angle and press [Enter]) • If L is entered, the next prompt is: • Specify length of chord: (enter a chord length and press [Enter]) EDT 310 - Chapter 16 - Drawing and Editing Polylines and Splines
The Direction Option • The Direction option • changes the bearing of the arc. • It changes the default option of placing a polyline arc tangent to the last polyline, arc, or line. • The Directionoption functions much like the Direction option of the ARC command. EDT 310 - Chapter 16 - Drawing and Editing Polylines and Splines
Drawing a Polyline Arc by Radius • Radius Option • Polyline arcs can be drawn by giving the arc's radius. • Enter the Radiusoption inside the PLINE Arc command. EDT 310 - Chapter 16 - Drawing and Editing Polylines and Splines
Three-Point Polyline Arc EDT 310 - Chapter 16 - Drawing and Editing Polylines and Splines
Three-Point Polyline Arc • A three-point polyline arc can be drawn by using the Second pt option. EDT 310 - Chapter 16 - Drawing and Editing Polylines and Splines
Three-Point Polyline Arc • The CLose option • adds the last segment to close a polygonal shape. • Used inside the PLINE Arc command sequence closes the shape with a polyline arc segment, rather than a straight polyline. EDT 310 - Chapter 16 - Drawing and Editing Polylines and Splines
Three-Point Polyline Arc • Two letters are required • CL = CLose • CE = CEnter option. EDT 310 - Chapter 16 - Drawing and Editing Polylines and Splines
Presetting Polyline WidthsThe PLINEWID System Variable EDT 310 - Chapter 16 - Drawing and Editing Polylines and Splines
Presetting Polyline Widths • The PLINEWID system variable • Sets the constant width for polylines. • To change a PLINE width • Enter PLINEWID at the Command: prompt and • enter a new value. EDT 310 - Chapter 16 - Drawing and Editing Polylines and Splines
Presetting Polyline Widths • Polygons • are NOT affected by the PLINEWID system variable. EDT 310 - Chapter 16 - Drawing and Editing Polylines and Splines
Editing Polylines EDT 310 - Chapter 16 - Drawing and Editing Polylines and Splines
Editing Polylines • Polylines are drawn as single segments. • Even though you draw connecting segments, AutoCAD puts them all together. • The result is one polyline treated as a single object. EDT 310 - Chapter 16 - Drawing and Editing Polylines and Splines
Editing Polylines • When editing a polyline, you must • Edit it as one object • OR • Divide it into its individual segments. • This method destroys the PLINE (!) • Not recommended. EDT 310 - Chapter 16 - Drawing and Editing Polylines and Splines
Editing Polylines • The PEDIT (PE) command is accessed by: • Picking the Edit Polyline button from the Modify II toolbar • OR • By typing PE or PEDIT at the Command: prompt, • OR • By selecting Polyline from the Modify pull-down menu. EDT 310 - Chapter 16 - Drawing and Editing Polylines and Splines
Editing Polylines • PEDIT • You can also • select a polyline and • then right-click in the drawing area to display a shortcut menu. EDT 310 - Chapter 16 - Drawing and Editing Polylines and Splines
Editing Polylines • Use the pick box to select a polyline to be edited. • If you use the pick box on a wide polyline, you must pick it on the edge of a polyline segment, rather than in the center. EDT 310 - Chapter 16 - Drawing and Editing Polylines and Splines
Editing Polylines • If the object you select is a line or arc object (not a polyline), the following message is displayed: • Object selected is not a polyline • Do you want to turn it into one? <Y> • Entering Y or pressing [Enter] turns the selected object into a polyline. EDT 310 - Chapter 16 - Drawing and Editing Polylines and Splines
Editing Polylines • Join Option • Allows a group of connected lines and arcs can be turned into a continuous polyline. EDT 310 - Chapter 16 - Drawing and Editing Polylines and Splines
Editing Polylines • There is no default option for the PEDIT command • You must enter one of the options. • Pressing [Enter] returns you to the Command: prompt. EDT 310 - Chapter 16 - Drawing and Editing Polylines and Splines
Opening and Closing a Polyline EDT 310 - Chapter 16 - Drawing and Editing Polylines and Splines
Opening and Closing a Polyline • Open PLINEs can be Closed. • Closed PLINEs can be Opened. • hese functions are performed with the Open and Closeoptions of the PEDIT command. EDT 310 - Chapter 16 - Drawing and Editing Polylines and Splines
Opening and Closing a Polyline • If the PLINE is OPEN • It can only be CLOSED • If the PLINE is CLOSED • It can only be OPENed • AutoCAD displays only the appropriate option – NOT both options. EDT 310 - Chapter 16 - Drawing and Editing Polylines and Splines
Opening and Closing a Polyline • The Open optionis not displayed if you select a polyline that was closed bymanually drawing the final segment. • It is only available if the polygon was closed using the Close option of the PLINE command. EDT 310 - Chapter 16 - Drawing and Editing Polylines and Splines
Joining Polylines to Other Polylines EDT 310 - Chapter 16 - Drawing and Editing Polylines and Splines
Joining Polylines to Other Polylines • Join Option • Allows polylines, lines, and arcs that share an EXACT endpoint can be joined to create a single polyline. • AutoCAD computes line vertices to 25 decimal places • Lines may appear to have the same endpoints, BUT in reality, do NOT. • You CANNOT join objects with PEDIT unless the endpoints match EXACTLY. EDT 310 - Chapter 16 - Drawing and Editing Polylines and Splines
Joining Polylines to Other Polylines • This option works only if the polyline and other existing objects meet exactly. • They cannot cross. • There cannot be any spaces or breaks between the objects. • Select each object to be joined EDT 310 - Chapter 16 - Drawing and Editing Polylines and Splines
Joining Polylines to Other Polylines • To get the endpoints to match EXACTLY • You may have to MOVE an object • Turn OSNAP on • And MOVE the object using the ENDPOINT OSNAP to get the endpoints aligned. EDT 310 - Chapter 16 - Drawing and Editing Polylines and Splines
Changing the Polyline Width EDT 310 - Chapter 16 - Drawing and Editing Polylines and Splines
Changing the Polyline Width • The Width Option • of the PEDIT command • allows you to change a polyline width to a new width. EDT 310 - Chapter 16 - Drawing and Editing Polylines and Splines
Editing a Polyline Vertex EDT 310 - Chapter 16 - Drawing and Editing Polylines and Splines
Editing a Polyline Vertex • The Edit vertex option of the PEDIT command is used to • Edit polyline vertices and • Points of tangency. EDT 310 - Chapter 16 - Drawing and Editing Polylines and Splines
Editing a Polyline Vertex • A polyline vertex • is where straight polyline segments meet. • A point of tangency • is where straight polyline segments or polyline arcs join other polyline arcs. EDT 310 - Chapter 16 - Drawing and Editing Polylines and Splines
Editing a Polyline Vertex • When you enter the Edit vertex option, • an "X" marker • appears on screen at the first polyline vertex or point of tangency. EDT 310 - Chapter 16 - Drawing and Editing Polylines and Splines
Next Previous Break Insert Move Regen Straighten Tangent Width eXit Editing a Polyline Vertex The Edit vertex option has 10 options EDT 310 - Chapter 16 - Drawing and Editing Polylines and Splines
Editing a Polyline Vertex • Next • Moves the "X" marker on screen to the next vertex or point of tangency on the polyline. • Previous • Moves the marker to the previous vertex or point of tangency on the polyline. • Break • Breaks a portion out of the polyline. EDT 310 - Chapter 16 - Drawing and Editing Polylines and Splines
Editing a Polyline Vertex • Insert • Adds a new polyline vertex. • Move • Moves a polyline vertex to a new location. • Regen • Generates the revised version of the polyline. • Straighten • Straightens polyline segments. EDT 310 - Chapter 16 - Drawing and Editing Polylines and Splines