Download
1 / 5
50 likes | 116 Views
Integrating push notification for ios and android in cocos2dx is always a big challenge for developers. So, this blog will walk you through step-by-step integration process by taking the examples from the sample.

E N D
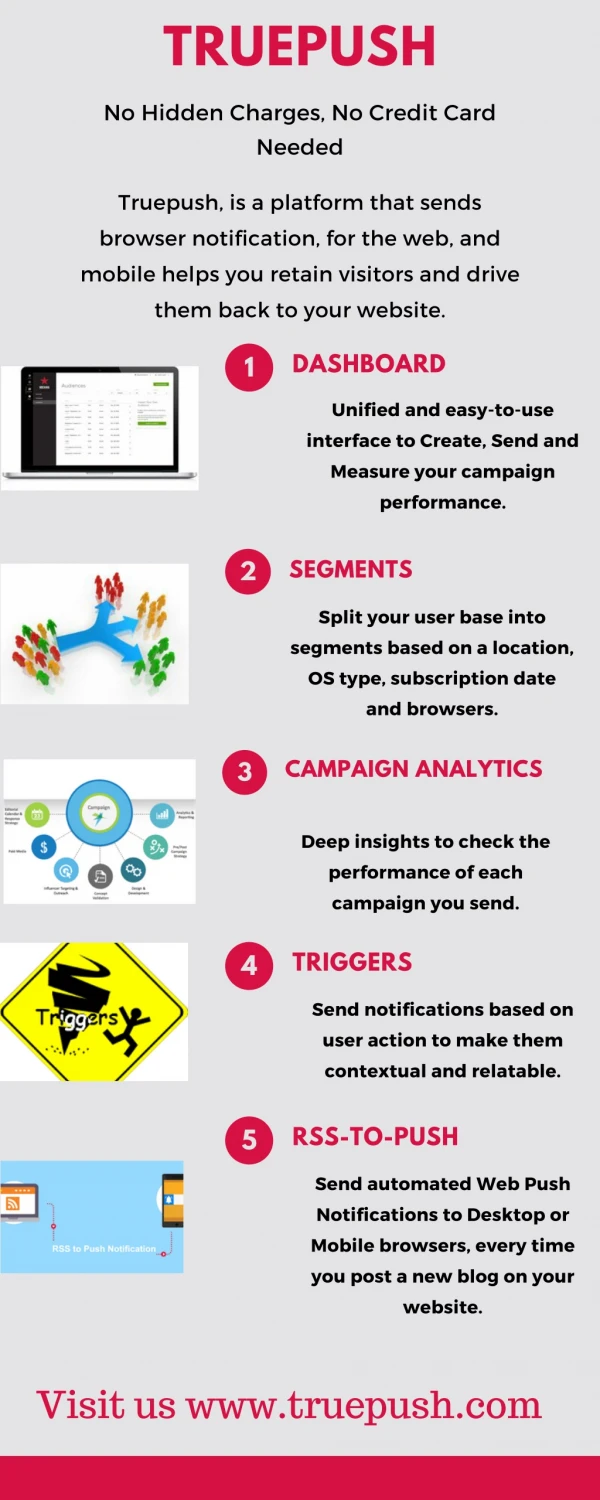
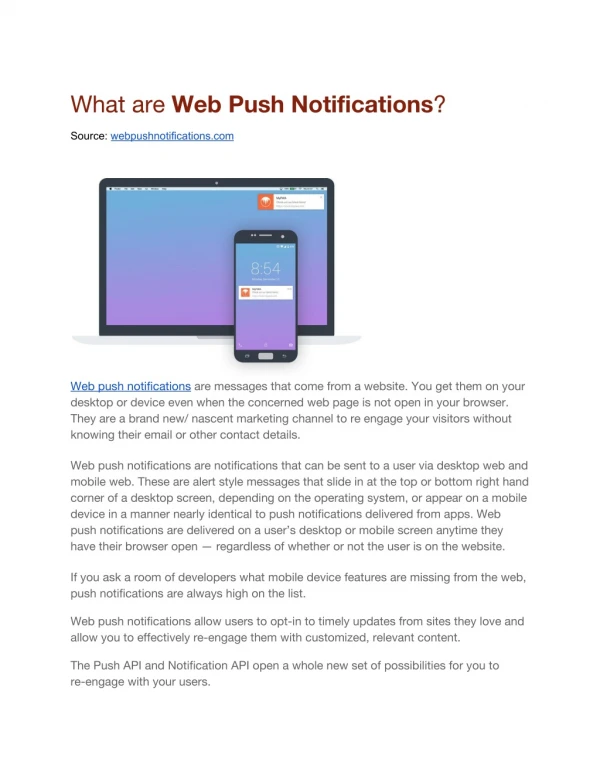
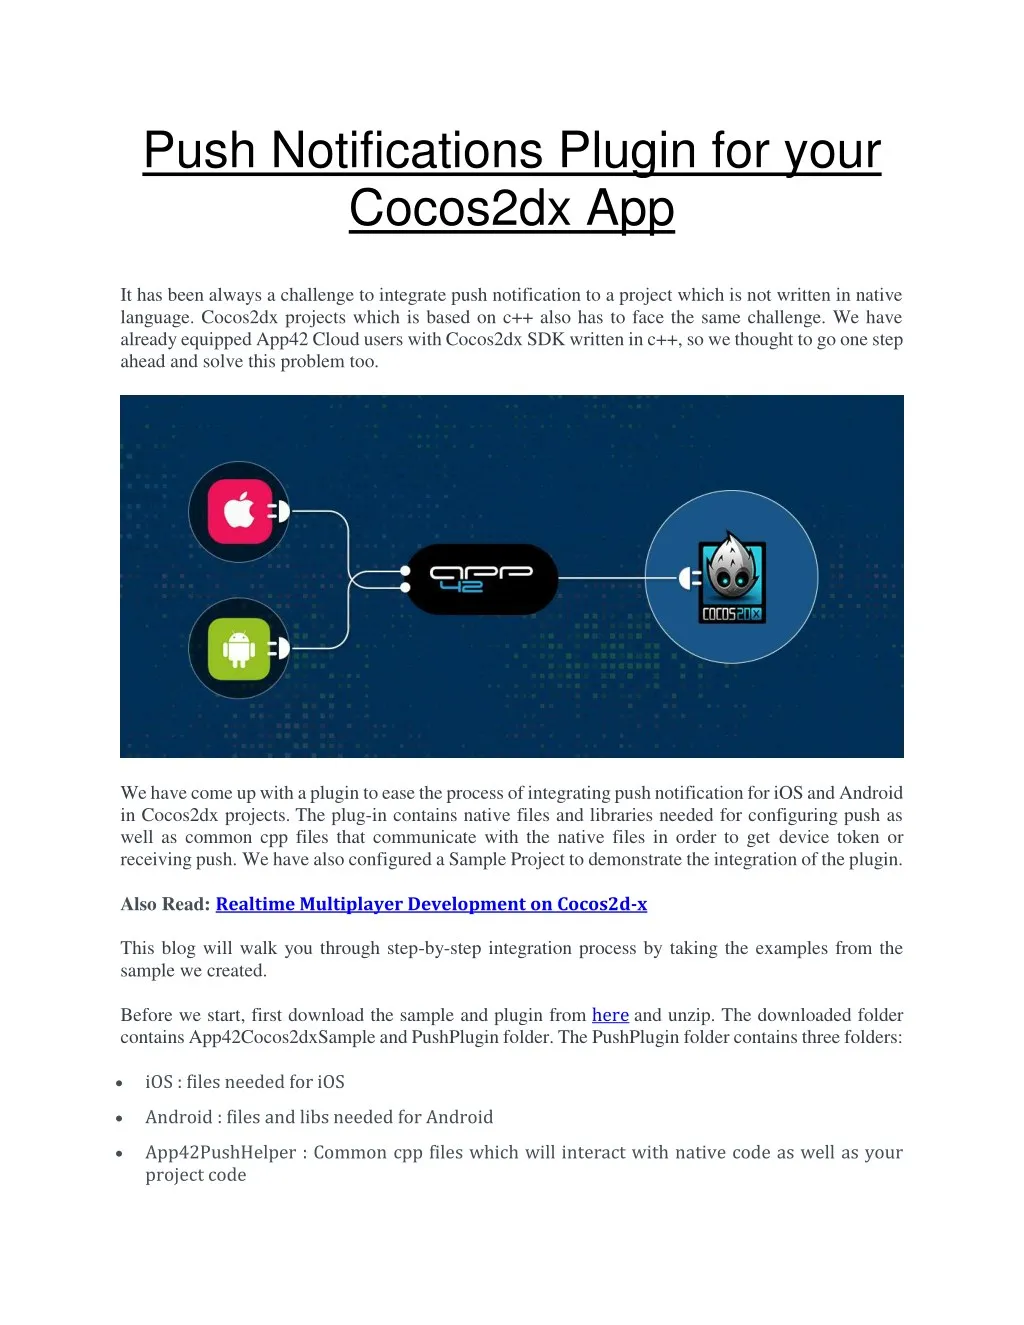
Push Notifications Plugin for your Cocos2dx App It has been always a challenge to integrate push notification to a project which is not written in native language. Cocos2dx projects which is based on c++ also has to face the same challenge. We have already equipped App42 Cloud users with Cocos2dx SDK written in c++, so we thought to go one step ahead and solve this problem too. We have come up with a plugin to ease the process of integrating push notification for iOS and Android in Cocos2dx projects. The plug-in contains native files and libraries needed for configuring push as well as common cpp files that communicate with the native files in order to get device token or receiving push. We have also configured a Sample Project to demonstrate the integration of the plugin. Also Read: Realtime Multiplayer Development on Cocos2d-x This blog will walk you through step-by-step integration process by taking the examples from the sample we created. Before we start, first download the sample and plugin from here and unzip. The downloaded folder contains App42Cocos2dxSample and PushPlugin folder. The PushPlugin folder contains three folders: iOS : files needed for iOS Android : files and libs needed for Android App42PushHelper : Common cpp files which will interact with native code as well as your project code
Integrating the Plugin: Step-1 : Copy App42PushHelper folder from PushPlugin folder to the project folder parallel to classes folder Step-2 :Let’s do some platform dependent settings: iOS: Copy below mentioned files to folder proj.ios_mac->ios App42Bridge(.h & .mm) AppController+App42PushExt(.h & .mm) Open your project in Xcode and add above files to the project under ios group Drag and drop App42PushHelper folder from your project folder to xcode project Android: Add path of common cpp files in your Android.mk file as follows: 1.Add "../../App42PushHelper/App42PushHelper.cpp" path in LOCAL_SRC_FILES 2.Add "$(LOCAL_PATH)/../../App42PushHelper" path in LOCAL_C_INCLUDES Copy plugin source from PushPlugin/Android folder to your src folder of Android project with same directory structure “app42/push/coco” Copy .jar files from PushPlugin/Android/libs folder to your libs folder of proj.Android Add following permission in your AndroidManifest.xml file(ignore this step if already added): ‹uses-permission android:name="android.permission.INTERNET" /› ‹uses-permission android:name="android.permission.VIBRATE" /› ‹!-- GCM requires a Google account. --› ‹uses-permission android:name="android.permission.GET_ACCOUNTS" /› ‹!-- Keeps the processor from sleeping when a message is received. --› ‹uses-permission android:name="android.permission.WAKE_LOCK" /› ‹!--
Creates a custom permission so only this app can receive its messages. NOTE: the permission *must* be called PACKAGE.permission.C2D_MESSAGE, where PACKAGE is the application's package name. --› ‹permission android:name="com.shephertz.sample.permission.C2D_MESSAGE" android:protectionLevel="signature" /› ‹uses-permission android:name="com.shephertz.sample.permission.C2D_MESSAGE" /› ‹!-- This app has permission to register and receive data message. --› ‹uses-permission android:name="com.google.android.c2dm.permission.RECEIVE" /› Add Receiver component in your Androidmanifest.xml file: ‹receiver android:name="app42.push.coco.App42GCMReceiverr" android:permission="com.google.android.c2dm.permission.SEND"› ‹intent-filter› ‹!-- Receives the actual messages. --› ‹action android:name="com.google.android.c2dm.intent.RECEIVE"/› ‹!-- Receives the registration id. --› ‹action android:name="com.google.android.c2dm.intent.REGISTRATION"/› ‹!-- Your package name here --› ‹category android:name="com.shephertz.sample"/› ‹/intent-filter› ‹/receiver› Declare Service in your AndroidManifest.xml file:
‹service android:name="app42.push.coco.App42GCMService"› ‹/service› Replace “app42.push.coco.App42GCMService” with your application package name in AndroidManifest.xml file Using the plug-in: Once you are done with platform dependent settings, now its time to use the plug-in. Step-1: Include App42PushHelper.h to class where you want to use the plugin(In the sample we are using it in TestPushNotificationService class) as follows: #include "App42PushHelper.h" Step-2: Define two callback functions in the class one for getting the device token and other for getting push messages as follows: /** * Callback where you will get device token when device is registered successfully */ void TestPushNotificationService::deviceDidRegisteredWithDeviceToken(constchar* deviceToken) { log("deviceToken = %s",deviceToken); } /** * Callback where you will receive push meassges */ void TestPushNotificationService::didReceivePushNotification(const char* pushMsg) { log("Message = %s",pushMsg); } Step-3: Set the callback function to receive your push messages already defined in step-2 as follows: //Add this line in init function of the class you are working as we have added in the //sample App42PushHelper::setPushCallBack(CC_CALLBACK_1(TestPushNotificationService::di dReceivePushNotification, this)); Step-4: Register your device to APNS/GCM as follows: App42PushHelper::registerForPush(CC_CALLBACK_1(TestPushNotificationService::de viceDidRegisteredWithDeviceToken, this));
Here we are calling “registerForPush” function of App42PushHelper class. The callback function “deviceDidRegisteredWithDeviceToken” will be called by the plug-in once the device is registered successfully to APNS. You will be getting a deviceToken in this function. The above statement can be called whenever you want to register your device for push, normally in the init method of the working class. Also Read: Bridging the Gap – Plugin for Unity and iOS Congratulations, you have just equipped your app with Push Notification. But the job is not yet done as to send push you have to configure your app on App42 Cloud and store your device token which you got in step 4. To know more in details, do follow our tutorial Cocos2DX Push Notification. If you have queries or need further assistance, please feel free to reach us at support@shephertz.com