Download
1 / 28
280 likes | 460 Views
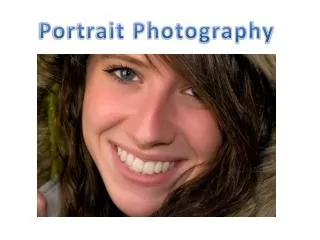
Most of the time the photos you taken from photo studio may not be able to satisfy your mind and you may think of looking better on that photos. But you don't know how this can be possible, don't worry an easy to learn tutorial can help you to retouch your studio portrait to make your photo according to your desire one in photoshop.

E N D
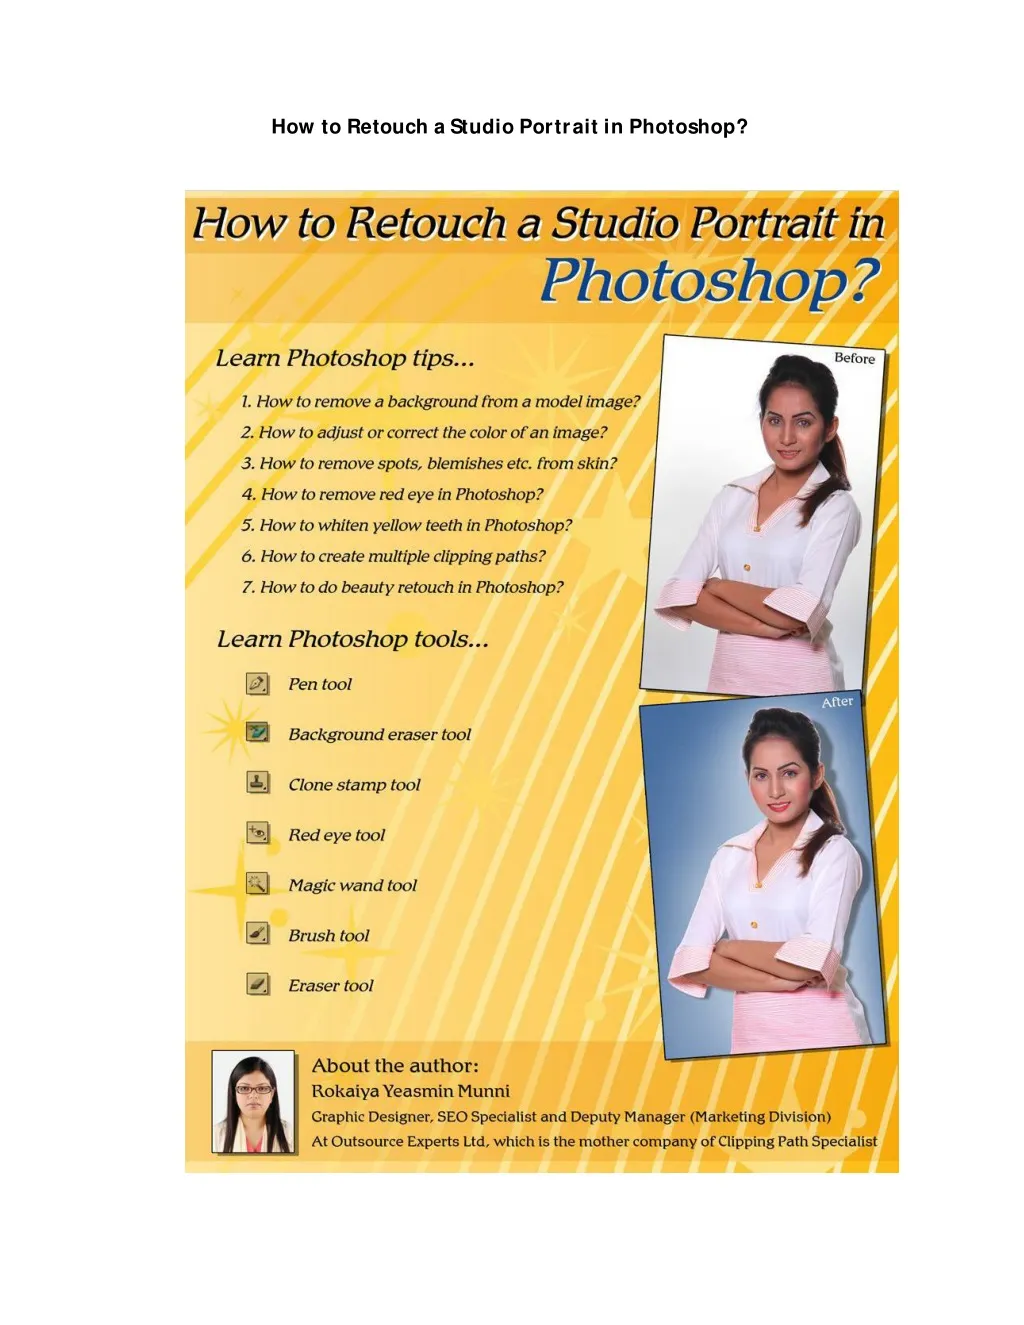
Supposeyouhavetakensomephotosfromaprofessional photostudiothatisindesperateneedofaphotoretouchingtechnique.Perhapsyoudiscoveredsomeflawsordamagetothephotoyoujustcan’tlivewithandyouwanttomakethephotosextraordinary,sowhatdoyoudo?Todaywearegoingtolearnhow toretouchastudioportraitinPhotoshop.Iwillshowyoustepbystep,eachphotoretouchingtipstogiveyourphotoafinishedlook.Itisnotasdifficultasyoumaythink,justfollowthestepsandyouwillbeabletomakeyourphotoslookalmostasgoodastheprofessionals,atafractionofthecost.So,guysjustfollowmytutorialandretouchthemodelimageinPhotoshopsmoothly. QuickSummarySoFar: I’veenclosedalotofPhotoshoptechniquesandtoolshereaboutworkingwithretouchingastudioportrait,sobeforewemoveonandstartlearningthewholetutorial,let’sdoaquickreviewatbellowshortlisttoknowthathowmany techniquesandtoolswearegoingtostudy. Photoshopretouchingtechniques: Howtoremoveabackgroundfromamodelimage? Howtoadjustorcorrectthecolorofanimage? Howtoremovespots,blemishesandunwantedhairfromskin? HowtoremoveredeyeinPhotoshop? HowtowhitenyellowteethinPhotoshop? Howtocreatemultipleclippingpaths? HowtodobeautyretouchinPhotoshop? PhotoshopTools: Pentool BackgrounderasertoolClonestamptool Redeyetool MagicwandtoolBrushtool Erasertool
1.Retouchingthebackground: Thefirstthingyouwanttodoisstartwiththebackgroundofthephoto.So,youaregoingtolearnhow to isolate the photo from thebackgroundtoplacetheimageindifferentbackgroundorcolor,using thePhotoshopPenTool. AllyouneedtodoisselectthePenTool,thengotothetopofthescreenandbesurethatyouhavechosenpath,notthelayerchecked. Youthenstartatanypointonthebodyorhandpartoftheimagethatyouwish,exceptthehair(Iwillgettothislater).ThenusingthePenTool, anchorthefirstpoint,andcontinuetomakemorepoints,bydrawingapatharoundtheentireedgeofyourimageuptotheareawherethehairstarts(youcandrawaroundthehairpart,butleavepartofthebackgroundclosesttothehair;youwilluseadifferenttoolforthatpart).
Afteryouhavecompletedtheoutline,youwouldthenclickonmakeselection,selectanti-aliasandsetthefeatherradiusat0.5-1pixels.Afteryouhavecompletedtheoutline,youwouldthenclickonmakeselection,selectanti-aliasandsetthefeatherradiusat0.5-1pixels.
Nowyoushouldseethemarchingantssurroundingtheimage. Nowgotothetopofthescreen,clickonselect,inverseanddelete,now thebackgroundshoulddisappear.
Thisisprobablythequickestandeasiestwaystoremovebackgroundfromasolidimage.Thisisprobablythequickestandeasiestwaystoremovebackgroundfromasolidimage. Next,youwillbeusingtheBackgroundEraserTooltoremove thebackground from hair image.Openanewlayertoworkwith.Youshouldhavealreadyremovedmostofthebackgroundaroundthehair.SelecttheBackgroundEraserToolfromthetoolbar.
Andchoosethesizeofbrushyouwishtouse(Iwanttouse150).ThenselectSampling:Background Swatch,a tolerance of about 50anddiscontiguous. Thenclickyourleftmousebutton,anduseyourBackgroundEraserTooltogoaroundtheentireobject.Youwillnoticeaverythinlightcolorlinethatsurroundsthehair.Howeverifyouselectalightcoloredbackgroundratherthanadarkercoloredone,youwon’tevennoticethatfineline.Youhavetheoptionofusingaburntool,ifyouwantthefinelinegone,butthat’suptoyou.
Nowyoucanaddanewbackgroundcolorifyoulike.SeetheimagebellowIhaveusedadifferentbackgroundcolorwithashadowtomake theimagepop. 2.ColorAdjustments: Thenextstepistoadjust brightnessand contrastofyourphoto.Wewillbeusingtheadjustmentspanelandfocusonsomeofthemoreimportantadjustmentsthatyoucanusetoenhanceandimproveyourphotos.
Manypeoplewillgototheimageadjustmentatthetopofthescreen,but thatisnotrecommended,asthatmakestheadjustmentontothepixels themselves.Sonowyoucan’tundoit,ormodifyitafterthefact.Sotohavemoreflexibilityyouwillwanttogodirectlytoyouradjustmentspanel.Youwillstartbyusinglevelstomakethebrightnessandcontrastoftheimage,andseehowtocustomizeit.Soclickonthelittlesunshineiconat thelowerpartofthelayer,andthenselectthelevels.Thisanalyzestheimageandmodifiesthecontrolstogiveagoodimage. Soyouwillusethesliderbartoadjustthecontrastandbrightness.Thencheckbeforeandafterandyoucandecideifyoulikeitorwanttodomore.
Yourotheroptionistoclosethatpanelandgototheopacity.Hereyouhaveamoresubtleeffect,youwoulddecreasetheopacityandminimize theeffect. Ifthepropertiespanelcloses,allyouneedtodoisdoubleclicktheiconfortheadjustmentlayer,anditwillreopenwiththecontrolssoyoucanmakeanyfurtherchanges. Theneatthingisthatevenafteryoumaketheadjustmentsyouwant,youcanwalkawayandcomelaterandmakedifferentchangesifyoudon’tlikethepreviousones. 3.RemoveSpots,BlemishesandUnwantedHairfromskin: HereyouwilluseaskinretouchingtechniquefromPhotoshopthatisquitehandyforremovingblemishesfromtheskinandcleaningupyourphotos.
First,zoomupontheimage,useCommand/Ctrl + hold down thespacebaranditwillturnintoazoomtool,soyoucanzoomtheimageyouwish. Thenwewilltakealayerbyclickingon“createanewlayer”iconatthelowerpartofthelayerpalate.Youwillbeworkinginthislayerrather thantheoriginalsothatyoucanalwaysgoback.
ThefirsttoolwewanttouseistheCloneStampTool.Gotothetoolbarontheleftsideofthescreen,andclickonthelittlestamptool.Basically,whatthisdoesisallowyoutoclonepartoftheimageanduseitsomeplaceelseintheimage.ThefirsttoolwewanttouseistheCloneStampTool.Gotothetoolbarontheleftsideofthescreen,andclickonthelittlestamptool.Basically,whatthisdoesisallowyoutoclonepartoftheimageanduseitsomeplaceelseintheimage. Nowgotothetopofthetoolbarwhereitsaysalignedorunaligned. Touseitaligned,youhavetosampleanareaontheimage.TodothatyouwouldholddownAlt/Opttoturntoolintocrosshairs,clickoncetosamplethatarea. Nowifyouhavealinecheck,godowntothejawareaandclickandholddownthespacebar,thenstarttopaint,youwillseecross-hairsformasyouduplicatethatpartoftheimage.
Nowifyouletgoofthemousebutton,andmovetoanotherpartoftheimage,andstarttopaint,thecrosshairmoveswithit(itisatafixedpositionawayfromthebrush).Youcanmoveanywhereanditwillalwaysbealignedwiththecrosshairs.Nowifyouletgoofthemousebutton,andmovetoanotherpartoftheimage,andstarttopaint,thecrosshairmoveswithit(itisatafixedpositionawayfromthebrush).Youcanmoveanywhereanditwillalwaysbealignedwiththecrosshairs. Iliketousethetoolwiththealignedleftunchecked,asyouhavemoreflexibility. So,youholdAlt/Optandgetclosetoablemishlikealittlemole,clickonce tosamplethearea. Thenclickoverthetopoftheblemishandit’sgone.
Whenyousampleanareathatissimilartoyourtargetarea,itwillfadeintotheotherpartoftheimage.Removeallspotsandblemishesbythisprocess.SeebellowimagewhereIhaveremovedallspots,blemishes,unwantedhairsetc.…Whenyousampleanareathatissimilartoyourtargetarea,itwillfadeintotheotherpartoftheimage.Removeallspotsandblemishesbythisprocess.SeebellowimagewhereIhaveremovedallspots,blemishes,unwantedhairsetc.… 4.RemoveRedEyeinPhotoshop: Thisisoneofthesimplesttasksyouwilleverdo.Thereareadvanced techniques,formostpurposesallyouhavetodoisusethebuiltinRedEyeRemovalTool.Basicallywhathappensisthattheflashistoocloseto thelensandthepupiloftheeyecan’tclosefastenough,allowingthelight toentertheeyeandreflectofftheinnerpartoftheeye.
Onthetoolbartotheleft,clickontheSpotHealingTool,aboxwilldropdown,andyouwillseetheRedEyeTool,selectit.Onthetoolbartotheleft,clickontheSpotHealingTool,aboxwilldropdown,andyouwillseetheRedEyeTool,selectit. Andthenitisjustasimpleclickoverthepartoftheeyethatisred,andpooftheredisgone.Ifyouareparticular,youcangotothetoolbaratthe topofthescreenandadjustthesizeofthepupil,aswellaschangehowdarkitis,butthatisoptional.
5.WhitentheTeeth: Manytimeswhenyoutakeaphotoofsomeone,theteethwillappearvariousshadesofyellow.Sincemostofusfindthatunpleasantanddisgusting,Iwillbeexplaininghow towhitentheyellow teethofyoursubject. Soyoutakeyourphotoandzoomintotheteetharea,whereyouwillnoticeadiscoloration. Firstyouwillneedtoselecttheteeth,thereareseveralwaystodothis,usingtheMagicWandToolortheLassoTool.HerewewillusetheMagicWandTool.Selectthetoolfromthelefttoolbar.
Thensetthetolerance level to 20,checktheAnti-alias,andContiguousboxes. Thengototheteethareaandclickthemouseinatooth.Youwillseethathasmadeaselection,butnotexactlywhatyouwant.Nowholddowntheshiftkeyandyouwillseea+sign.Nowanythingyouclick,willbeadded tothecurrentselection.Sonowyoujustgoaroundtheteethandselectasmuchasyoucan,fillinginanyspotsyoumayhavemissedatfirst.Don’tworryifyougetintothegumarea,wewilltakecareofthatlater.Continueuntilthemarchingantssurroundtheteeth.Nowthereareafewspotswherethegumwasincluded,andwewanttoremovethose.NowyouwillholddowntheAlt/Optkeyinsteadoftheshift.Nowyoushouldseea–(minus)sign.Clickonthegumareasyouwantremovedandtheyaregone. Nowgobacktothetopandclickonselect,modifyandfeather,Iamusing avalueof2inthefeatherradius.Thiswillbasicallysmoothoutandfeathertheedgesofourselection,thenclickOK.
Nowwewillapplythecolorcorrections.Wearegoingtousesomethingcalledthehueandsaturationdialog.Nowclickonthelittlesunshineiconfromthelayerpalateandselectthehue/saturation.Thedialogboxwillappear.Nowwewillapplythecolorcorrections.Wearegoingtousesomethingcalledthehueandsaturationdialog.Nowclickonthelittlesunshineiconfromthelayerpalateandselectthehue/saturation.Thedialogboxwillappear.
Wewillturndownthesaturation,sinceitcontrolsthecolor.Bringthesaturationdownto–50;youwillseethecoloroftheteethlighten.Thelaststepistoincreasethelightnesstoabout+17,andthenclickOK.Wewillturndownthesaturation,sinceitcontrolsthecolor.Bringthesaturationdownto–50;youwillseethecoloroftheteethlighten.Thelaststepistoincreasethelightnesstoabout+17,andthenclickOK. ThendeselectbypressingCtrlDwenowhaveteeththataremuchbrighter. 6.CreateMultipleClippingPaths:
Thistypeoftechniqueisusedwhenyouaredealingwithskins,cloths,ornamentsetc.Wewilllookathowtoselecteachitemseparately,and thenchangeorcorrectthecolorstomakemodelorstudioimagemoreattractive. FirstyouwillrightclickoverthePenicononthetoolbar,andthenselect thePenTool. NextlocatethePathicononthetoolbaratthetopofthescreen,andclickonit. Nowyouwilldrawthefirstpatharoundtheitemyouwish(Iamdrawing theclothofthemodelintheimage),andclosethepathbyclickingonthefirstanchorpointyoumade.
Thenchoosethepathyoujustfinishedfromthepathpaletteanddragitto the“NewPath”iconatthebottomofthescreen.Nowletgoofthemouse tosaveyournewpath. Next,youwillclickonthePenToolagainandfollowthesamestepstomakeeachpathuntilyouhavecompletedasmanyasneeded.Youmaywanttodecidehowtoorganizetheadditionalpathsyouarecreating. Youcancontinuedrawingtocreatemultiplesub-pathsthatPhotoshopwillthenconsolidateintoasinglesavedpath.Anotheroptionyoucanuse
istoclickthe“CreateaNewPath”iconeverytimebeforeyoubegindrawingtoseparateeachnewoutlineintoadifferentpath.Thereareafewoptions;it’sprettymuchuptoyou.Let’sseebellowhowIhavecorrectedthecloth’scolorusingthemultipleclippingpath.istoclickthe“CreateaNewPath”iconeverytimebeforeyoubegindrawingtoseparateeachnewoutlineintoadifferentpath.Thereareafewoptions;it’sprettymuchuptoyou.Let’sseebellowhowIhavecorrectedthecloth’scolorusingthemultipleclippingpath.
7.BeautyRetouchinPhotoshop: Thelastpartoftheprocessistoaddsomecolortotheface,abeautyretouchofeyeliner,eyeshadow,lipstick,blush,etc.…tomakethisphotoextraordinary. Thefirstareaistoworkontheeyes.Italldependsontheeffectyouwish toachieve,ortheclient’swishes.Itoftenhelpstostartyouradjustmentsattheextremeendofthescale,andthenworkyourwaydowntoamoresubtleeffect.Youmaywanttostartbycleaningupsomeoftheredveinsinthewoman’seyes,whichIhavedoneintechnique“4“ofthistutorial. Onceyouarehappywiththat,youcanapplyeyemakeup.Firstgotolayerpallet.Youwillcreateanewlayerbyclickingthenew layer buttononthepallet. Andthenchooseyourcolorastheblendingmode.Ichose100 magenta,80yellow,0onthecyanandblack.
Next,youwillchooseabrush(press“B”fromkeyboardtoselectbrush)oryoucanselectfromthetoolbar.Next,youwillchooseabrush(press“B”fromkeyboardtoselectbrush)oryoucanselectfromthetoolbar. Choosesizewhateveryouwish(Iliketoselectthesize40,hardness50andopacity50). Next,youcanstartapplytheeyeshadowtothenewlayer.
ThenyouwillusetheEraserToolfromthetoolbar. Andchangethebrushsizeto81anduseahardnessof10toremovepartofthecolorandcreateasoftgradient.
Next,openanewlayer,andthenchangetheblendingmodetomultiply.Nowyouwillcreateeyelinerofblackcolorwithabrushof17pixelsand takeouttheoverspillwithaneraserbrushof12pixels. Youcanalsotouchupthecheekfollowingthesametechnique.UsingtheEyedropperToolclickonthelowerpartofeyeshadowtoselectthesamecolor.Nowchoosealargebrushsize,hardnessandopacity(Ichosebrushsize200,hardness0andopacity15).Next,applythisbrushinanewlayer.
Then,youmayalsousethephotoretouchingtechniquetosmooththelips,makebrighterandthenaddcolorifyouwish.Todoit,IwouldliketoselectthelipsusingPhotoshoppentool.Createpatharoundthelipsandselect,choosefeatherisabout1andthenapplyhue/saturation.Seetheresultinthebellowimage.Then,youmayalsousethephotoretouchingtechniquetosmooththelips,makebrighterandthenaddcolorifyouwish.Todoit,IwouldliketoselectthelipsusingPhotoshoppentool.Createpatharoundthelipsandselect,choosefeatherisabout1andthenapplyhue/saturation.Seetheresultinthebellowimage.
Takeacursorytolookatthebellowimagetoseethathowitislookingafterappliedalltheabovetechniques.Takeacursorytolookatthebellowimagetoseethathowitislookingafterappliedalltheabovetechniques. Insummary,thesephotoretouchingtechniquesshouldhelpyouretouchandimprove/enhanceyourphotosorstudioportraits.Therearemanydifferentwaystotouchupphotos,buttheabovetipsshouldgetyoustartedindoingretouchingwork,usingthePhotoshopToolsthatwillsaveyoualotofmoneywhendoingityourself.Youcanspendthousandsofdollarswhengettingphotosdoneprofessionally.Withalittlepractice,yourworkwilllookasprofessionalasanyexpertwhodoesphotoretouchingService.Happydrawingandbestofluck! Tutorialpublishedonhttp://www.clippingpathspecialist.com/tutorial/how-to-retouch-a-studio-portrait-in-photoshop/ Abouttheauthor: RokaiyaYeasminMunni GraphicDesigner,SEOSpecialistandDeputyManager (MarketingDivision)AtOutsourceExpertsLtd,whichisthemothercompanyofClippingPathSpecialist