Download
1 / 15
300 likes | 861 Views
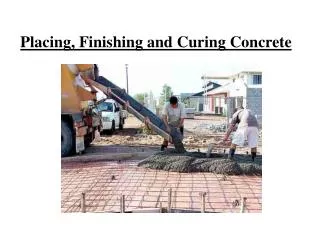
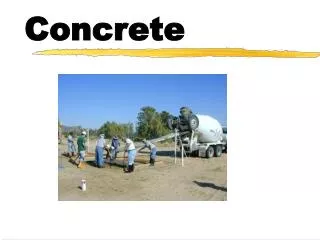
Concrete Technology Finishing Concrete Joints in Concrete Lecture 20. Eng: Eyad Haddad. Finishing Concrete. WHAT IS FINISHING

E N D
Concrete Technology Finishing Concrete Joints in Concrete Lecture 20 Eng: Eyad Haddad
Finishing Concrete • WHAT IS FINISHING • Finishing is screeding, floating or trowelling the concrete surface to densify and further compact the surface of concrete, as well as giving it the look you want. • Finishing takes place in two stages: • 1. INITIAL finishing. • 2. FINAL finishing.
Finishing Concrete • 1. INITIAL FINISHING: • Concrete is first screeded to the level of the formwork, then bullfloated and left to set. • In some cases screeding leaves a good enough finish, especially if floor coverings are to be used over the concrete. • Water then appears on the surface of the concrete.This water is called bleed water. • No final finishing can begin until the bleed water has dried up. Mixing bleed water with the surface paste will weaken it, possibly resulting in a dusty surface.
Finishing Concrete • Excess bleed water can be removed by dragging an ordinary garden hose across the surface of the concrete. • Never try to dry up the bleed water using stone dust or cement as this will weaken the concrete surface in the long run. • Once the bleed water dries up and concrete can support a person’s weight, with only a slight marking to the surface, the final finishing can begin.
Finishing Concrete • FLOATING • There may be two stages in floating: • 1. The BULLFLOAT, which is part of the initial float. • 2. The POWER or HAND FLOAT which is part of the final float. • Floating helps compact and level the surface and close minor cracks. • Floating can be done by hand or with a power float. • Power floating leaves a better finish than hand floating.
Finishing Concrete • 2. FINAL FINISHING: • This involves floating, trowelling, edging, jointing or • patterning the concrete. • Special finishes such as brooming, colouring or patterned • finishes can be applied to the surface. • Trowelling leaves a dense, hard, smooth adurable surface. The surface should be trowelled TWICE. A well trowelled surface will be very smooth and can be slippery when wet. • Trowelling can be done by hand or power trowel.
Finishing Concrete • Edging and Grooving: • All the edges of a slab should be finished with a special edging tool. • This gives a neater and stronger edge, less prone to chipping.Joints should be planned before placing and are usually formed into the concrete during finishing. • Once any surface has been finished it MUST be cured.
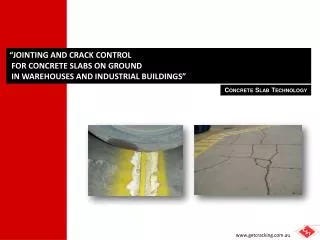
Joints in Concrete • WHAT ARE JOINTS? • Joints are PLANNED BREAKS in concrete which allow it to move and prevent random cracking. • WHEN TO MAKE JOINTS? • Joints can be made at two different times: • 1. BEFORE any concrete is poured. As for Construction joints or Isolation • joints. • 2. AFTER concrete has been placed and compacted, as for Control joints. • Joints are used to control CRACKING in concrete. • Random cracking can weaken the concrete and spoil itappearance.
Joints in Concrete • TYPES OF JOINTS: • 1. Control Joints: • Wet formed joints are inserted with the use of a grooving tool to create a plane of weakness which conceals where the shrinkage crack will occur. • To be effective the joint must be tooled to a minimum depth of 1/4 to 1/3 the depth of the concrete, eg for 100 mm thick concrete – joint depth should be a minimum of 25 mm to 35 mm. • Control joints may be made while concrete is hardening by slicing it with a thin piece of metal. • The edges of the joints should be finished with a grooving or edging tool. • Alternatively a crack inducer may be cast, or pressed into, the concrete. • Control joints may also be sawn, but timing is very important.
Joints in Concrete • The edges of the joints should be finished with a grooving or edging tool. • Alternatively a crack inducer may be cast, or pressed into, the concrete. • Control joints may also be sawn, but timing is very important. • Too early and the sawcut can ravel and too late the concrete will have already cracked randomly. • A joint may be filled with a flexible filler to minimize water entry and to prevent stones etc entering which may later cause spalling of the concrete. • The position and number of control joints must be carefully planned. Control joints in an unreinforced concrete slab should divide it into roughly square areas. (ie A one-metre-wide path needs a control joint about every one metre).
Joints in Concrete • Control joints in unreinforced concrete should be located at a spacing of a width to depth ratio of about 20 (to 25) to 1 ie a 100 mm deep slab should have joints every 2 to 2.5 m. • In steel reinforced slabs the joint spacing is controlled by the area of steel. The more steel there is, the further apart the joints can be.
Joints in Concrete • 2. Isolation Joints: • An isolation joint totally separates a concrete element from another concrete element, or a fixed object such as a wall or column, so that each can move and not affect the other. • The joint filling should be full depth and soft. It can be made of cork, foam rubber, or some other flexible material.
Joints in Concrete • 3. Construction Joints: • A construction joint is a place where work finishes temporarily. • Formwork is used to support the edge of the concrete already in place so that it doesn’t just collapse. • Concrete is finished square and the reinforcement normally runs through the joint.
Joints in Concrete • When placing begins again: • Remove the formwork and brush any loose material from the old surface. • Roughen the old surface, to expose the coarse aggregate, to help the new concrete bond properly. • Pour the new concrete against the old surface.
Joints in Concrete • PLANS: • The position of ALL JOINTS should be shown on the plans for any concrete slab. • THE END