Download
1 / 22
220 likes | 333 Views
Installing a Wireless Home Network. Susan Norris. Topics. Check for Broadband Availability Equipment Needed Plan Your Layout Setting Up the Wi-Fi Devices Setting Up the Access Point Configuring Your Network. Broadband Availability. Wireless Does Not Work Well with Dial-Up

E N D
Installing a Wireless Home Network Susan Norris
Topics • Check for Broadband Availability • Equipment Needed • Plan Your Layout • Setting Up the Wi-Fi Devices • Setting Up the Access Point • Configuring Your Network
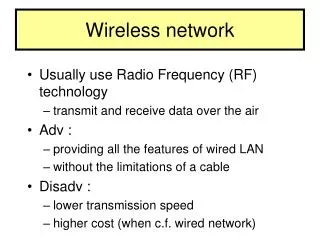
Broadband Availability • Wireless Does Not Work Well with Dial-Up • If You Don’t Already Have DSL or Cable, Check for Availability in Your Area High Speed Internet Offer!
Cable or DSL Modem Router Wireless Access Pointor Router/AP Combo Wireless NICs Equipment Needed
Layout Network • Place the Access Point in the Center of Your Network • Place as High as Possible • Do Not Place Near TVs, Telephones or Appliances
Install Wireless NIC into Desktop PC • Remove Cover of PC and Install Wireless NICS in any Desktop Computers • Computers Can Also be Connected to AP via cat 5 Patch Cables
Install Wireless NIC in Laptop • Wireless NIC can be PCMIA Card or USB Connection or You May Have a Built in Centrino Wireless Chip • Insert Plug’nPlay Card or USB Device • If You Have a Built-in Chip, You Have Nothing Else to Install in Your Laptop
Connect Desktop PCs Without Wireless NIC to Access Point • Most APs have 4 ports for wired PC connections • Use a Cat 5 Cable to Connect the Ethernet Port on the PC to one Port on the AP • If There are More than 4 Wired PCs, you will need to Add a Hub or a Router
Know Your Cable or DSL Modem • On the Back of Your Modem You Should See the Following Ports • Ethernet Connection • USB Connection • Cable (Internet) Connection • Power Supply
Your Access Point will Typically Have the Following Ports/Connections Ethernet (Internet) Connection Wired Network Connections Power Supply Reset Button Know the Back of Your Access Point
Connect the AP to the Cable or DSL Modem • Use a Cat 5 Patch Cable to Connect Ethernet Port on Modem to Internet Port on AP • Modem Should Already be Connected to Cable via Cable Port • Power On Modem, then Power On AP
Configuring Your Network • Power On the Computer from which You Want to Configure the Router (Access Point) – Can be Wired or Wireless Computer • Open a Browser Window and Enter the following in the Address Field: http://192.168.1.1
Sign On Screen • You Will Need to Sign On • If You Haven’t Changed the Defaults, Typically You Leave the User Name Blank and type “admin” into the Password Field admin
Configuration Screen • This is a Linksys Configuration Screen • If You Have a Different Device, it Should look Similar • Click the Wirelss Link
Configuration Continued Most Important Items Here – These are What Secure Your Network • Change Network Name (SSID) to Something Other than Default (Linksys in this case) • If You Don’t Want Your Network Name to be Broadcast for Others to See, Click the Disable Radio Button – Recommended • Click Save Setting Button • Click the Wireless Security Link mynetwork
Configuration Continued • Security Mode is IMPORTANT – This is What Makes Your Network More Secure from Intrusion • Select a Security Mode other than Disable – Here We are Selecting WEP • Select a Timeout Key, Level of Encryption • Create a Passphrase (unique name that you will remember) and click Generate • Access Keys will be Generated for You – MAKE NOTE OF THESE • Save Settings • Click the Security Link secureme 123456789AB 23456789ABC 3456789ABCD 56789ABCDEF
Configuration Continued • Set Up the Router’s Firewall Here • Enabling Block WAN Requests Makes Your Network More Secure by Making It Much Harder for an Intruder to Get In • Select Other Links as Appropriate
Signing on to the Network • Turn On Your PC With the Wireless Connection • Your Quick Launch Bar Should Show Your Wireless Connection
Network Signon Continued • If You Point at One of These With Your Mouse, You Should See the Status of Your Wireless • If the Connection Says Network Unconnected, Double-Click on the Icon
Network Signon Continued • Select Desired Network then Click Connect • NOTE: This is the screen where you can see any broadcast wireless networks in your area. If a network is unsecured, you can use it for Internet access – select the network and click Connect. Once you connect, you will be using the other network; however, it will likely be considerably slower than yours.
Network Signon Continued • Sign On to Network • Security Enabled? • Enter a Security Key and Press Connect • Enter Key First Time You Access Network • Enter Key Anytime You Reconnect to Network