Download
1 / 14
230 likes | 675 Views
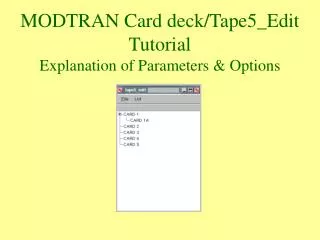
PC MODTRAN Tutorial. How to make an atmospheric model in 47 easy steps. Find MODTRAN and start it. The PcModwin 4.0 icon should be on the desktop, and you double click on it to get. Configure model input data. Select Modtran Input-> Model Atmosphere (1). Model atmosphere parameters.

E N D
PC MODTRAN Tutorial How to make an atmospheric model in 47 easy steps.
Find MODTRAN and start it • The PcModwin 4.0 icon should be on the desktop, and you double click on it to get
Configure model input data • Select Modtran Input-> Model Atmosphere (1)
Model atmosphere parameters • Select model Atmosphere->1976 U.S. Standard • Select Type of Atmospheric Path -> Slant Path • Select Mode of Execution -> Transmittance
Hit Next! • Atmospheric Column parameters – hit Next! • Aerosols (note that we’re using Rural, with 23 km visibility) – Hit Next
Geometry and Spectral Band (3) lots to do here • Many path types, use default • Observer height – 60 km • Final Height – 0 km • Zenith Angle – 180 degrees • Initial Frequency 0.5 microns • Final Freq 2.9 microns • Next!
Sanity check diagram • The model parameters are reproduced here to make sure that the program is configured correctly. • Model parameters at top • Note diagram showing viewing geometry
Run the model • Select Run Model-> Run Modtran • Wait…. • Hit any key to continue
Plot that puppy. • Select Plot -> Interactive • Select MODOUT2 • Change X-axis to Micrometers, hit okay
Wait for it to plot twice • Now we have a plot of transmissivity in the VNIR, and you can answer the questions in lab. Oh wait, perhaps a little more direction would be helpful. • First trick. Clicking on the plot will show the X and Y location you’ve clicked on the upper left corner. This is probably all you need to answer the first question.
More Plotting Tricks • If you’re one of those types who has to have the exact answer, you can adjust the plotting parameters as you like. • Select Plot->Edit Plot • For example:Autoscale: OFFMin X=1, Max X=1.1X Decimal = 2 (you might have to fiddle with X Divisions too) will yield
A Beautiful Butterfly of a Plot • So that you can get ridiculously exact about answering the questions in the lab. • For example:Autoscale: OFFMin X=0.938, Max X=0.946X Decimal = 5 will yield the plot on the next page
Still more plotting tricks • There are also ways to plot one data set over another, and various other things that you should mess around with, but first answer the first question in the lab. Then go to the next page to do the tropical model, and answer those questions.
Tropical Model • Click on Card1 Input • Which brings up the dialog box Model Atmosphere(1) • Select Model Atmosphere-> Tropical Model • Hit okay, and run the model again. Plot it and fill in the blanks on the answer sheet for Tropical model.