Download
1 / 6
60 likes | 61 Views
Cartcoders, one of the top Shopify development company provides you Shopify Google Analytics Integration Services.From above points you can do easily Shopify Google Analytics Setup youu2019re your ecommerce store correctly and are ready to make the most out of your store and all the key insights and information it can provide on a daily basis. - https://cartcoders.com/ <br><br>

E N D
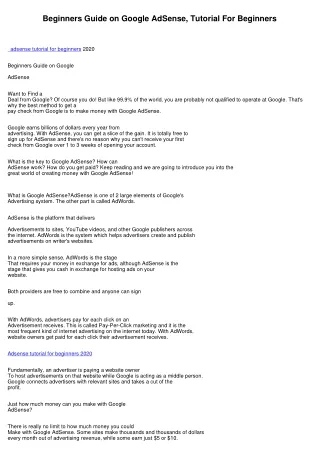
A Beginners Guide for Shopify Google Analytics Setup Google Analytics is that themost useful online tool you'llhave; there’slittle doubtthis. However, only 56% of all websites use it, and over 90% of Shopify stores have. it founded incorrectly. MOST of our new clients usually have their Google Analytics broken, a technique or another. We’ve got you. Here’s Cartcoders complete course on a way tofounded Google Analytics for your Shopify store, step by step! We’re here to assist you founded your Shopify Google Analytics integration correctly, but first, here is why it’s so important. Why you would like Google Analytics When Shopify Google Analytics is ready up correctly, it can help you: • learn which channels are drivingthe foremost sales, • understand who your customers are, • track your ROI and avoidhard cashwithin the wrong places, and • track your marketing campaigns’ results. This means it can provide all the datayou would like to plan your future marketing efforts and findthe foremost out of your money. Because after youDON’T have Google Analytics foundedcorrectly, YOU’RE WASTING YOUR MONEY: you don’t know your results, what’s working or what channels are bringing in customers and revenue.
This is why we built a guide to assist you founded Google Analytics properly. How to founded your Google Analytics on Shopify Completing the fundamental implementation settings for a brand new GA account isn'tthat onerous, and it’s even easier for Shopify stores as Shopifyencompasses a native integration. Here are the 11 steps you wish to follow: 1. Create a Google Analytics Account 2. foundedthe required views 3. Exclude Internal Traffic 4. Exclude Traffic from known bots and spiders 5. founded site search 6. founded demographic reporting 7. Add Your Site to Referral Exclusion List 8. founded Google Signals for Cross-Device Tracking 9. Add the Google Analytics tracking code to Shopify 10. Verify Google Analytics Implementation with Real-Time Reporting 11. founded Enhanced eCommerce STEP 1: If you don’thave already got one, the primary step is to form a Google Analytics account. To do this, you wish to: • Go to the Google Analytics homepage. • Click Startfree. • Set up a property in your Analytics account • Set up a reporting view • Add the tracking code to your websiteto begin collecting data. If you have already got a Google Analytics account and wishto feature a property, then: 1. move to the Google Analytics homepage and sign up to your account. 2. head to Admin. 3. within the ACCOUNT column, select Create Account. 4. Choose website 5. Enter the web site URL 6. Select an Industry Category 7. Select Reporting zone 8. Under Data Sharing Settings, choose the setting you wish 9. Get tracking ID 10. Add Tracking code to your website STEP 2: Next up is creating your views. A view is where you'll be able to access, customize, and analyze your data and reports. Always create 3 views: All Website Data, Master View & Test View. • The Master View is your working dashboard. Hereyou'll apply different filters to inducethe foremost accurate and actionable data.
• The Test view is your testing playground. Hereyou'll test out all the filters you would like without affecting the general report. • The All Website Data is your backup. Hereyou'll be able to review all the datawith none changes. this offers you something to fall back on should something get it wrong with the opposite two views. STEP 3. Exclude Internal Traffic: Your visitors come from all places, including your own corporation. Your team has do perform daily monitoring, testing, launching, and reviewing, which translates in visits, clicks and time on site. This extra data can skew your numbers, which is why internal traffic must be excluded. To do this, you wishto form an IP address filter: 1. Create a brand new filter for your view 2. Leave filter as Predefined 3. Click the Select Filter Type menuand choose Exclude 4. Click Select Source or Destination menuand choose the traffic from your IP addresses 5. Click the Select expression menuand choosethe acceptable expression 6. Enter the IP address or a daily expression. For more information or examples, you'll be able to visit the Google Analytics Help Center. STEP 4. Exclude Traffic from known bots and spiders: The reason behind this is oftena no brainer. Not being actual customers, this can be traffic that brings no actionable data to your website. To do this, you wish to: 1. Click Admin 2. head to View Settings 3. Scroll right down to the Bot Filtering section 4. Check box to “Exclude all hits from known bots and spiders” 5. Click Save STEP 5. founded site search: Site Search allows you to knowyour site’s search function and engagement.it'll show you the products users are trying to findand if they’re converting or not.this is often important because it can facilitate your optimize your website. To set up Site explore for a view, you wish to: 1. Click Admin and navigate to the view where you wishto line up Site Search 2. within the View column, click Settings 3. Under Site Search Setting, set Site Search Tracking to ON. 4. within the Query Parameter field, enter the words that compose your internal query parameters (like term, search, query, keywords). you'll be able to enter up to five parameters separated by commas. 5. Select whether or not you would like Analytics to strip the query parameter from your URL 6. Turn Site Search Categories ON or OFF. If your site has few products/categories, we recommend leaving this OFF. 7. Click Save
STEP 6. founded demographic reporting: As the name states, this reporting will offer you demographics and interests information per your business. To enable the reports from the Admin tab: 1. check in to your Analytics account. 2. Click Admin. 3. Navigate to the account and property where you would like to use Demographic and Interests data. 4. within the PROPERTY column, click Property Settings. 5. Under Advertising Features, set Enable Demographics and Interests Reports to ON. 6. Click Save. For more information on demographic reporting, you'll visit the Google Analytics Help Center. STEP 7. Add Your Site to Referral Exclusion List: The Referral Exclusion List excludes the domains you don’t want to attribute as referrals. this offers you more accurate reports. To add it, you would like to: 1. Click Admin 2. attend Property 3. Click Tracking Info 4. Click Referral Exclusion List 5. Add the subsequent domains: Yourwebsite.com Checkout.shopify.com If you've got any external payment gateways (like Paypal.com), make certainto incorporate them also. STEP 8. founded Google Signals for Cross-Device Tracking: Google Signals can show Cross-Device remarketing ads to Google users who have turned on Ads Personalization. This helps enhance remarketing and reporting for your website. To activate Google Signals, you would like to: 1. Click Admin 2. Select Property 3. Click Tracking Info 4. Click Data Collection 5. Click startwithin the blue notification banner 6. bear the activation panels 7. Read over the Google signals information and click on Continue 8. Activate STEP 9. Add the GA tracking code to Shopify: Now to at least one of the foremost important parts: adding the Google Analytics tracking code to your Shopify store! 1. From your Google Analytics account, click Admin 2. visit Tracking Info 3. Select Tracking Code & copy the code shown
4. Log into your Shopify store 5. From the Shopify Admin, visit Online Store > Preferences 6. Scroll all the way down to the Google Analytics section and paste the code 7. Save Next, you wishto show on eCommerce tracking. you'llactivate Basic eCommerce tracking or Enhanced eCommerce Tracking: • Basic eCommerce Tracking – allows you to ONLY view transaction and revenue data. • Enhanced eCommerce Tracking – gives you more information about customer behavior. We recommend fixingEnhanced eCommerce Tracking. Here’sthe way to do it: In your Shopify Admin: 1. Click Online Store > Preferences 2. within the Google Analytics section, click the employment Enhanced Ecommerce checkbox 3. Save In your Google Analytics account: 1. Click Admin 2. head to View menu 3. Select Ecommerce Settings 4. Click Enable Enhanced Ecommerce Reporting to ON 5. Save When you’refinished this, move down and add your checkout funnel (add to cart, cart, billing, shipping, payment) so as to successfully track your sales. For more information on this step, you'll visit the Shopify Help Center. STEP 10. Verify GA implementation with Real-Time Reporting: This one’s easyand cancause you towant a detective. All you would liketo try and do is open the location in Incognito mode and see if there'san energetic user from your location! STEP 11. founded Google Analytics Goals Tracking: The final thingyou wishto try to tois ready up Google Analytics Goals. this can help keep you measuring everything you would like. note of the destinations (AKA, web pages) you would liketo stay special track of. as an example, if you wishto understandwhat percentage people visited certain product pages, you'll be able tofounded a Destination Goal to trace this information. Once you have gotthe mandatoryinformation, you’reable tofounded Goals in Google Analytics: 1. Click Admin 2. within the View column, click Goals 3. Click New Goal 4. you'll choose one to form a Goal from a Goal Template, Create a Custom Goal or Create a sensible Goal. For now, you'll choose the Template. 5. Pick the Goal you wishto live for your Shopify store (Revenue, Acquisition, Inquiry, Engagement, Conversion, etc.). 6. Save 7. Repeat the method and add new goals as necessary Of course, you may want to tracequite just sales like form submissions or button clicks. For that, you’llmustfounded custom goals, which could be a bit more complicated and we’ll discuss it in a very separate article.
If you wish more information, you'll be able to visit the Shopify Help Center or the Google Analytics Help Center. Summary: And that’s it! Cartcoders, one of the top Shopify development company provides you Shopify Google Analytics Integration Services.From above points you can do easily Shopify Google Analytics Setup you’re your ecommerce store correctly and are ready to make the most out of your store and all the key insights and information it can provide on a daily basis. The road to amazing ROI is paved with data. Google Analytics data. And you’re on the right track for conversion and success. Contact Us: Website: www.cartcoders.com Facebook:www.facebook.com/CartCoders Twitter:www.twitter.com/CartCoders Linked In:www.linkedin.com/company/cart-coders Pinterest:in.pinterest.com/cartcoders Instagram:www.instagram.com/cart__coders Email:contact@cartcoders.com Contact: (+91)794-007-7787 Mobile : (+91)901-677-7787