Download

1 / 11
110 likes | 300 Views
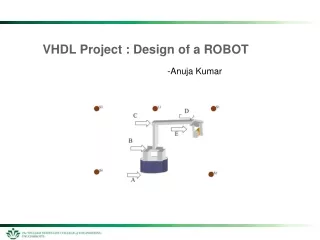
VHDL Project II: Bubble Sorter. Slides Available at: www.pages.drexel.edu/~mjm46. Matthew Murach. Bubble Sort Description. Takes a certain number of values and sorts them in ascending order Project consists of a simple four bit comparator which interchanges values when required.

E N D
VHDL Project II:Bubble Sorter Slides Available at: www.pages.drexel.edu/~mjm46 Matthew Murach
Bubble Sort Description • Takes a certain number of values and sorts them in ascending order • Project consists of a simple four bit comparator which interchanges values when required. • Logic is needed to wire the comparators together. (master->component design) • Bubble sort has a worst case complexity of O(N) where N is the number of numbers to be sorted.
Method One: Logic Flow (4 number example) 1st Stage: Sequence R-L-R-L 8 5 7 3 5 8 3 7 2nd Stage: Sequence L-R-L-R 3rd Stage: Sequence R-L-R-L 5 3 8 7 3 5 7 8 4th Stage: Sequence L-R-L-R (DONE) = denotes swap operation = basic PE element (four required)
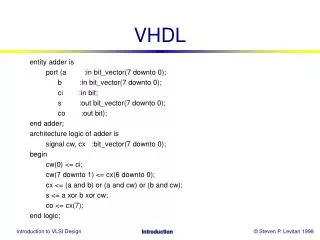
Processing Element Ld : in std_logic_vector(3 downto 0) – initial value L : in std_logic_vector (3 downto 0) – right register value R : in std_logic_vector (3 downto 0) – right register value L_o : out std_logic_vector (3 downto 0) – pass result to the left register R_o : out std_logic_vector (3 downto 0) – pass result to the left register Ck : in std_logic; -- clock input En : in std_logic; -- enable Wr : in std_logic; -- load register Sw : in std_logic; -- R or L read Rd : in std_logic; -- Read result Output : out std_logic_vector(3 downto 0)
Disadvantages of Method 1 • Messy boundary conditions • Need a special value at the ‘end’ nodes • Or need to use non-standard PEs • Wire intensive • Uses lots of wires (11 total signals) • A pain to route all that internal wiring in the master design (what if we want more control on the swap which would require another 4 wires….) • PE is complicated
Method Two: Make it simple • Why not use registers to store values instead of the processing units? (uses three simple PEs) 8 5 7 3 = Register A B = PE 5 8 3 7 C
PE for Method Two A : in std_logic_vector(3 downto 0); B : in std_logic_vector(3 downto 0); Ck : in std_logic; -- Clock En : in std_logic; -- En C : out std_logic_vector(3 downto 0); D : out std_logic_vector(3 downto 0);
Method 2: Examined • Only 6 wires need to be routed (8 if control is desired on the write ports) • Simple design • No need for fancy internal logic (R, L states) • Just compare the two values and swap if necessary • Compare logic is fixed with respect to input • Need extra logic for a register but that is trivial.
Component Declarations • Component declaration is nearly same as the device’s entity declaration. • Simply Copy and Paste in the component descriptions and add the key word component. Entity bubble_sort is port ( -- stuff here ); end bubble_sort; Component bubble_sort is port ( -- stuff here ); end component;
Internal Signals and Port Mappings • Internal wiring is done with signals. Simply declare these signals like you have done in previous exercises. • Port mapping is the where the actual components are instantiated and mapped to their respective signals. • Note that you can instantiate more then one instance of each component.
Example of Port Mapping • Let’s say you want to make a master VHDL design from the two components on the right. C Component -- Signal Declarations Signal N : std_logic; Signal M : std_logic; Begin -- Port Map Declarations My_A : Acomp generic map(N) port map(N,M,ck); My_B : Bcomp generic map(N) port map(M,N,ck); Ck A Component M N B Component