Download
1 / 6
70 likes | 260 Views
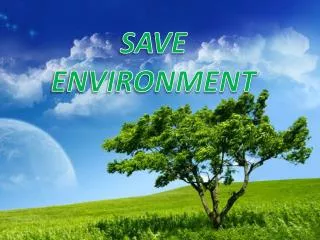
Making Your Short Film – Environment Project. Task. Create a short film that illustrates environmental issues in Boroondara and considers the question: How can we ensure a sustainable future for Booroondara and beyond?. Technique – When filming.

E N D
Task • Create a short film that illustrates environmental issues in Boroondara and considers the question: • How can we ensure a sustainable future for Booroondara and beyond?
Technique – When filming • Using the camera is not just a matter of point and shoot. There are a number of things to consider: • WALKING SPACE: The subject should be given room to move. They need to be able to walk into free space. • TALKING SPACE/LOOKING SPACE: The subject also needs space to look into and to talk into. • RULE OF THIRDS: Imagine your frame has been separated into thirds both vertically and horizontally. In general the subject should be intersected by one of those lines. • FOCUS: You should always use manual focus. Focus can be used to direct the audience attention or to indicate a flashback or to create a particular mood. • ANGLES: Vary your shooting angle for effect. For example a high angle shot may give quite a different impression of a subject. • MOVEMENT: A series of static frames can become monotonous. Use pans, zooms and tracking shots as well as static frames. • LEAD IN/ LEAD OUT: This is very important. Before the action begins roll the camera for at least five seconds. At the end of the scene roll the camera for at least five seconds after the action finishes. If this is not done the editing of your production becomes far more difficult.
Production Roles. • Director: The director takes responsibility for the artistic side of production. They work with the camera operator and editor to decide on the type of shot to take and any other production elements that need to be taken into account. • Editor: The editor has the responsibility of putting the shots together in the correct order. They will also add other elements of production during the editing. • Camera operator: The camera operator has the responsibility of taking the shots, in consultation with the director. The camera operator must familiarise themselves with camera technique and with the features of the camera. • Screenwriter: Has the overall responsibility for the production of the storyboard and the script. • Producer: The producer is the organiser. S/he organises timing, set, properties, and all other aspects involved in the production of the video.
The Storyboard • The storyboard is a series of drawings showing each of the proposed shots of your video. • Beside or beneath each picture you will need to write down: • Shot size, angle, focus (soft or sharp) • Movement; of character, of the camera (Tracking, panning, zooming). • Artistic features; lighting, colour, focus pulling. • A description of the action. • Dialogue, sound effects, music. • Each student in your group needs to keep a copy of the storyboard so that production does not stop when the scriptwriter is away.