Download
1 / 16
160 likes | 295 Views
Using the Smart Board. Jeanne Klein Instructor Computer Inservice Program Spring 2006. Whiteboard Basics. Hook up Connect whiteboard cable to computer Connect computer to projection unit Connect power outlet cable to computer Plug all units into outlet from cart plug

E N D
Using the Smart Board Jeanne Klein Instructor Computer Inservice Program Spring 2006
Whiteboard Basics • Hook up • Connect whiteboard cable to computer • Connect computer to projection unit • Connect power outlet cable to computer • Plug all units into outlet from cart plug • Computer, projection unit and whiteboard should be on • Green light in lower right-hand corner of whiteboard should be on • Indicates connected to computer
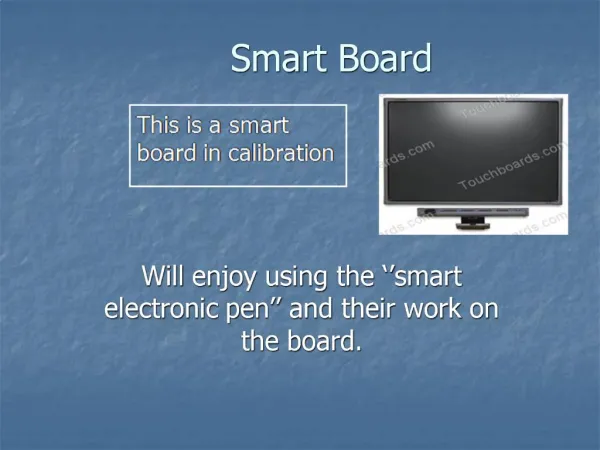
Orient the Smart Board • Press and hold the pen tray buttons simultaneously until the orientation interface appears. • Begin orientation by pressing your finger squarely in the center of each red cross as they come up. • You can use your finger as a mouse to click on objects or to write with finger.
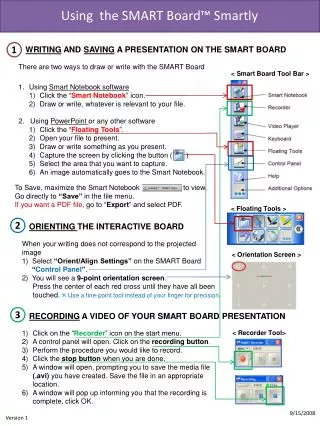
Tools Notebook Recorder Video Player Keyboard Floating Toolbar Control Panel Help More…
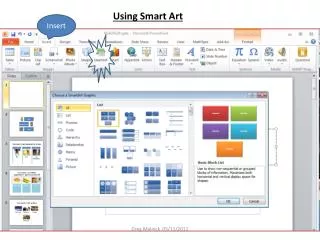
Inserting Files • Flash Files • Gallery • Pictures from files
Toolbars • New Notebook file • Open a file • Save • Paste • Zoom • Undo • Redo • Delete selected object • Display previous page • Display next page • Insert blank page • Show/hide screen shade • Launch Full Screen view • Capture tool • Select object • Write or draw with pen • Write or draw with creative pen • Erase annotations • Draw a line • Create a shape • Create a text entry box • Set current color of a tool, shape or object • Select the line width of tool • Set eh transparency of a tool • Select the line properties
The Gallery • Click on Gallery tab on right side to open • Click on collection + sign to view topics • Click on the collection name to view what’s in the collection • Click and drag item to notebook page to insert or • Click on down arrow of selected image and insert in notebook
Create Collection Name Select My Content Select the down arrow Select Add New Subcategory Select new category Select the down arrow Select Rename Rename new category Import Items to New Collection Select Add/Import located at top of Gallery Select Import Picture/Template File… Browse to the file you wish to import Select the picture or template Press the Open button Add to the Gallery Collection
Using Capture Toolbar Screen Capture—captures everything displayed on the screen Area Capture—click on drag on area you wish to capture Window Capture—press anywhere inside the window to capture that window
Ink Aware Applications • Smart Board integrates with • Word • Excel • PowerPoint • And many other applications.
Print to Smart Board • Print your document from any application to the Smart Board. • It becomes a Smart Board presentation. • Example: • From PowerPoint • Click on Slide • Go to File, Print • Choose Smartboard printer • Tell it what slide(s) you want to print. • They automatically become part of a smart board presentation.
Printing Notes from Smart Board • Click on File, Print. • Determine what you want printed • Slides • Handouts (how many per page) • Print to color printer or black & white printer in room. • Slides with notes will print.
Flowport • Use Flowport to e-mail printed documents to your account and use with Smart Board. • Go to Flowport site http://www.flowport.cnyric.org/ • Type in your username and password. • Click on create a new cover sheet. • Click on Title Goes Here link and type in Scan to myself. • On top of form where Heading appears, click on drop-down arrow and choose e-mail recipient. • Click on blue arrow under Sent to and type in your e-mail address. • In the Checkbox label, type in your name. • Click OK.
Click on save form at top of page. • The form will now appear on first page. • Select the form by clicking on the checkbox next to it. • Click on print at bottom of screen. • Choose main office printer nearest you. • Click OK. Your cover sheet will print out on the main office Xerox machine.
How to use your Flowport cover sheet • Take cover sheet and document you want to e-mail to yourself and place face up on the main office Xerox machine document feeder. Cover sheet should be on top. • Click on All Services on the Xerox menu. • Choose Network scanning button. • Click start to begin copying. • Once done, your document will be sent to you via e-mail. • You can reuse your cover sheet over and over again.
Smart Board Resources • Smart Technologies web site--www.smarttech.com • Smart Technologies Grades 10-12--http://education.smarttech.com/ste/en-US/Ed+Resource/Lesson+Activities/Notebook+Activities/Browse+Notebook/United+States/Secondary/10-12/?sort= • Smart Board Resources Center School District--http://www.center.k12.mo.us/edtech/SB/SB.html • Smart Idea Templates--http://www.center.k12.mo.us/edtech/SB/SITemplates.htm • Kenton County Schools--http://www.kenton.k12.ky.us/SmartBoard/smartboardindex.htm • Using Elect. Whiteboards in Your Classroom--http://www.waukesha.k12.wi.us/WIT/SmartBoard/specificapps.htm • Kent NGFL--http://www.kented.org.uk/ngfl/ict/IWB/resources.htm