Download
1 / 25
250 likes | 344 Views
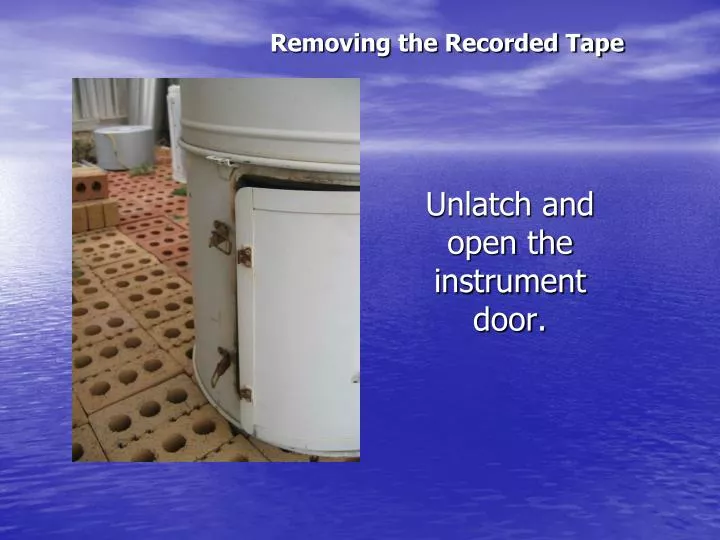
Removing the Recorded Tape. Unlatch and open the instrument door.

E N D
Removing the Recorded Tape Unlatch and open the instrument door.
Make sure the next punch cycle is not ready to begin, by checking the timer. Push the button on the right side of the timer. If a punch cycle begins – just stop and wait for it to complete.You CAN turnthe gage off – just rememberto turn it back ON!!!
Remove the plastic chad tray.
Mark a line across the top of the tape. Make one or two manual punches. Removing the Recorded Tape
Mark the date, time of removal, and Station Name and number on the recording tape – BELOW the bar. Example: Hobbs 13W, NM 29-4030-07 1 Dec 2008 1900 MST Below the bar
From the underside of the instrument, draw about 20 inches of blank tape from the spool. There are several ways to do this: Push down gently on the metal flange or tape guide and pull on the tape as shown. side of the tape.
Or loosen the tape by counter rotating the take up spool slightly – this will cause the tape to bow.
Pull enough tape to have at least 24 inches of excess for the next step. Pull this excess tape through, the punch block, then tear.
There should be 12 inches at the end of the roll and 12 inches of blank tape at the beginning. Do Not tear at the end of the data. That is where the data holes are. This allows sufficient tape to re-thread, and enough tape for the end.
Another view, removing the tape. Note the spring inside the grooved wheel – you can’t see it when the cover is on, but you can feel it.
Now you should Have sufficient Amount of tape To rethread
Bar guide Thread tape under the bar guide to the tape spool. Note the slot along the edge of the spool.
Re threading the spool. Line up the paper with the slot across the tape take up spool.
Using the take up spool Spring, Tighten the tape around The spool several times. It is best to have enough tape to rap around the spool 3 or 4 times. If you do not have enough, pull more tape from the bottom. Go back to slides 7 and 8.
Other things to consider: • Do Not write on the data area of the tape. • Check that the tape is properly keyed to the drive sprocket feed pins. Holes line up with feed pins
Setting the Time • The time at the punch block should be a little short of the actual time. • Manually punch up to the correct hour. • Manually punch to the the quarter hour you need. • Adjust as needed.
More on Setting the time: The gear sprocket: see slide 7 The lines on the tape: The solid horizontal lines indicate the hour measured in military time. i.e. 12 is noon, 13 is 1 pm 14 = 2 pm etc. Lighter shaded horizontal lines are in 15 minute increments. Vertical lines are Precipitation amounts. • As you turn the gear sprocket, each click moves the paper by 1 line or 15 minute increment. • Move the tape this way, you should tighten the paper feed at the top, • see slide 18.
Now you are ready To complete the tape Process Mark a line across The top of the Tape guide bar.
Mark New date and time the tape was put on. Remember Station Name and number – When putting on the new tape write information **ABOVE** the bar. Above the punch block bar.
Label the gage with the Station Name and number. • And Date and time you completed the process. e.g. • 2 Jan 05 • 1534 CST or MDT indicating daylight time or standard, as the case may be.
Put the Chad tray back on by sliding the side indentations along the sticks on the side. Remember to Turn the gage Back on if you Turned it off.