Download
1 / 76
870 likes | 1.51k Views
robotics PROGRAMMING & INTERFACING. Engr. Julius S. Mallari February 12, 2013. OBJECTIVES. Understand what is robot, mobot microcontroller, arduino and PBot Learn to program arduino Learn to interface arduino to pbot Learn to program PBot Move forward/backward, Turn left/right

E N D
roboticsPROGRAMMING & INTERFACING Engr. Julius S. Mallari February 12, 2013
OBJECTIVES • Understand what is robot, mobot microcontroller, arduino and PBot • Learn to program arduino • Learn to interface arduino to pbot • Learn to program PBot • Move forward/backward, Turn left/right • Read line and collision sensors • Understand other applications using the same concept and technology
ROBOT • a mechanical or virtual intelligent agent that can perform tasks automatically or with guidance, typically by remote control. • 1921 - The term "robot" was first used in a play called "R.U.R." or "Rossum's Universal Robots" by the Czech writer Karel Capek. Robot means slave.
Mobot • MObileroBOT • An electronic device that is composed of sensors, controllers and motors • Programmable, non-programmable • MCU based, Logic Gates based • Good learning tool to study robotics and automation
Mobot Controller • Motor Driver • Controls the motor movement (CW, CCW) • Main Controller • Controls the whole mobot(sensors, motor controller, other output devices)
Microcontroller • Microcomputer • An IC (Integrated Circuit) • Configurable Pins • Programmable Function • With Built-in Memory • RAM • ROM
Kinds of Microcontrollers • PIC - Microchip • ATmega - Atmel • ARM – Texas Instruments • ZILOG – Zilog • Intel, Motorola, Maxim, Cypress • ARDUINO • CPLD • FPGA • PLC
What is Arduino • A project which began in Ivrea (Italy) in 2005 • Massimo Banzi • David Cuartielles • device for controlling student-built interaction design • less expensive • more modern than what is available • Basic Stamp
What is Arduino • Open Source Hardware • Based on Wiring • Open Source Software • Based on Processing • Multi-platform • Programmed via USB
What is Arduino • named the project after a local bar • Italian masculine first name • "strong friend" • English equivalent is "Hardwin"
Getting started with Arduino • Arduino IDE • Homepage: http://arduino.cc/ • Download: http://arduino.cc/en/Main/Software arduino-00xx.zip • Device Driver • Gizduino uses prolific chip http://www.prolific.com.tw/eng/downloads.asp?id=31
Arduino Programming • Setup and Loop void setup() { //enter code here } void loop() { //enter code here }
Arduino Programming • Setup() • called when a sketch starts running • use it to initialize • variables, • pin modes, • start using libraries • will only run once, after each powerup or reset of the Arduino board
Arduino Programming • Setup() void setup() { LEDPin = 13; pinMode(LEDPin, OUTPUT); digitalWrite(LEDPin, LOW); } void loop() { }
Arduino Programming • Loop() • Executed repeatedly • Allows the program to change and respond.
Arduino Programming • Loop() void setup() { LEDPin = 13; pinMode(LEDPin, OUTPUT); digitalWrite(LEDPin, LOW); } void loop() { delay(500); digitalWrite(LEDPin, HIGH); delay(500); digitalWrite(LEDPin, LOW); }
C Programming Review • #include<stdio.h>int main(){printf("Hello World\n"); return 0;}
Arduino Programming • ArduinoBuilt-in Functions • Predefined functions to easily configure Arduino • Pin Operation • Peripheral Operation • shortcuts
Arduino Programming • pinMode(pin, mode) • Configures a digital pin to behave either as an input or an output • pin: the pin number whose mode you wish to set (digital 0-19; analog A0-A5) • mode: either INPUT or OUTPUT • Example pinMode(13, OUTPUT);
Arduino Programming • digitalWrite(pin, value) • Write a HIGH or a LOW value to a digital pin • pin: the pin number whose value you wish to set (digital 0-19; analog A0-A5) • value: either HIGH or LOW • Example digitalWrite(13, HIGH);
Arduino Programming • digitalRead(pin) • Reads the value from a specified digital pin • pin: the digital pin number you want to read • Digital 0-19 • returns either HIGH or LOW • Example result = digitalRead(13);
Arduino Programming • analogRead(pin) • Reads the value from a specified analog pin • pin: the analog pin number you want to read • returns an integer (0 to 1023) corresponding to pin voltage • Example result = analogRead(13); result = pinV * 1023/Vref
Arduino Programming • delay(value) • Pauses the program for the amount of time • value: the number of milliseconds to pause • Example delay(1000); will pause for 1000ms, equivalent to 1sec pause
Arduino Programming • Blinking LED Example intLEDPin; void setup() { LEDPin = 13; //make a variable LEDpin and assign to digital pin 13 pinMode(LEDPin, OUTPUT); //set pin 13 as OUTPUT digitalWrite(LEDPin, LOW); //initially turn OFF pin 13 } void loop() { delay(500); //put 5ms delay digitalWrite(LEDPin, HIGH); //turn it ON delay(500); //put 5ms delay digitalWrite(LEDPin, LOW); //turn it OFF }
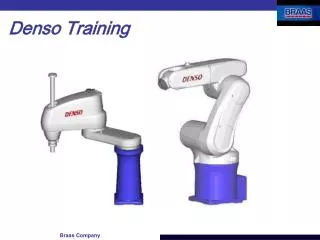
PBOT • General Purpose Mobile Robot Interface Module • Manufactured and distributed by e-gizmo • contains an elaborate set of electronics subsystems that will enable you to build mobile robots with ease • It has a 2 DC motors, 3 collision sensors, and 3 line sensors
PBOT • has no on-board controller • allows you to use a controller that suits your preference • compatible with Arduino, gizDuino, picGuino,STM32 MCU kit,ZilogEncore!andAnitomicrocontroller modules
Running Motors Forward Right Motor • Run/Stop Control – Pin9 • Direction Control – Pin8 Left Motor • Run/Stop Control – Pin10 • Direction Control – Pin11
Running Motors Forward • Forward Rotation Convention • Run Control pin (9,10) must be set • Direction Control pin (8,11) must be set