Download
1 / 55
590 likes | 1.56k Views
DNA Extraction. What is DNA?. DNA (deoxyribonucleic acid) is one of four major families of organic molecules in the cell. DNA’s primary structure consists of a sugar/phosphate backbone to which nitrogenous bases are attached. The bases are either Purine or Pyrimidine ring’s.

E N D
What is DNA? • DNA (deoxyribonucleic acid) is one of four major families of organic molecules in the cell. • DNA’s primary structure consists of a sugar/phosphate backbone to which nitrogenous bases are attached. The bases are either Purine or Pyrimidine ring’s. • It serves as the “master copy” for most information in a cell.
Discovery of DNA • In the late nineteenth century, a German biochemist discovered the long-chain polymers of nucleotides were made up of sugar, phosphate, and nitrogen bases. • Determined that the sugar in nucleic acids can be of two forms…ribose (RNA) or deoxyribose (DNA). • In 1943, American Oswald Avery proves that DNA carries genetic information.
Discovery of DNA, cont. • In the early1950’s, Cambridge University graduate student Francis Crick and research fellow James Watson became interested in the work of Linus Pauling. • Watson and Crick were interested in Pauling’s 1948 discovery that many proteins take the shape of an alpha helix…in other words, they spiraled like a spring coil.
Discovery of DNA, cont. • At King’s College in London, DNA pioneers Maurice Wilkins and Rosalind Franklin were using x-ray diffraction images to look at DNA. • Also in 1950, biochemist Erwin Chargaff found that the arrangement of nitrogen bases in DNA varied widely, but the amount of certain bases always occurred in a one-to-one ratio.
Discovery of DNA, cont. • Chargaff’s and Pauling’s discoveries would prove to be an important foundation later for the description of DNA. • In 1953, without the consent of Franklin, Wilkins showed Franklin’s results to Watson and Crick. • Based on that information, Watson and Crick suggested the DNA molecule was made of two chains of nucleotides.
Discovery of DNA, cont. • Watson and Crick showed that each strand of the DNA molecule was in a helix configuration, but one was going up and the other going down. • They also showed that each strand was a template for the other.
Discovery of DNA, cont. • Franklin passed away in 1958. • Watson, Crick, and Wilkins were awarded the Nobel Prize in 1962. • The Nobel Prize is only awarded to living persons. • DNA’s discovery has been called the most important biological work of the last 100 years.
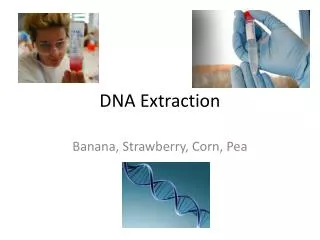
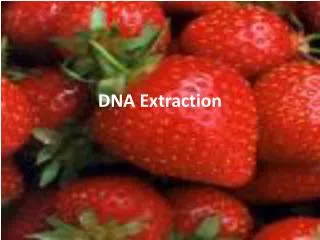
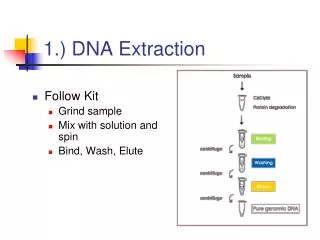
DNA Extraction • DNA can be extracted from any living thing. • Procedures for DNA extraction vary from simple experiments that can be performed at home, to extensive experiments that require the use of a laboratory. • The procedure used is outlined below.
DNA Extraction using Wheat Germ • The basic procedure is to lyse the wheat germ cells rupturing the cell walls, membranes and nuclear membrane if there is one. • Carefully read the instructions prior to beginning the DNA extraction.
Materials • The following materials/supplies are needed to achieve DNA extraction: • Raw Wheat Germ • Warm water bath (50°- 60°C) • Meat tenderizer • Salt (NaCl) • Sodium bicarbonate solution • Liquid detergent such as Woolite™
Materials, cont. • 250mL beaker • Cheese cloth or coffee filter • Thermometer • Pipet • Scale • 95% Ethanol or 100% Isopropanol alcohol • Centrifuge • Gloves
DNA Extraction Procedure • Prior to beginning the extraction, prepare the warm water bath (50°- 60°C).
DNA Extraction Procedure, cont. • PUT ON GLOVES! Failure to wear gloves will allow your DNA to contaminate the DNA of the Wheat Germ! • Place 45mL of tap water in a beaker and place it in the warm water bath. • Use the scale to measure 2g wheat germ. • Sprinkle the wheat germ into the pre- warmed water.
DNA Extraction Procedure, cont. • Record the exact temperature of the water. • The optimal temperature for DNA extraction is 55°- 60°C. • DO NOT ALLOW THE TEMPERATURE TO RISE ABOVE 60°C. • Add 2-5mL of detergent and stir gently trying to create as few bubbles as possible.
DNA Extraction Procedure, cont. • Continue to stir the mixture for an additional 5 minutes remembering to keep the temperature below 60°C. • After 5 minutes, gently stir in 2g of meat tenderizer. • Add 5mL of sodium bicarbonate solution and continue to stir and heat for an additional 5-15 minutes.
DNA Extraction Procedure, cont. • Immediately cool in ice bath to room temperature. • Filter through cheesecloth or coffee filter.
DNA Extraction Procedure, cont. • After filtration, place approximately 5mL of the filtrate to a test tube. • Next, pipette 5mL ice-cold alcohol down the side of the test-tube making sure the alcohol doesn’t mix with the filtrate. • 2 distinct layers should be visible. • Spool the DNA from the filtrate.
DNA Extraction, Additional Procedures • 3 additional extraction procedures were conducted. • Each was carried out using the procedure explained above with the following exceptions: • 1. No heat was used. • 2. Heating time was reduced to 5 minutes. • 3. Heating time was increased to 25 minutes.
Results of DNA Extraction using Wheat Germ • Results were inconclusive when DNA extraction was attempted without the benefit of heat. • Heating the wheat germ as specified in the original procedure (15 minutes) proved to be the most successful. • Extremely fragmented DNA occurred when solution was heated for 25 minutes.
Results of DNA Extraction using Wheat Germ • DNA was easily extracted, but isolating the DNA from the filtrate proved to be the biggest obstacle. • Sterile cotton swabs and sterile loops were used with little success.
DNA Extraction with Green Peas • The following materials are needed: • Fresh or frozen Green peas • Blender • Liquid detergent, such as Woolite™ • Coffee filter • Meat tenderizer • 70-95% rubbing alcohol or ethyl alcohol • 250mL beaker • Test tubes
DNA Extraction Procedures • Place the following items in a blender: • ½ cup of green peas. • 1/8 tsp of salt. • 1 cup of cold water. • Blend on high for 15 seconds. • Strain through coffee filter into 250mL beaker and add 2 tablespoons of liquid detergent.
DNA Extraction Procedures, cont. • Allow mixture to sit for 5-10 minutes. • Pour mixture into test tubes, add a small pinch of meat tenderizer and stir gently. • Gently pour an amount of alcohol equal to the amount of filtrate into the test tubes. • DNA will appear in the alcohol layer.
Results of DNA Extraction using Green Peas • All attempts to extract DNA using green peas were unsuccessful. • DNA extraction was never observed. • Procedure altered in the following way: • Peas were crushed instead of blended. • Peas were blended less than 15 seconds. • Peas were blended for 30 seconds. • The mixture was heated for 15 minutes and cooled to room temperature.
DNA Detectives Lab • The DNA Detectives Lab uses restriction enzymes to isolate specific fragments of DNA. • The exact number and size of fragments produced by a specific restriction enzyme vary from person to person. • Restriction enzymes are used to “cut” DNA molecules internally (endo) or on the ends (exo).
DNA Detectives Lab, cont. • Hind III recognizes the sequence AAGCTT and cuts the DNA at different points of the strands resulting in a staggered cut (endo). • Pvu II cuts through both strands of DNA resulting in a clean cut, leaving blunt ends (exo).
DNA Detectives Lab, cont. • Examples of Restriction Enzymes: • BamH I • EcoR I • Hae III • Hind III - • Pvu II - (used in the DNA Detectives Lab)
DNA Detectives Lab, cont. • Materials needed: • 0.8% Agarose • 5X TBE running buffer • Quickview DNA stain concentrate • Microfuge tubes • Staining trays • Loading dye • Lambda DNA/Hind III marker
DNA Detectives Lab Materials, cont. • 4 suspect DNA samples • 2 Pvu II restriction enzyme • 2 Pvu II reaction buffer 10X • Electrophoresis chamber • Power supply • Micropipettes • Permanent marker • Distilled water
DNA Detectives Lab Materials, cont. • Microwave oven • 37°C water bath • 65°C water bath • Duct tape • Gloves • Ice bath for sample tubes • Petroleum ether for rinsing micropipette • Test tube rack • 9-Volt Batteries
DNA Detectives Lab Procedures • Remove DNA sample kit from freezer and allow samples to thaw. • Label 5 microfuge tubes as follows: • Crime scene • Suspect 1 • Suspect 2 • Suspect 3 • Suspect 4
DNA Detectives Lab Procedures, cont. • Using a 10µl micropipette, pipette 10µl of the Crime scene DNA into the microfuge tube labeled “Crime scene.” • Rinse the micropipette with petroleum ether and add 2µl Pvu II reaction buffer 10X. • Rinse the micropipette with petroleum ether and add 2µl Pvu II restriction enzyme. • Repeat these steps for Suspects 1- 4 using the same procedure outlined above
DNA Detectives Lab Procedures, cont. • Incubate all tubes at 37°C for 1 hour. • Cast Agarose Gel during this time if not prepared ahead of time.
DNA Detectives Lab Casting Agarose Gel • Place bottle of 0.8% Agarose Gel in microwave oven and microwave on high at 30 second increments until gel is melted. (usually one 30 second cycle) • HANDLE WITH CAUTION…GEL IS EXTREMELY HOT! • Use duct tape as end dams for the gel casting tray making sure tape securely adheres to the tray.
DNA Detectives Lab Casting Agarose Gel • Insert the gel comb at the end of the gel tray. • Place the gel tray on the countertop and add melted Agarose Gel until it’s just below the bottom portion of the solid comb. • Allow the gel to cool and solidify which takes approximately 30 minutes.
DNA Detectives Lab Procedures, cont. • Prepare the Dilute Stain while the gel is cooling. • Add 5ml of DNA stain concentrate to 95ml warm (50-55°C) distilled water. • Set solution aside, but maintain temperature.
DNA Detectives Lab Procedures, cont. • After all tubes have incubated for 1 hour, and the Agarose Gel has cooled, add 2µl of loading dye to each tube. • Incubate all tubes for 5 minutes at 65°C. • This incubation period along with the loading dye stops enzyme activity from occurring. • If enzyme activity is not stopped, the enzymes will continue to degrade the DNA causing smaller fragments.
DNA Detectives Lab Procedures, cont. • While the tubes are incubating at 65°C, wear gloves and remove the duct tape from the ends of the Agarose Gel tray. • If gloves aren’t worn, your DNA could contaminate the Agarose Gel leading to false/inaccurate results. • Place the gel tray into the chamber and slowly add 350ml of 1X TBE running buffer.
DNA Detectives Lab Procedures, cont. • Add buffer to one end of the chamber until that chamber is filled. • Repeat this procedure with the other chamber. • Once both chambers are filled, slowly continue adding buffer until the Agarose Gel is completely covered.
DNA Detectives Lab Procedures, cont. • Use a 50µl pipette and add the following to the Agarose Gel: • Lane 1: 10µl Lambda DNA/Hind III • Lane 2: 15µl Crime Scene DNA • Lane 3: 15µl Suspect 1 DNA • Lane 4: 15µl Suspect 2 DNA • Lane 5: 15µl Suspect 3 DNA • Lane 6: 15µl Suspect 4 DNA
DNA Detectives Lab Procedures, cont. • When loading the DNA to the Agarose Gel, make sure the DNA isn’t injected into the gel. • Once all wells are loaded, gently slide the cover into the chamber. • Connect the 9-volt batteries to the cover – no more than 75-125 volts.
DNA Detectives Lab Procedures, cont. • Monitor the movement of the DNA samples. Pay attention to Lane 1. • Lane 1 contains Hind III marker which serves as an indicator. • Hind III has a lighter molecular weight than the DNA samples. Therefore, it will run through the gel faster and reach the end of the gel before the DNA samples.
DNA Detectives Lab Procedures, cont. • Disconnect the power supply, and remove the cover. • Gently pour the running buffer out of the chamber. • Wear gloves and remove the gel tray from the chamber. • Carefully slide the gel into a staining tray and add stain solution until it covers the gel.
DNA Detectives Lab Procedures, cont. • Cover the tray and allow the gel to stain for approximately 30-40 minutes. • Once the gel has finished staining, carefully pour the stain out of the tray ensuring that the gel remains flat, and doesn’t slide into the corner of the tray. • Add distilled water to the tray using care not to pour water directly onto the gel.
DNA Detectives Lab Procedures, cont. • For best results, allow the gel to “Destain” overnight. • You may also expedite the destaining process by gently rocking the tray. • This process will take approximately 30 minutes and several water changes.
DNA Detectives Lab Results • After performing all steps necessary to isolate the DNA, perform gel electrophoresis, and complete the destaining process, the banding patterns were reviewed. • The banding patterns indicate……