Download
1 / 43
430 likes | 501 Views
Advanced PowerPoint. TTTC Breakout Session Monday, July 17, 2006. Facilitators. David Kotkosky david.kotkosky..@..lausd.net Instructional Technology Applications Facilitator. Carol Takemoto carol.takemoto..@..lausd.net Science Coordinator - Elementary. Objective.

E N D
Advanced PowerPoint TTTC Breakout Session Monday, July 17, 2006
Facilitators David Kotkosky david.kotkosky..@..lausd.net Instructional Technology Applications Facilitator Carol Takemoto carol.takemoto..@..lausd.net Science Coordinator - Elementary
Objective • Participants will be provided an opportunity to view or perform popular PowerPoint tasks • Participants will be provided resources, tutorial links, and directions
Equipment and OS • PowerBook Titanium 800 MHz G4 • 1 G SDRAM • OS 10.4.7 • Monitor set to Extended Desktop
Software • QuickTime • iMovie • Inspiration/Kidpiration • Excel • PowerPoint - Mac Office 2004 • Grab • iPhoto • Preview • Windows MediaPlayer
PowerPointAlternatives • Apple’s Keynote http://www.apple.com/iwork/keynote/ • OpenOfficehttp://www.openoffice.org/ • PowerPoint Viewer (Win) • Tech4learning MediaBlender
Mac User Tips • There are some things you can do on a Tiger system to clean things up. • Reset PRAM (same CMD-OPT-P-R as the old days) • No need to defrag, as long as your drive doesn't get beyond full (have 200MB min. of free space) • Hold down the Shift key at boot up. After the system boots, reboot it normally. • Run MacJanitor, for getting the daily, weekly, and monthly cleanup scripts to run manually • Use Control + click = right click (PC mouse OK) • CMD-SHFT-3 and CMD-SHFT-4
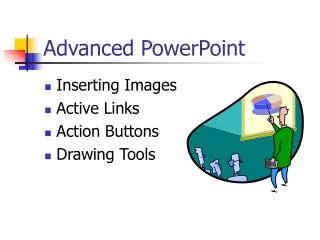
Tasks Include (a): • Assistance Sources • Slide Templates • Bullets and animation • Western Eye Movement • Master Slide Logo, Clipart
Tasks Include (b): • Format Master Slide Text • Slide Sorter • Hide Slides • Produce Handouts • Add Clip Art and Shapes
Tasks Include (c): • Add Design Elements • Add QuickTime mov • Add Hyperlinks: • Websites • Other PowerPoints and Files • Other Pages • CD Tracks • Windows MediaPlayer File
Tasks Include (d): • Play Slide Show as Kiosk • Add Screenshots (Apple’s Grab) • Add Inspiration and Kidspiration files • Add Excel Chart/table • Add Excel Graph • “W” and “B” keys • Slide Transitions
Assistance • Microsoft Help • Search within application • PowerPoint 2004 online Mactopia • Searches: Google look for .edu, .gov • iLife online Tutorials with Video and Soundhttp://www.apple.com/ilife/tutorials/ • Many Photography Resourceshttp://del.icio.us/district6/photography
Slide Templates • Powerpoint has templates installed • More templates can be found online:http://office.microsoft.com/en-us/templates/default.aspx • Education specific templateshttp://office.microsoft.com/en-us/templates/CT061993301033.aspx
Bullet Pre-Animation • Set Viewing for Master Slide and Formatting Palette • Bullets and Numbering • Indent - increase or decrease • Style and Color - caveat on fonts and shapes if using on other computers
BulletAnimation • Master Slide • Slide Show > Custom Animation > Text 2 • Entrance Add Effect > Appear • Start > On Click • Effect > No sound • Effect > After animation > dim > select color • Caveat… inserting text boxes will not have Master Slide characteristics
WesternEye Movement • Most persons view from left to right • Then scan to lower left • Then move right • Most memorable items should be in lower right
Master SlideLogo Clipart • Logos or “permanent” items on all slides • View Master > Slidemaster • Place clipart, logos, watermarks • If on top of text boxes - no problem in Slidemaster: • Layered objects “Formatting Palette” > “Size, Rotation, and Ordering • Click “Layering” > “Bring to Front, Send to Back, or Bring forward, Send back
Slide Sorter • View > Slide Sorter • Drag Slides to the location desired
Hide Slides • Normal view Select the slide you want to hide, and then click Hide Slide on the Slide Show menu. • Slide sorter view Select the slide you want to hide, and then click Hide Slide on the Slide Sorter toolbar. • A "null" sign appears over the slide number of any slide you have hidden in “Slide Sorter”
Produce Handouts - Handout Master • 1. On the View menu, point to Master, and then click Handout Master. • 2. Use the Handout Master toolbar buttons to see the layout of handouts with two, three, four, six, or nine slides per page. • 3. On handout master add credits, graphics • Position the placeholders for headers, footers, date, and page number as you want them to appear on your printed handouts. • Select three slides per page provide a “notes” area
Produce Handouts - “Print” Menu • Go to File > Print > • Print What > 3 Slides per Page to get “Participant Notes” area • Output > grey scale (economical)
Add Clip Art andShapes • ClipArt • Insert > Picture > ClipArt or from File • Shapes • Formatting Palette > Add Objects > multiple choices Is this how you feel everyday?
Color Schemes • Color schemes can be added to the slide master • Color schemes can alter the design template • Eight colors are pre-selected to harmonize • One source of color information is Pantone - some is public - free support area with logon
Add QuickTime mov • Update software to have latest QuickTime Player • Download QuickTime file or link to website • Place in PPT folder • Add Hyperlink to play on mouse click, or… • Set slide to play on open
Add QuickTime mov • QuickTime > Country and City Mouse website • iPhoto > iMovieproject with Ken Burns effect file (could not link to file)
Add Hyperlinks • Websites • Other PowerPoints • Other Files • Other pages • CD tracks
Add Hyperlinks • Websites • Select Text or image • Insert > Hyperlink > paste URL • Display will show selected text or image description • Example: How Stuff Works
Add Hyperlinks • Hyperlink to other PowerPoints or files • Select text > Insert > Hyperlink • Choose “Document” • Meander to file name • Caveat if sharing files • Put all files in one folder • Load files • Test and re-link, if needed • Examples: Welcome.doc Netiquette.ppt (Created with Keynote)
Add Hyperlinks • Other pages within presentation (non-linear) • Select Text or image • Insert > Hyperlink > Anchor • Better to Select Page Title vs. page number • Examples • Title page • Facilitator info page
Add Hyperlinks • CD tracks or iTunes file • Add CD or copy tracks to folder • Hyperlink to CD track • Examples • iTunes File (not successful) • CD track
Add Hyperlinks • Play Windows MediaPlayer file 21b • Download Windows MediaPlayer for Mac • Download file • Hyperlink to file (Solid Rocket STS-121) • May need to open MediaPlayer prior to show • May interfere with extended monitors function
Play Slide Show as Kiosk • Use for announcements, vocabulary, reinforcement, spelling, concepts, project showcase • Use old computer/monitor to run in less secure areas • SlideShow > Set Up Show > Browsed at Kiosk…> use Timings • SlideShow > Slide transition > Automatic at n seconds
Add Screenshots (Apple’s Grab) • Use “Grab” to get a screen image • Grab saves as TIFF only. • Use “Preview”> “new from Clipboard > save in 11 formats • Use “iPhoto” Drag TIFF or Preview saved file into iiPhoto to resize • JPG is good format for PPT
Add Inspiration Files • Link to Inspiration fileInsert > Hyperlink > find file • Example: Car Construction Steps
Add Kidspiration Files • The
Add Excel Chart • Method 1 • Insert Completed Graph from Excel File: Insert > Graph > Import > File Name > Chart Name • Chart is created by Apple’s Grapher • Not dynamic in PowerPoint • Method 2: • Copy > paste from Excel File • Chart is dynamic • See next page
Add Excel Table • Copy > Paste Excel Table > Edit Text • Data is Dynamic
“W” and “B” keys • While in presentation mode: • “B” Key yields a Black Screen • “B” key again return the SlideShow • “W” key yields a White Screen • “W” key again returns the SlideShow
Slide Transitions • A brief transition helps viewer acknowledge screen change • Slide Show > Slide transitions > Select Effect > on Mouse Click > apply to all > test
“Grab” • Converting Grab screen shots to other formats • Grab saves screen shots as files in TIFF format. • If you want to use your screen shots on the web, in email, or in a word processor, you can use the Preview application to convert the TIFF files to other formats, such as JPEG or PICT. • Next >
Grab - convert to other format • 1. Open Preview (located in Applications) and choose File > Open. • 2. Locate the TIFF file you want to convert and click Open. • 3. Choose File > Save As. • 4. Choose a file format from the Format pop-up menu and click Save. • You can also use third-party applications to open and convert TIFF files created in Grab.