Download
1 / 18
220 likes | 544 Views
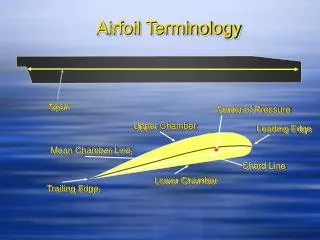
Activity 1.2.3a Airfoil. Construction Guide. Equipment. AE VEX kit Slow f lyer propeller 8x6SF Propeller adapter with set screw 4mm 2 in. x 9 in. strip of paper. Step 1: Construct Base. Step 2: Construct Drive Towers . Step 3: Construct Propeller Towers. Towers aligned

E N D
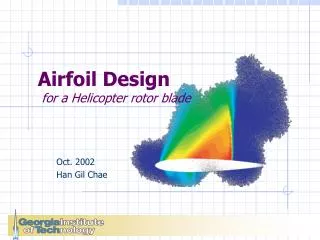
Activity 1.2.3a Airfoil Construction Guide
Equipment • AE VEX kit • Slow flyer propeller 8x6SF • Propeller adapter with set screw 4mm • 2 in. x 9 in. strip of paper
Towers aligned opposite each other 2 in. spacer 2 in. spacers x4 4th hole 7th hole Step 4: Install Towers and Battery Placement
Small gaps Small gaps All detail images shown from left side Step 5: Install Sprockets
11 1/2 in. chain 10 7/8 in. chain Step 6: Install Chains
Slow flyer propeller 8x6SF (label side toward nose) Propeller adapter with set screw 4mm Tighten propeller adapter using hex wrench (Remove after tightening adapter) Step 7: Assemble Propeller
Install bump switch Secure propeller to shaft with set screw Install battery and connect to CORTEX Motor into CORTEX motor 1 Bump switch into CORTEX digital 1 Step 8: Install Inputs and Outputs
1. Click image above to go to the VEX Cortex Video Trainer using ROBOTC website: http://www.education.rec.ri.cmu.edu/products/teaching_robotc_cortex/index.html 2. Click Setup 3. Click and follow directions 4. Click and follow directions 5. Click and follow directions 6. Click and follow directions Step 9: Prepare Cortex and Joystick Hardware
2 in. x 9 in. paper with two lines drawn 2 in. and 4 in. from edge Step 13: Prepare Simulated Airfoil
Align center line of the slow flyer propeller 8x6SF horizontally with the center of the paper strip Ensure that there is a safe gap between the propeller and the airfoil stand Align center line of the slow flyer propeller 8x6SF above the center of the paper strip Step 14: Align Propeller and Airfoil
Stop Complete Activity 1.2.3 Airfoil