Download
1 / 23
230 likes | 234 Views
service repair manual

E N D
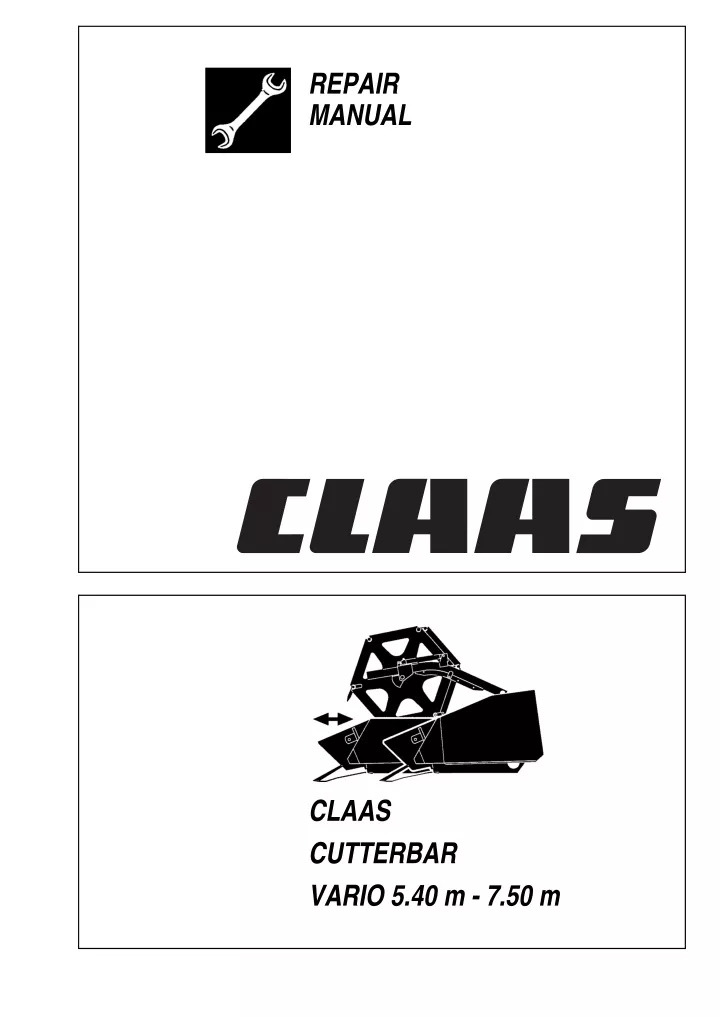
REPAIR MANUAL CLAAS CUTTERBAR VARIO 5.40 m - 7.50 m
Contents CONTENTS Installing the knife ........................................................... 3.3.1 Adjusting the knife height ................................................ 3.3.2 1. General information General .................................................................................. 1.1.1 Introduction ...................................................................... 1.1.1 Introduction to the CLAAS REPAIR MANUAL ................. 1.1.2 Key to symbols ................................................................ 1.1.3 Safety rules ............................................................................ 1.2.1 Important information ....................................................... 1.2.1 Identification of warning and danger signs ...................... 1.2.2 Correct use of the round baler ......................................... 1.2.2 General safety and accident prevention regulations ....... 1.2.2 Leaving the combine harvester ....................................... 1.2.3 Service ............................................................................. 1.2.3 Basic rule ......................................................................... 1.2.3 Hydraulic accumulators ................................................... 1.2.3 General repair information ..................................................... 1.3.1 Reason of damage .......................................................... 1.3.1 Spare parts ...................................................................... 1.3.1 Transmission ................................................................... 1.3.1 Tensioning the steel roller chains .................................... 1.3.1 Taper ring fasteners ........................................................ 1.3.1 Self-locking bolts ............................................................. 1.3.1 Liquid locking compound ................................................. 1.3.1 Correct installation of lock collar bearings ....................... 1.3.2 Correct installation of adapter sleeve bearings ................ 1.3.2 Ferrule fittings on hydraulic lines ..................................... 1.3.2 Progressive ring fittings on hydraulic lines ....................... 1.3.3 Taper fittings on hydraulic lines ....................................... 1.3.3 Welding ............................................................................ 1.3.3 Some advice for speedy and correct repair work: ........... 1.3.4 Tightening torques ................................................................. 1.4.1 Bolts ................................................................................. 1.4.1 Hydraulic screw fittings .................................................... 1.4.2 Specifications ......................................................................... 1.5.1 Lubricants chart ............................................................... 1.5.1 Drive diagram ......................................................................... 1.6.1 General information on drives ......................................... 1.6.1 Drive diagram, left-hand: ................................................. 1.6.1 Drive diagram, right-hand: ............................................... 1.6.2 4. Drives Main drive universal drive shaft ............................................. 4.1.1 Removing the main drive universal drive shaft ............... 4.1.1 Disassembling the main drive universal drive shaft ........ 4.1.1 Assembling the main drive universal drive shaft ............. 4.1.5 Mounting the main drive universal drive shaft ................. 4.1.6 Intermediate drive, left-hand .................................................. 4.2.1 Removing the left-hand intermediate drive ..................... 4.2.1 Installing the left-hand intermediate drive shaft ............... 4.2.2 Removing the hydraulic pump drive shaft ....................... 4.2.3 Installing the hydraulic pump drive shaft ......................... 4.2.6 Knife drive ............................................................................. 4.3.1 Removing the knife drive belt (40) .................................. 4.3.1 Installing and adjusting the knife drive belt (40) .............. 4.3.2 Adjusting the knife drive pull cylinder .............................. 4.3.3 Adjusting the limit switch ................................................. 4.3.3 Removing the pull cylinder of knife drive belt (40) ...................................................... 4.3.4 Disassembling the pull cylinder of knife drive belt (40) ... 4.3.6 Assembling the pull cylinder of knife drive belt (40) ........ 4.3.6 Installing the pull cylinder of knife drive belt (40) ............ 4.3.7 Removing the wobble transmission (spare part no. 643 656.1 and spare part no. 643 656.2) 4.3.9 Disassembling the wobble transmission (spare part no. 643 656.1 and spare part no. 643 656.2) ....................................... 4.3.10 Assembling the wobble transmission (spare part no. 643 656.1 and spare part no. 643 656.2) ................. 4.3.15 Installing the wobble transmission (spare part no. 643 656.1 and spare part no. 643 656.2) ................ 4.3.22 Removing the wobble transmission (spare part no. 637 534.0) ............................................. 4.3.25 Disassembling the wobble transmission (spare part no. 637 534.0) ............................................. 4.3.26 Assembling the wobble transmission (spare part no. 637 534.0) ............................................. 4.4.30 Installing the wobble transmission (spare part no. 637 534.0) ............................................. 4.4.35 Removing the deflection pulley of knife drive (40) ........ 4.4.37 Deflection pulley of knife drive (40), disassembled ....... 4.4.38 Installing the jockey pulley of knife drive (40) ................ 4.4.38 Removing the jockey pulleys of knife drive belt (40) ..... 4.4.38 Jockey pulley of knife drive (40), disassembled ............ 4.4.38 Jockey pulley of knife drive (40), disassembled ............ 4.4.39 Mounting the jockey pulleys of knife drive (40) ............. 4.4.39 2. Crop dividers Crop dividers .......................................................................... 2.1.1 Removing the crop dividers ............................................. 2.1.1 Installing the crop dividers ............................................... 2.1.1 3. Cutterbar trough – Cutter bar Cutterbar trough – Cutter bar ................................................. 3.1.1 Removing the VARIO table ............................................. 3.1.1 Mounting the VARIO table ............................................... 3.1.3 Adjusting the potentiometer sensing band ...................... 3.1.6 Replacing the support bracket ......................................... 3.1.7 Adjusting the slide bars ................................................... 3.1.7 Cleaning the slide bars (19) ............................................. 3.1.7 Cutterbar lock ......................................................................... 3.2.1 Removing the cutterbar lock ............................................ 3.2.1 Mounting and adjusting the cutterbar lock ....................... 3.2.2 Cutter bar ............................................................................... 3.3.1 Removing the knives ....................................................... 3.3.1 5. Intake auger Intake auger drive .................................................................. 5.1.1 Removing the feed drive chain (41) ................................ 5.1.1 Installing and adjusting the feed drive chain (41) ............ 5.1.2 Removing the intake auger slip clutch ............................ 5.1.3 Intake auger slip clutch, disassembled ........................... 5.1.4 Mounting the intake auger slip clutch .............................. 5.1.5 Intake auger .......................................................................... 5.2.1 Removing the left-hand intake auger bearing ................. 5.2.1 Left-hand intake auger bearing, disassembled ............... 5.2.3 0.1.1 299 203.0 - RHB SW VARIO 5,40 m - 7,50 m
Contents Assembling the electric reel speed adjustment (up to machine no.) ......................................................... 6.3.9 Mounting the electric reel speed adjustment (up to machine no.) ....................................................... 6.3.11 Removing the electric reel speed adjustment (from machine no.) ........................................................ 6.3.12 Electric reel-speed adjustment, disassembled (from machine no.) ........................................................ 6.3.13 Mounting the electric reel-speed adjustment (from machine no.) ........................................................ 6.3.14 Removing the reel variable-speed drive bearing tube ... 6.3.15 Reel variable-speed drive bearing tube, disassembled ................................................................ 6.3.16 Assembling and installing the reel variable-speed drive bearing tube .................................................................. 6.3.16 Removing the spring-loaded reel variable-speed pulley 6.3.17 Spring-loaded reel variable-speed pulley, disassembled ................................................................ 6.3.19 Mounting the spring-loaded reel variable-speed pulley . 6.3.20 Reel ....................................................................................... 6.4.1 Removing the reel ........................................................... 6.4.1 Installing the reel ............................................................. 6.4.2 Reel height adjustment (Basic setting) .................................................................. 6.4.4 Reel, disassembled ......................................................... 6.4.7 Removing the reel bearing .............................................. 6.4.8 Installing the reel bearing ................................................ 6.4.8 Removing the control rollers ............................................ 6.4.9 Installing the control rollers ............................................ 6.4.10 Checking and adjusting the track of control rollers ........ 6.4.10 Removing the outside right-hand reel spider ................. 6.4.12 Mounting the outside right-hand reel spider .................. 6.4.12 Removing the outside left-hand control spider .............. 6.4.13 Mounting the outside left-hand control spider ............... 6.4.13 Removing the outside left-hand reel spider ................... 6.4.14 Mounting the outside left-hand reel spider .................... 6.4.14 Removing the reel shaft (on 7.50 m cutterbars) ................................................... 6.4.15 Installing the reel shaft (on 7.50 m cutterbars) ................................................... 6.4.16 Removing the centre reel spider ................................... 6.4.17 Mounting the centre reel spider ..................................... 6.4.18 Installing the left-hand intake auger bearing .................... 5.2.4 Removing the left-hand intake auger drive shaft ............. 5.2.7 Installing the left-hand intake auger drive shaft ............... 5.2.8 Removing the right-hand intake auger bearing ................ 5.2.8 Right-hand intake auger bearing, disassembled ........... 5.2.11 Installing the right-hand intake auger bearing ................ 5.2.12 Removing the right-hand intake auger flange ................ 5.2.13 Installing the right-hand intake auger flange .................. 5.2.15 Removing the adjusting shaft ........................................ 5.2.17 Installing the adjusting shaft .......................................... 5.2.17 Removing the control shaft ............................................ 5.2.17 Installing the control shaft .............................................. 5.2.21 Removing the intake auger finger .................................. 5.2.24 Installing the intake auger fingers .................................. 5.2.25 Removing the intake auger ............................................ 5.2.26 Installing the intake auger .............................................. 5.2.27 6. Reel Reel drive belt / drive chains .................................................. 6.1.1 Removing the reel drive chain (42) .................................. 6.1.1 Installing and adjusting the reel drive chain (42) ............. 6.1.2 Removing the reel drive chain (46) .................................. 6.1.3 Installing and adjusting the reel drive chain (46) ............. 6.1.4 Removing the sprocket of reel drive chain (46) ............... 6.1.4 Mounting the sprocket of reel drive chain (46) ................. 6.1.5 Removing the reel drive belt (43) ..................................... 6.1.6 Installing the reel drive belt (43) ....................................... 6.1.7 Regelscheiben Haspelantrieb ausbauen ......................... 6.1.7 Regelscheiben Haspelantrieb einbauen .......................... 6.1.7 Reel drive universal drive shaft / angle drive ......................... 6.2.1 Removing the reel drive universal drive shaft with friction clutch .................................................................... 6.2.1 Disassembling the reel drive universal drive shaft with friction clutch .................................................................... 6.2.2 Assembling the reel drive universal drive shaft with friction clutch .................................................................... 6.2.6 Mounting the reel drive universal drive shaft with friction clutch .................................................................... 6.2.7 Replacing the friction linings of the reel drive universal drive shaft with friction clutch ........................... 6.2.9 Mounting the friction linings of reel drive universal drive shaft with friction clutch ........................... 6.2.9 Adjusting the slip clutch ................................................... 6.2.9 Removing the rear angle drive ....................................... 6.2.10 Disassembling the rear angle drive ............................... 6.2.11 Assembling the rear angle drive .................................... 6.2.14 Mounting the rear angle drive ........................................ 6.2.15 Removing the front angle drive ...................................... 6.2.16 Disassembling the front angle drive ............................... 6.2.16 Assembling the front angle drive ................................... 6.2.21 Mounting the front angle drive ....................................... 6.2.24 Electric reel speed adjustment ............................................... 6.3.1 Removing the electric reel variable-speed pulley ............ 6.3.1 Electric reel variable-speed pulley, disassembled ........... 6.3.3 Mounting the electric reel variable-speed pulley .............. 6.3.4 Removing the electric reel speed adjustment (up to machine no.) .......................................................... 6.3.5 Disassembling the electric reel speed adjustment (up to machine no.) .......................................................... 6.3.6 7. Hydraulic system / Electric system Control valves ........................................................................ 7.1.1 Removing the cutterbar control valve block .................... 7.1.1 Cutterbar control valve block, disassembled ................... 7.1.2 Assembling and installing the cutterbar control valve block ................................................................................ 7.1.3 Replacing the non-return valve ....................................... 7.1.3 Removing the Reel lower 2/2-way valve (Y23) ............... 7.1.4 Reel lower 2/2-way valve (Y23), disassembled ............... 7.1.5 Installing the reel lower 2/2-way valve (Y23) ................... 7.1.6 Removing the reel backward 3/2-way valve (Y25) .......... 7.1.7 Reel backward 3/2-way valve (Y25), disassembled ........ 7.1.7 Installing the reel backward 3/2-way valve (Y25) ............ 7.1.8 Removing the lock-up valve unit of reel backward valve (Y25) ........................................... 7.1.9 0.1.2 RHB SW VARIO 5,40 m - 7,50 m - 299 203.0
Contents Disassembling the lock-up valve unit of reel backward valve (Y25) ......................................... 7.1.10 Assembling the lock-up valve unit of reel backward valve (Y25) ......................................... 7.1.10 Installing the lock-up valve unit of reel backward valve (Y25) ......................................... 7.1.10 Hydraulic cylinders ................................................................. 7.2.1 Removing the left-hand double-acting reel height adjustment hydraulic cylinder .......................................... 7.2.1 Disassembling the left-hand double-acting reel height adjustment hydraulic cylinder .......................................... 7.2.2 Assembling the left-hand double-acting reel height adjustment hydraulic cylinder .......................................... 7.2.4 Installing the left-hand double-acting reel height adjustment hydraulic cylinder ............................................................. 7.2.6 Removing the right-hand single-acting reel height adjustment hydraulic cylinder .......................................... 7.2.6 Disassembling the right-hand single-acting reel height adjustment hydraulic cylinder .......................................... 7.2.7 Assembling the right-hand single-acting reel height adjustment hydraulic cylinder ....................... 7.2.10 Installing the right-hand single-acting reel height adjustment hydraulic cylinder ........................................ 7.2.12 Removing the reel horizontal adjustment hydraulic cylinder ........................................................... 7.2.12 Disassembling the reel horizontal adjustment hydraulic cylinder ........................................................... 7.2.13 Assembling the reel horizontal adjustment hydraulic cylinder ........................................................... 7.2.15 Installing the reel horizontal adjustment hydraulic cylinder ........................................................... 7.2.16 Removing the VARIO table hydraulic cylinder ............... 7.2.17 Disassembling the VARIO table hydraulic cylinder ........ 7.2.18 Assembling the VARIO table hydraulic cylinder ............ 7.2.21 Installing the VARIO table hydraulic cylinder ................. 7.2.23 Hydraulic motors / pumps ...................................................... 7.3.1 Removing the rape side cutter hydraulic pump ............... 7.3.1 Mounting the rape side cutter hydraulic pump ................. 7.3.2 8. Index Index ...................................................................................... 8.1.1 0.1.3 299 203.0 - RHB SW VARIO 5,40 m - 7,50 m
1 Generalinformation
General GENERAL Introduction This CLAAS REPAIR MANUAL is to assist in pre- serving the permanent working order and therefore the high value of your CLAAS round baler by careful main- tenance and service. Experience gathered by both our service engineers and factory staff has been compiled in this REPAIR MANUAL. The figures explain the procedure of repairs and the text describes the different adjustments to be made, the use of CLAAS special tools etc. The illustrations included in support to the expla- nations show the sequence of major repairs so that minor repairs can easily be followed. The CLAAS REPAIR MANUAL is filed in a folder which allows to insert supplementary pages as issued following technical developments and to always have an updated manual at hand for reference. To be sure, always compare settings and filling capacities with specifications stated in the current Operator’s Manual which applies to the machine. CLAAS KGaA mbH Service Department 1.1.1 299 203.0 - RHB SW VARIO 5,40 m - 7,50 m
General Introduction to the CLAAS REPAIR MANUAL The CLAAS REPAIR MANUAL is divided into main groups and subgroups. Pages and illustrations are numbered consecutively throughout each main group. The first figure at the bottom of each page refers to the main group whereas the second figure following the point indicates the subgroup; the figure behind the second point indicates the page number. In each subgroup, the figures and pages are numbered consecutively, starting at 1. Where differences between the machine types must be observed, this is indicated in headings. Where a service procedure applies to all machines covered by this book, the machine names are not specifically given. When supplements are to be added, the subgroups are supplemented or exchanged. All supplements are inserted into the respective main group / subgroup and the table of contents is updated. The symbols communicate brief messages when recurring service procedures are described. Their meaning is explained at the beginning of this manual. The section “GENERAL REPAIR INSTRUCTIONS” at the beginning of this manual contains useful practical hints. Read and follow these fundamental instructions. They are the basis for reliable service and durability of parts after repairs have been carried out. The description of a particular service procedure can easily be found by checking the table of contents of the appropriate main group / subgroup. 1.1.2 RHB SW VARIO 5,40 m - 7,50 m - 299 203.0
General Key to symbols The meaning of these symbols will be easily recognised and remembered by the user. These symbols are to help to quickly recognise recurring service procedures and they also help to communicate information shown on the illustrations. This CLAAS REPAIR MANUAL uses some symbols as defined in the “DIN 30600 Symbol summary” by the German Standardisation Institute (DIN). Dismantle, remove Prevent damage to materials Grease Disassemble Oil Special tools Drain, outlet Assemble Adjust/set Install, mount on Fill, filler opening Check visually Unlock, release, secure Mark Overflow Lock by means of liquids, glue, seal Balance Bleed Underprop, support Possibly reuseable Renew on each assembly Observe direction of installation 1.1.3 299 203.0 - RHB SW VARIO 5,40 m - 7,50 m
Safety rules SAFETY RULES Important information The instructions contained in this manual should be carefully read and observed by all persons who are concerned with the operation, maintenance and inspection of this machine in order to prevent accidents. In particular, read the section “Safety rules”. The use of spare parts, accessories and ancil- lary equipment other than genuine CLAAS pro- ducts or those which have been tested and approved by CLAAS, may change the specified design characteristics of this CLAAS machine or detract from its functional performance, with a possible adverse effect on the active and/or passive operational safety of the machine and its occupational safety standards (accident pre- vention). CLAAS is in no way liable for any damage or personal injury caused through the use of other than original or approved CLAAS parts, acces- sories and ancillary equipment. Technical data, dimensions and weights are given as an indication only. CLAAS reserve the right to make changes subsequently as techni- cal developments continue. Responsibility for errors and omissions not accepted. IMPORTANT: Front, rear, right and left refer to the direction of forward travel. 1.2.1 299 203.0 - RHB SW VARIO 5,40 m - 7,50 m
Safety rules Identification of warning and danger signs Correct use of the round baler All parts of this manual having to do with your safety or the safe operation of the machine are marked with the following signs. Please pass all safety instructions on to other users, too. Fitting and retrofitting of ancillary equipment which is not originally manufactured by CLAAS, and, in addition, also modifications and changes may only be carried out with the consent of CLAAS, as any such actions may have considerable adverse effects on the safety and operational function of the machine. Danger! Sign to indicate instructions which must be observed. Failure to do so would cause danger to life and limb to the operator and the people around him. Any arbitrary modifications carried out on the round baler will relieve the manufacturer of all liability for any resulting damage or injury. General safety and accident prevention regulations Preventive measures 1. In addition to the instructions contained in this manual, also observe the general safety and accident prevention regulations. Caution! Sign to indicate instructions which must be observed. Failure to do so could result in damage to the machine. 2. Always comply with local traffic regulations when driving on public roads. 3. Before starting the engine ensure that the transmission is in neutral and that all guards are installed and in their correct position. Measures to prevent damage to the machine 4. Start the engine only from the operator’s seat. Never attempt to start the engine by shortening across the starting motor terminals as the machine may immediately start to move! Note! Sign to indicate instructions for a more effi- cient and economic use of the machine. 5. Before moving away, always check the immedi- ate vicinity of the machine. Ensure adequate visibility – for a warning, always blow the horn before starting up. Important! 6. Never run the engine in a closed building! Sign to indicate instructions to be followed during disassembly / assembly. 7. Clothing worn by the fitter must be close-fitting. Avoid wearing loose jackets and shirts. 8. Handle fuel with care as it is highly flammable. Never refuel the machine in the vicinity of naked flames or sparks. Do not smoke during refuelling! Environment! Sign to indicate instructions which must be observed in order to avoid damage to the environment. 9. Always stop the engine and remove the main switch key (ignition key) before refuelling. Fill the fuel tank outdoors. Clean up any spilled fuel immediately! Danger to the environment is caused by irregular handling and incorrect disposal of toxic material (e.g. used oil). 10. Prevent fires by keeping the machine clean! 11. Take care when handling brake fluid and bat- tery acid (toxic and corrosive)! The warning and instruction signs placed on the round baler provide recommendations for safe ope- ration. These instructions involve your safety – observe them at all times! 12. Always blow the horn before starting the engine and engaging the threshing mechanism. 1.2.2 RHB SW VARIO 5,40 m - 7,50 m - 299 203.0
Safety rules Leaving the combine harvester 1. When leaving the combine harvester, ensure that it will not roll away (apply hand brake and chock blocks). Shut off the engine, remove the main switch key (ignition key) and lock the ope- rator’s cabin (if installed). – Turn off the battery isolating switch! 2. Never leave the combine unattended as long as the engine is still running! 3. Lower front attachments (cutterbars and others) fully to the ground before leaving the combine! Service 1. Repair, service and cleaning work and the eli- mination of malfunctions should only be perfor- med with the drive and the tractor engine switched off – remove the ignition key! 2. Escaping fluid (fuel or hydraulic oil) under high pressure can penetrate the skin and cause serious injury. In such a case, consult a doctor immediately as otherwise serious infections may result! 3. Dispose of oil, fuel and filters in a way that is harmless to the environment and in accordance with existing anti-pollution regulations! 4. Only have qualified workshops carry our repair work on the hydraulic system! Basic rule Always check the operating and road safety of the cutterbar before using it. Hydraulic accumulators Take particular care when working on hydraulic accumulators! Hydraulic accumulators are under high pressure! In the case of valve-controlled accumulators such as e.g. for the Autopilot, the short-circuit screw has to be loosened before starting repair work on the accumulator so that the hydraulic pressure is relieved. 1.2.3 299 203.0 - RHB SW VARIO 5,40 m - 7,50 m
General repair information GENERAL REPAIR INFORMATION Removal: After loosening the axial clamping, loosen the taper ring fasteners with a sharp blow, using a block-ended tube. Reason of damage Identify reason of damage, limit the case of damage and safeguard the machine. Caution! Spare parts The inside diameter of the block-ended tube must be large enough to extend over the tapered ring. Use genuine CLAAS spare parts and corresponding CLAAS special tools. Indicate the machine number of the round baler and also the respective serial numbers when ordering spare parts and in case of technical questions. This is necessary as otherwise, incorrect spare part deliveries may result. Self-locking bolts (with microencapsulated adhesive) Replace self-locking bolts, e.g. Verbus-Plus / Imbus-Plus and similar types every time such bolts are removed. In exceptional cases, they may be reused up to three times. Always observe the specified tightening torque. Transmission When removing the transmission, first drain the oil and then remove the transmission. Separate parts which are firmly connected with each other by means of a soft metal-tip or plastic-tip hammer. Always tighten self-locking bolts with microencap- sulated adhesive rapidly to the specified tightening torque. When removing these bolts, quickly unscrew them completely. These self-locking bolts must not come into contact with sealing compound (e.g. “Epple 33” or similar products). Tensioning the steel roller chains Find the centre point in the slack span between sprockets. With the tight span slightly under load, push in the centre point of the slack span with the thumb. The chain tension is correct when its slack span deflects about 2% of the centre distance between shafts. Check chain tension more frequently when using new chains. In individual cases, bolts with liquid locking compound can be used instead of self-locking bolts only where these bolts can be heated up to approx. 200 °C for removing them. Ensure that the specified quality grade of bolts (8.8/10.9 or similar grades) is observed here as well. Example: For a distance between centres of shafts of 500 mm, the slack span of the chain should deflect about 10 mm. Self-locking bolts with microencapsulated adhesive may be used only where operating temperatures will not exceed +90 °C max. Taper ring fasteners These bolts can be subjected to full stress after 24 hours at +20 °C. To speed up the curing time, heating may be applied (e.g. to 15 minutes at +70 °C). Taper ring fasteners provide a safe mechanical con- nection, even when transmitting high forces from the driving element on the shaft and vice versa, if they are properly prestressed. Liquid locking compound Installation: (e.g. Delo-ML 187 / Loctite 242 or similar types) When installing taper ring fasteners, it is important that the shaft, hub, parallel key and the taper rings have been thoroughly cleaned, that semi-fluid lubricant of NLGI class 00 (e.g. Shell Retinax G or similar brands) is applied and that the components are tightened to the specified torque in the correct order of assembly. Use liquid locking compound only where specified by the manufacturer. Correct application: Metal surfaces where liquid locking compound is to be applied must be absolutely free from grease. Use the “Aktivator” included in the workshop package for cleaning. Caution! No solid grease must be used when assembling the parts. 1.3.1 299 203.0 - RHB SW VARIO 5,40 m - 7,50 m
General repair information Loosening the bearing: Before applying the liquid locking compound, the metal surfaces where Aktivator has been applied must have dried. Especially in blind holes, no Aktivator (cleaning agent) residues are allowed. Bend up the tab which secures the sleeve nut and first back off the nut a few turns only (the thread must still fully grip). Loosen the taper lock adapter sleeve with a sharp blow, using a block-ended tube. When installing bolts, apply the liquid locking compound only to the internal thread (nut) if possible in small quantities (drops). In blind holes only wet approx. 1d (d = nominal diameter of bolt) at the thread bottom. The same applies to any extra-long female threads. When applying the liquid locking compound to the bolt or at the top end of a female thread, the liquid locking compound will spread over the entire thread length when screwing the bolt in. As a result, too much break-away torque is required to remove the bolt – Danger of breaking! Ferrule fittings on hydraulic lines When pre-assembling the unit and for pre-assembled factory-delivered ferrule fittings, the following applies: installation is in the associated, well-oiled threaded joint with half a turn of the union nut beyond the point where resistance is felt. Pre-assembly: Threaded assemblies secured with liquid locking compound can be easily unscrewed by heating them up to approx. 200 °C. 1. Cut off the tube at right angles. Do not use a pipe cutter because this will slant the tube wall, causing heavy inside and outside burrs. Slightly deburr the tube end on the inside and outside (do not chamfer!) and clean it. In case of tube bends, the straight tube end up to where the bending radius starts must be at least twice the height of the union nut. Correct installation of lock collar bearings Lock collar bearings are tightened on the shaft by rotating the eccentric ring over the inside bearing ring. Prior to installation, apply semi-fluid lubricant of NLGI class 00 (e.g. Shell Retinax G or similar brands) to the inside ring and the shaft to make bearing removal easier during future repairs. 2. Push the union nut and the ferrule on the tube. 3. Push the tube against the stop in the union and tighten union nut until the ferrule grips the tube (the tube must not rotate with the nut). This point can be felt because increase power is needed from here. Always fasten the eccentric ring moderately in the direction of rotation of the shaft and lock by means of a set screw. To remove the bearing, loosen the eccentric ring in opposite direction of rotation of the shaft. 4. Tighten the union nut half a turn beyond the point where resistance is felt. 5. Check the cut made by the ferrule edge: A visible shoulder must fill the space before the ferrule front end. The ferrule may rotate, but axial dis- placement must not be possible. Correct installation of adapter sleeve bearings Adapter sleeve bearings do not require a specially machined bearing seat. They may be mounted on any drawn or scalped shaft. This is an advantage because it allows the shaft to be axially moved as required to obtain correct alignment. Installation: Insert the pre-assembled tube into the well-oiled threaded joint, tighten the union nut up to the point where resistance is felt and then half a turn beyond this point. Always install adapter sleeve bearings according to the conical inside ring. Clean the taper lock adapter sleeve and the shaft and check that the sleeve nut runs easily so the taper lock adapter sleeve will not turn on the shaft when tightening. Re-installation: Every time the ferrule fitting has been loosened, retighten the union nut without using increased force. Tightening the bearing: First tighten the sleeve nut to the point where the taper lock adapter sleeve has no more play and is under slight preload. Now tighten the nut by approx. 90° and continue turning until the next nearest slot fits the tab. Secure sleeve nut with the tab. Ferrule fitting leaks: If a ferrule fitting leaks, first loosen the union nut until some oil escapes and then tighten it as specified. 1.3.2 RHB SW VARIO 5,40 m - 7,50 m - 299 203.0
General repair information Progressive ring fittings on hydraulic lines Caution! When pre-assembling the unit and for pre-assembled factory-delivered progressive ring fittings, the following applies: installation is in the associated, well-oiled threaded joint with half a turn of the union nut beyond the point where resistance is clearly felt. Failure to observe the tightening torques reduces the nominal power and the service life of the fitting, resulting in leaks and in the tube slipping out. Pre-assembly: 1. Cut off the tube at right angles. Do not use a pipe cutter because this will slant the tube wall, causing heavy inside and outside burrs. Slightly deburr the tube end on the inside and outside (do not chamfer!) and clean it. In case of tube bends, the straight tube end up to where the bending radius starts must be at least twice the height of the union nut. Taper fittings on hydraulic lines Montage: Apply oil to the O-ring on the taper. Tighten the union nut a third of a turn beyond the point where resistance is felt. Important: Back up the threaded joint with a wrench! 2. Push the union nut and the progressive ring on the tube. Caution! 3. Push the tube against the stop in the union and tighten union nut until the progressive ring grips the tube (the tube must not rotate with the nut). This point can be felt because increase power is needed from here. Failure to observe the tightening torques reduces the nominal power and the service life of the fitting, resulting in leaks and in the tube slipping out. 4. Tighten the union nut half a turn beyond the point where resistance is felt. Welding 5. Check the cut made by the progressive ring edge: A visible shoulder must fill the space before the progressive ring front end. The progressive ring may rotate, but axial displacement must not be possible. Caution! When carrying out electric welding work on the machine, proceed as follows: Installation: 1. Turn off the battery isolating switch! Insert the pre-assembled tube into the well-oiled threaded joint, tighten the union nut up to the point where resistance is felt and then half a turn beyond this point. 2. Disconnect the connector to the display monitor. The connector is located in the central terminal compartment next to the plug-in module (11 – Automatic reel control). Important: Back up the threaded joint with a wrench! 3. Pull out the electrical plug-in modules in the central terminal compartment. Re-installation: 4. Disconnect the electrical connectors between the engine and the main wiring loom. Every time the progressive ring fitting has been loosened, retighten the union nut until resistance is felt and then continue for half a turn beyond that point. 5. Always connect the earth clamp of the welder in the near vicinity of the area where the welding is being carried out. Important: Back up the threaded joint with a wrench! Progressive ring fitting leaks: If a progressive ring fitting leaks, first loosen the union nut until some oil escapes and then tighten it as specified. 1.3.3 299 203.0 - RHB SW VARIO 5,40 m - 7,50 m
General repair information Some advice for speedy and correct repair work: – Mark machine parts prior to disassembly to ensure their correct left-to-right positions and balance when reassembled. – Fit expansion pins with the slot facing the side under load. When fitted with a quarter turn from this position, they will get loose, fall out or shear off. – Replace cotter pins, locking wires, locking plates, tab washers and lock washers when carrying out repairs. – Fit lubricated ball and slide bearings with high-quality grease. – Align chain wheels and V-belt pulleys towards each other. – Care for strict cleanliness when working on hydraulic systems. – Never mix different oil types. – Run the machine or operate machine assemblies at low speed after any repair. 1.3.4 RHB SW VARIO 5,40 m - 7,50 m - 299 203.0
Tightening torques TIGHTENING TORQUES Bolts Tightening torques (in Nm) of hexagon bolts, cheese-head screws and hexagon nuts Bolts and nuts blackened, phosphatised or galvanized Strength class 8.8 10.9 12.9 Dimensions Metric thread M 4 2.7 3.8 4.6 M 5 5.5 8.0 9.5 Hexagon bolts DIN 931 DIN 933 M 6 10.0 14.0 16.0 M 8 23.0 33.0 40.0 M 10 45.0 63.0 75.0 M 12 78.0 110.0 130.0 M 14 122.0 175.0 210.0 Cheese-head screws DIN 912 M 16 195.0 270.0 325.0 M 18 260.0 370.0 440.0 M 20 370.0 525.0 630.0 Hexagon nuts DIN 934 M 22 510.0 720.0 870.0 M 24 640.0 900.0 1080.0 M 27 980.0 1400.0 1650.0 M 30 1260.0 1800.0 2160.0 Dimensions Metric fine thread M 8 x 1 25 35 42 M 10 x 1.25 48 67 80 Hexagon bolts DIN 960 DIN 961 M 12 x 1.25 88 125 150 M 12 x 1.5 82 113 140 M 14 x 1.5 135 190 225 M 16 x 1.5 210 290 345 M 18 x 1.5 300 415 505 Hexagon nuts DIN 934 M 20 x 1.5 415 585 700 M 22 x 1.5 560 785 945 M 24 x 2 720 1000 1200 M 27 x 2 1050 1500 1800 M 30 x 2 1450 2050 2500 CAUTION! Cadmium-plated and copper-plated bolts and nuts must be tightened with tightening torques 25% below the specified values. 1.4.1 298 293.0 - RHB SW VARIO 5,40 m - 7,50 m
Tightening torques Hydraulic screw fittings Tightening torques for hydraulic screw fittings with O-ring according to ISO 6149 Dimensions Tightening torque according to ISO 6149 7+2 Nm M 8 x 1 11+4 Nm M 10 x 1 16+5 Nm M 12 x 1,5 23+8 Nm M 14 x 1,5 29+10 Nm M 16 x 1,5 38+13 Nm M 18 x 1,5 46+15 Nm M 20 x 1,5 67+22 Nm M 22 x 1,5 86+29 Nm M 24 x 1,5 103+34 Nm M 26 x 1,5 103+34 Nm M 27 x 2 170+57 Nm M 30 x 2 200+67 Nm M 33 x 2 245+82 Nm M 36 x 2 245+82 Nm M 38 x 2 310+103 Nm M 39 x 2 380+127 Nm M 42 x 2 440+147 Nm M 45 x 2 1.4.2 RHB SW VARIO 5,40 m - 7,50 m - 298 293.0
Specifications SPECIFICATIONS Lubricants chart Component Lubricant type Capacity Transmission Front angle drive 0.6 l CLAAS hypoid transmission oil SAE 85W-90 (MIL-L-2105) API-GL-4-90 Rear angle drive 0.5 l Wobble transmission 637 534.0 1.25 l Wobble transmission 643 656.1 / 643 656.2 0.85 l Hydraulic system Working hydraulics CLAAS hydraulic oil VD-Plus HVLPD 46 approx. 1.85 l Multigrade hydraulic oil of viscosity class ISO-VG 46 according to DIN 51 524, part 3 ** ** The following guide values must be observed when selecting the hydraulic oil: Pourpoint Viscosity 0 °C Viscosity 40 °C Viscosity index < –25 °C (DIN ISO 3016) < 600 cSt. (DIN 51 562) 50.6 cSt. max. (DIN 51 562) > 170 (DIN ISO 2909) The oil must have detergent properties! 1.5.1 299 203.0 - RHB SW VARIO 5,40 m - 7,50 m
Specifications 1.5.2 RHB SW VARIO 5,40 m - 7,50 m - 299 203.0
Drive diagram 1 DRIVE DIAGRAM General information on drives The figures 1 and 2 show an overview of drive belts and chains. Important! When the belts are removed and during extended standstill periods of the machine, pro- tect the grooves and/or the contact faces of the drive belts on the pulleys against corrosion. Before re-installing the belts, clean the groove faces and/or the contact faces of the pulleys. (Fig. 1, 2) Drive diagram, left-hand: 40 Knife drive belt 41 Feed drive chain (Fig. 1) 1.6.1 299 203.0 - RHB SW VARIO 5,40 m - 7,50 m * 0106.fm * geändert: 01.10.02, 14:44
Thank you very much for your reading. Please Click Here. Then Get COMPLETE MANUAL. NO WAITING NOTE: If there is no response to click on the link above, please download the PDF document first and then click on it.
Drive diagram 2 Drive diagram, right-hand: 42 Reel drive chain 43 Reel drive belt 46 Reel drive chain (Fig. 2) 1.6.2 0106.fm * geändert: 01.10.02, 14:44 * RHB SW VARIO 5,40 m - 7,50 m - 299 203.0
2 Crop dividers