Download
1 / 71
1.05k likes | 1.37k Views
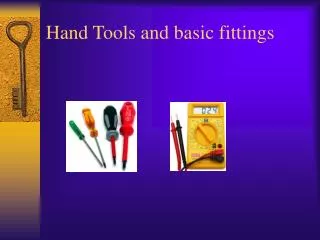
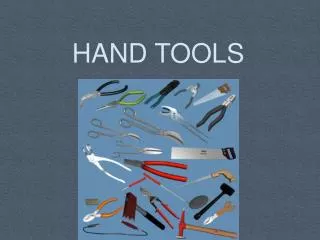
Basic Hand Tools. Purchase Quality Tools. With tools, you usually get what you pay for Quality tools are lighter, stronger, easier to use, and are usually covered by a warranty. Keep Tools Organized. For each tool to be used quickly, the tools should be neatly arranged

E N D
Purchase Quality Tools • With tools, you usually get what you pay for • Quality tools are lighter, stronger, easier to use, and are usually covered by a warranty
Keep Tools Organized • For each tool to be used quickly, the tools should be neatly arranged • There should be a place for every tool, and every tool should be in its place
Keep Tools Clean • Wipe tools clean and dry after each use • Greasy or oily tools can be dangerous! • Cleaning also prevents corrosion from forming on the tools
Use the Right Tool for the Job • Even though several different tools may be used to loosen a bolt, usually one will do a better job • One tool may be faster, grip the bolt better, be less likely to break, or require less physical effort
Wrenches • Used to install and remove nuts and bolts • Available in both imperial (inch) and metric (millimeter) sizes • size is stamped on the side of the wrench • Wrench size is determined by measuring across the wrench jaws
Wrench Sizes Imperial Metric
Rules for Wrench Use • Always select the right size wrench • wrench must fit the bolt head snugly • Never hammer on a standard wrench • use a longer wrench with more leverage or a special slug wrench, designed to be used with a hammer
Rules for Wrench Use • When possible, pull on the wrench • if the wrench slips, you are less likely to hurt your hand • Never use a steel bar or pipe to increase the length of a wrench • excess force can bend or break the wrench
Open-End Wrench • Has an open jaw on both ends • Each end is a different size and set at an angle • Angle allows the open-end wrench to turn bolts and nuts with little wrench swing space • Wrench can be turned over between each swing to get a new “bite” on the bolt head
Box-End Wrench • Completely closed on both ends • Will not round off bolt heads as easily as an open-end wrench • Available with either 6- or 12-point openings
Combination Wrench • Has a box-end jaw on one end and an open end on the other • Both ends are usually the same size • Provides the advantage of two types of wrenches for the price of one
Line Wrench • Also called a tubing wrench or flare nut wrench • Box-end wrench with a small opening or split in the jaw • Opening allows the wrench to be slipped over fuel lines, brake lines, or power steering lines • Prevents damage to soft fittings
Hand Wrenches A. Open-end B. Box-end C. Combination D. Tubing or line wrench
Socket Wrench (Socket) • Cylinder-shaped, box-end tool • One end fits over the fastener, while the other end has a square hole that fits on a handle used for turning
Socket Terms • Shallow or Deep • Deep sockets may fit over a stud or reach a recessed bolt • Chrome or Impact(black) • Chrome sockets must never be used on an impact wrench because they may shatter • Impact sockets are made to withstand the shock produced by an impact wrench
Socket Terms • Drive size • size of the square opening for the handle • common drive sizes are 1/4”, 3/8”, 1/2”, and 3/4” • Points • configuration of the box for the bolt head • 4-point, 6-point, 8-point, and 12-point are available
Ratchet Breaker bar or Johnson Bar Socket Handles
Torque wrench Speed wrench Socket Handles
Extensions Used between a socket and its handle
Universal Joint Swivel that lets the socket wrench reach around obstructions
Adjustable (Crescent) Wrench • Has jaws that can be adjusted to fit different size bolt and nut heads • Used only when other type wrenches will not fit
Pipe Wrench • Adjustable wrench used to grasp cylindrical objects • Toothed jaws actually dig into the object
Allen Wrench • Hexagonal shaft-type wrench • Used to turn set screws on pulleys, gears, and knobs
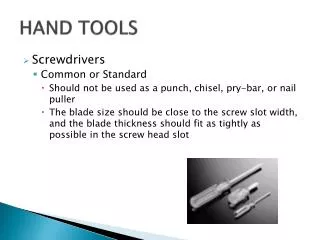
Screwdrivers • Used to remove or install screws • Available in many shapes and sizes
Screwdriver Types A. Standard / Flat / Slot B. Phillips D. Torx E. Clutch
Offset Stubby Screwdriver Types
Impact Driver Used to loosen stubborn fasteners. When struck with a hammer, the driver exerts powerful turning and downward forces
Selecting a Screwdriver Screwdriver tip must fit in theslot perfectly
Pliers • Used to grip, cut, crimp, hold, and bend various parts • Never use pliers when another type tool will work • Pliers can nick and scar a part
Combination (Slip Joint) Pliers Slip joint allows the jaws to be adjusted to grasp different size parts
Rib Joint Pliers Also called channel lock pliers or water pump pliers. Open extra wide for holding very large objects
Needle Nose Pliers Excellent for handling extremely small parts or reaching into highlyrestricted areas
Diagonal Cutting Pliers(Side Cutters) Jaw shape allows cutting flushwith a surface
Locking Pliers(Vise Grips) Clamp onto and hold a part. Sometimes used to unscrew fasteners with stripped or rounded heads
Snap Ring Pliers Sharp, pointed tips are useful for installing and removing special clips called snap rings
Hammers Various types of hammers are used for operations that involve strikinga tool or part
Rules for Hammer Use • Select the right size hammer • Always check that the hammer head is tight on the handle • Never hit a hardened part with a steel hammer • metal chips may fly off • Grasp the hammer near the end of the handle and strike the part or tool squarely
Ball Peen Hammer Flat surface is for general striking. Round end is for shaping metal parts, such as sheet metal or rivet heads
Sledge Hammer Heavy hammer, produces powerful blows
Brass (Lead) Hammer Provides a soft, heavy head. Head deforms to protect the part surfacefrom damage
Plastic (Rawhide) Hammer Light hammer with a soft head. Used where light blows are needed to prevent part breakage or damage
Rubber Mallet Recommended on many sheet metal or plastic parts, such as moldingsand wheel covers
Dead Blow Hammer • Features a plastic-coated, metal face • Filled with small metal balls (lead shot) • Extra weight prevents a rebound of the hammer when striking • Plastic coating avoids surface damage
Chisels and Punches • Chisels • used for cutting off damaged or badly rusted nuts, bolts, and rivet heads • Punches • used to mark or make an indentation in metal or to drive parts like pins or bolts out of holes
Chisels andPunches A. Flat chisel B. Cape chisel C. Round-nose chisel D. Diamond-point chisel E. Holder F. Center punch G Pin punch H. Long, tapered punch I. Starting punch
Center Punch Used to mark parts for reassembly and to start a hole before drilling
Chisel and Punch Rules • Use the largest punch or chisel that will work • Keep both ends of a chisel or punch properly ground and shaped • after prolonged hammering, the top of a chisel or punch can become deformed and enlarged (mushroomed)
Chisel and Punch Rules Grind off the mushroom andform a chamfer