Download
1 / 58
590 likes | 860 Views
NASTRAN User Training. PowerPoint Overview. Accessing the NCCS Systems Setting your Initial System Environment Moving Data onto the NCCS Systems Storing Data on the NCCS Systems Running the NASTRAN Script Requesting Help via the NCCS Ticketing System Obtaining an NCCS Userid.

E N D
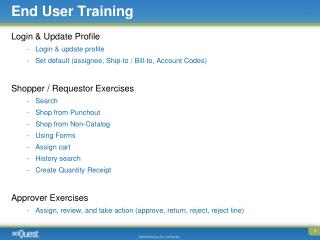
PowerPoint Overview • Accessing the NCCS Systems • Setting your Initial System Environment • Moving Data onto the NCCS Systems • Storing Data on the NCCS Systems • Running the NASTRAN Script • Requesting Help via the NCCS Ticketing System • Obtaining an NCCS Userid
Accessing the NCCS Systems Commands and Utilities
Access via a Terminal Window • As a user of NCCS computing systems you must log on using secure shell (ssh). • You will be asked to authenticate your access using your Agency RSA SecurID and NCCS password. • The first time that you access NCCS computing systems you must accept the secure shell key for the system. Respond by entering "yes.":
Access via a Terminal Window • From your workstation, access discover-nastran using any ssh client. For example: • You will need to provide your IP address before you are able to connect to discover-nastran, you can bypass this restriction by using GSFC VPN. • The first time you are prompted for a PASSCODE, you need to set a PIN. • https://www.nccs.nasa.gov/token_changes031109.html
Access via a Putty Window userid@discover-nastran.nccs.nasa.gov discover-nastran
Access via a Putty Window • You may save a session on putty by assigning a name and clicking the save button. • To open a saved session, click on the session name, click load and click open. userid@discover-nastran.nccs.nasa.gov discover-nastran
Initial System Environment Files and Configuration
Configuring the Program Shell • Your home directory on discover-nastran will automatically be created as well as several files, like .xemacs or .cshrc (depending on your shell). • If you are not sure what program shell you are using, you can issue the command “echo $SHELL” to display the value. • Please refrain from importing your .cshrc file from eagle. discover-nastran, xxx.xx.xx.xx userid userid
Configuring the Program Shell • To Display other environment variables that the system is setting by default or that you have set via one of the startup files like .bashrc, .cshrc, .login or .profile, issue the “env” command:
Configuring the Program Shell • You may use any text editor, such as vi, to make changes to your .bashrc, .cshrc, or .profile • You may also add aliases (short names for commonly used commands or messages) : • To activate changes to .cshrc, .profile, .bashrc, etc., you need to run the command: source .cshrc
Configuring the Program Shell • Some packages or utilities need a module to be loaded in order for you to use them. To see the modules that have been loaded to your session, issue the command, module list: • To display a list of available modules, issue the command, module avail:
Configuring the Program Shell • To load a new module, which dynamically modifies your environment (i.e. $PATH and/or other variables), issue the command: module load name For example, to load the GNU project C and C++ compiler version 4.5, issue the command: module load other/comp/gcc-4.5
Moving Data onto the NCCS Commands and Utilities
Using sftp or scp Commands • You can use the "sftp" or "scp" commands to transfer data between your local system and discover-nastran. • To transfer a file from your local machine to discover-nastran using the scp command (i.e. to push data to discover-nastran), issue the following:
Using sftp or scp Commands • To transfer a file to your local machine from discover-nastran using the scp command (i.e. to pull data from discover-nastran), issue the following: • Note the above command ends with a dot “.” to signal that you want the file placed in the current working directory on your local machine.
Using sftp or scp Commands • To transfer files between your local system and discover-nastran using the sftp command, you first have to establish a connection. For example: • The above method will simplify the initial move of your data from eagle to discover-nastran.
Using sftp or scp Commands • You may use the cd command to change the working directory and the ls command to display all of the files in the current working directory. • Variables like $NOBACKUP are not recognized in the sftp environment, the absolute path is required.
Using sftp or scp Commands • To transfer files from your local machine to discover-nastran using the sftp command, you need to use “get”, to copy a file to your local machine from discover-nastran and “put”, to move a file from your local machine to discover-nastran. For example:
Using WinSCP to Transfer Files • You may use WinSCP, a free sftp and ftp client for Windows to transfer files between your local PC and discover-nastran. You first have to establish a connection. For example: discover-nastran.nccs.nasa.gov
Using WinSCP to Transfer Files • You will be prompted for you PASSCODE and NCCS password: userid@discover-nastran.nccs.nasa.gov userid@discover-nastran.nccs.nasa.gov
Using WinSCP to Transfer Files • You may select a file from your local machine (left panel) and drag it to discover-nastran (right panel). • The red arrows indicate the drop-down menus that will allow you to change the working directory.
Storing Data on the NCCS Systems File Systems and Quotas
Storing Data on the NCCS Systems • The NCCS implements quotas on both, the home directory and the nobackup directory. • To display the current quotas on discover-nastran, for your userid, issue the showquota command: • The above example shows that djhome (also referred as $HOME or /discover/home) is over quota and there are only 2 days left before the user is prevented from writing any files.
Storing Data on the NCCS Systems • When you first logon to discover-nastran, you will be placed in your $HOME directory. Your $HOME directory is the place for your startup files and important files (hence the 0.5GB quota). • The work directory, which may be accessed by a convenient link from $HOME, points to dnb11 (also referred as $NOBACKUP or /discover/nobackup), it has a quota of 100GB. We DO NOT create backups of any file on discover-nastran. • You are responsible for maintaining any backups.
Storing Data on the NCCS Systems • Always use environment variable, such as $HOME or /discover/home or $NOBACKUP or /discover/nobackup in executables. DO NOT use the path provided by the pwd command (i.e. hardcoded paths like /gpfsm/dnb11/ or /gpfsm/djhome/). System Administrators may move file systems due to maintenance, which would brake any hardcoded paths as mentioned above.
How to Run NASTRAN The mnas Script and PBS Scheduler
Running the NASTRAN Script • The NASTRAN script, mnas, provides a help message when the –h option is invoked. The help message lists the different options available, as well as examples on how to run mnas. To display the help, issue the command: mnas –h • Executing the mnas script from your $NOBACKUP automatically creates a .pbs file, which is used to submit the the job to the PBS batch.
Running the NASTRAN Script • To run the mnas script, you need to cd into the NASTRAN work directory and issue mnas along with any options and the name of the input file to be used. For Example: • The mnas script has several built-in options, such as –opt for NASTRAN specific options. The example above tells both NASTRAN and PBS that you are asking for a memory allocation of 40 Megawords. The job number in this example is 123.borgpbs2.
Running the NASTRAN Script • The option, sdir is not allowed on discover-nastran due to the manner in which PBS manages data between file systems. • The mnas script assumes MSC 2008r1 as the default. • The –t option is used to delay the start of a PBS job. For more information check the mnas help message.
The PBS Environment • To display the PBS queues on discover-nastran, issue the command: qstat –q • The above print screen shows that the “short” queue has a limit of 1 job and max run time (i.e. walltime) of 10 minutes. The long queue has a limit of 6 jobs and a walltime of 96 hours.
The PBS Environment • To display the list of minimums (i.e. the defaults for when walltime, queue, etc. are not specified in a job) and maximums for an specific queue, issue the command: qstat –Qf queuename
The PBS Environment • To display the current work on the PBS batch scheduler, issue the command: qstat • Jobs that are running will have an “R” under the status column and a “Q” if the job is queued. • To find more details regarding an specific job while it is in an R or Q state, issue the command: qstat –f jobid
The PBS Environment • To delete your job from the batch scheduler, you must first obtain the job Id using the qstat command and then issue qdel –f jobid.number • Jobs that were submitted via the mnas script, will send you an e-mail when aborted by the system, deleted by you or when the job finishes normally.
The PBS Environment • If your job is not running (i.e. not in an R state), you may issue the command, qstat –s jobid • One reason for your job to be queued for a long time, is that there are no user limits on the discover-nastran queues and a single user may potentially fill-up the entire queue.
NCCS Ticketing System Access and Overview
FootPrints by Numara • The NCCS ticketing system is the COTS application, FootPrints, by Numara software. • Users may access FootPrints via the following URL: www.nccs.nasa.gov/internal/footprints • FootPrints uses a dual factor authentication (RSA SecurID and password).