Download

1 / 20
220 likes | 411 Views
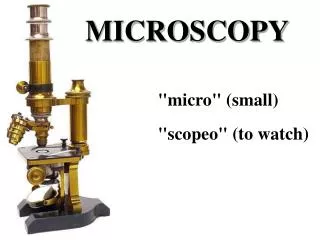
Microscopy. Microscopes. “micro” means small ! “scope” means watch/look !. Fun Fact! Microscopes were first developed as entertainment for the rich!. Light Microscopes. Focuses visible light rays Can be used on live or dead specimens Dyes & fluorescent markers help for viewing

E N D
Microscopes • “micro” means small! • “scope” means watch/look! Fun Fact! Microscopes were first developed as entertainment for the rich!
Light Microscopes • Focuses visible light rays • Can be used on live or dead specimens • Dyes & fluorescent markers help for viewing • Magnify up to 1000X on the ones we have! • Compound Light Microscopes & Confocal Microscopes
Light Micrographs Plant Human Chromosomes
Confocal Micrograph Spirogyra crassa(green algae)
Electron Microscopy (EM) • Focus beam of electrons on the specimen • Specimens must be dead • Transmission Electron Microscope (TEM) • Cross section of the material • Most detailed of the inner cell • Scanning Electron Microscope (SEM) • Surface of the specimen • Shows texture, but less detail
In a nutshell… • Light Microscopes will not show you the nucleus of a cell or something the size of a virus! • Confocal microscopy uses brightly colored markers. • TEM is detailed, flat, black & white. • SEM is 3D, textured, black & white.
Parts of the Microscope • Ocular Lens: eyepiece (10x magnification), first lens • Arm: connects base & body tube • Must hold arm while carrying microscope! • Course Adjustment Knob: roughly focuses object • Used to find specimen
Parts of the Microscope 4. Fine Adjustment Knob: small knob, finely focuses specimen • Use after object has been found! 5. Power Cord: must be wrapped around arm after use 6. Nosepiece: holds 3 objective lenses
Parts of the Microscope 7. Objective Lens: second lens • Scanning Lens (4x) • Low Power (10x) • High Power (40x) • Oil Immersion (100x)
Parts of the Microscope 8. Stage Clips: holds slide in place 9. Stage: flat plate where slides are held 10. Diaphragm: regulates the amount of light exposed to the specimen
Parts of the Microscope 11. Condenser Lens: focuses light on specimen 12. Power Switch: turns light on & off 13. Base: support of the microscope
Field of View • Total area visible through the ocular lens The higher the magnification, the smaller the field of view!
Total Magnification Total Magnification = ocular lens x objective lens If the 40x objective is in place… TM = 400x, because (10 x 40 = 400)
Focusing the Microscope • Locate the slide specimen at scanning power. • Then move the area to be viewed to the center of the field of view. • Make sure the slide is in perfect focus at scanning power before moving up to low power. • Turn your objective without moving the slide or stage. • You will slightly adjust the image at the next objective. • At high power use only the fine focus knob and do not turn it more than 1/2 turn.
Important! Microscope Rules • Always carry with 1 hand on arm & 1 hand on base! • Use a slide & coverslip. • Clean Up: • Always return to scanning (lowest) power! • Always lower stage all the way! • Unplug, wrap cord, & cover