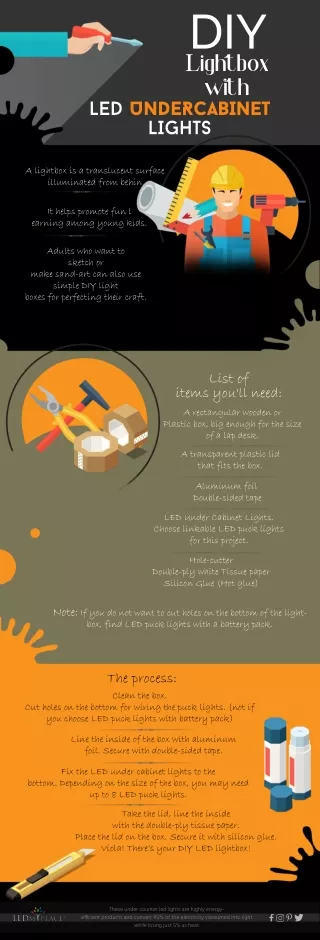
1 / 7
0 likes | 13 Views
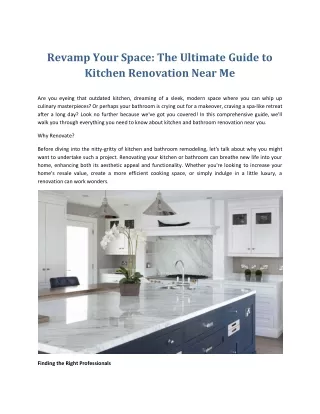
Transforming your living space doesnu2019t always require a complete overhaul. Sometimes, a simple yet strategic update can breathe new life into your home.

E N D
Revamp Your Space with an IKEA Cabinet Retrofit: A DIY Guide Transforming your living space doesn’t always require a complete overhaul. Sometimes, a simple yet strategic update can breathe new life into your home. One such effective approach is retrofitting IKEA cabinets. This DIY project not only enhances the aesthetics of your space but also adds functionality without burning a hole in your pocket. In this guide, we’ll walk you through the steps to successfully retrofit your IKEA cabinets, focusing on IKEA cabinet retrofit doors and general cabinet updates.
Why Opt for an IKEA Cabinet Retrofit? IKEA cabinets are renowned for their durability, affordability, and design versatility. Retrofitting these cabinets is an excellent way to customise your space without the need for a complete replacement. Here are some benefits: ● Cost-effective: Retrofitting is more economical than buying new cabinets.
● Customisation: You can personalise the look and feel to match your home decor. ● Sustainability: Reusing existing cabinets is an eco-friendly choice. Tools and Materials You’ll Need Before diving into the project, gather the following tools and materials: ● Screwdriver set ● Measuring tape ● Level ● Paint or wood stain ● New cabinet doors (if replacing) ● Sandpaper ● Hinges and screws ● Paintbrushes or rollers
● Drop cloths or old newspapers Step-by-Step Guide to Retrofitting IKEA Cabinets Step 1: Plan Your Design Start by envisioning the final look of your ikea cabinets . Decide on the colour scheme, the type of finish (paint or stain), and whether you’ll replace the doors or simply update the existing ones. Sketch out your ideas or use design software to visualise the end result. Step 2: Remove Cabinet Doors and Hardware Carefully remove the cabinet doors, handles, and hinges using a screwdriver. Keep the screws and hinges in a safe place if you plan to reuse them. Lay the doors flat on a drop cloth or old newspapers to prepare them for sanding and painting. Step 3: Sand and Prep the Surfaces
Using sandpaper, lightly sand the cabinet doors and frames to create a smooth surface for painting. This step is crucial for ensuring the paint adheres well. Wipe down the sanded surfaces with a damp cloth to remove any dust. Step 4: Paint or Stain the Cabinets Apply a primer if you are painting the cabinets. Once dry, follow with your chosen paint colour or wood stain. Use even strokes and allow each coat to dry completely before applying the next. Typically, two to three coats are sufficient for a smooth, professional finish. Step 5: Install New Cabinet Doors If you are replacing the doors, measure and mark the positions for the new hinges. Attach the hinges to the doors and then to the cabinet frames. Ensure the doors are level and aligned properly. Adjust as necessary for a perfect fit.
Step 6: Add Finishing Touches Reattach any handles or knobs, or consider upgrading to new hardware for an additional fresh look. Make sure all screws are tightened securely and that the doors open and close smoothly. Conclusion Retrofitting your IKEA cabinets is a rewarding DIY project that can dramatically transform your space. With careful planning, the right tools, and a bit of creativity, you can achieve a customised look that
reflects your personal style. Whether you’re updating the doors, painting, or adding new hardware, this guide provides a straightforward approach to making your cabinets look brand new. Embrace the opportunity to personalise your home while enjoying the process of creating something uniquely yours. Revamping your space with an IKEA cabinet retrofit not only enhances the visual appeal but also adds functionality and value to your home. So, roll up your sleeves and get started on this exciting DIY journey!