Download
1 / 15
150 likes | 344 Views
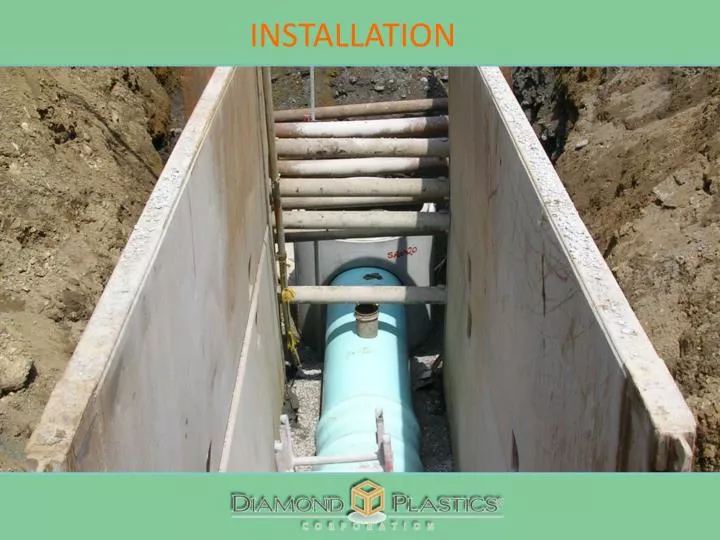
INSTALLATION. INSTALLATION. Be on Site to Start U p L arge D iameter P rojects Have contractor inspect loads as they arrive Don’t just sign for it; Inspect for damage Insure quantity is correct See that Installation guides are on site; confirm with super intendant Take Photos or Video

E N D
INSTALLATION • Be on Site to Start Up Large Diameter Projects • Have contractor inspect loads as they arrive • Don’t just sign for it; Inspect for damage • Insure quantity is correct • See that Installation guides are on site; confirm with super intendant • Take Photos or Video • Good references • Good training aids • Can load on Website
INSTALLATION • Review Basics of Installation Guide: • Handling requires care • Lower pipe; don’t kick off truck • Cold weather requires extra care • Store on a flat surface and protect from damage
INSTALLATION • Review Basics of Installation Guide • Don’t place pipe on hard pan, sharp rock or boulders • Bell holes are required for proper assembly and support
INSTALLATION • Review Basics of Installation Guide • Thoroughly Clean dirt and foreign material from gaskets and spigot • Once lubricated protect surfaces from dirt and debris • Lubricate spigot evenly, to insertion mark & gasket • Straight alignment is key to successful assembly (Max Offset 1 degree) • Protect the bell from the backhoe bucket when assembling • Do not insert spigot beyond insertion mark
INSTALLATION • Review Basics of Installation Guide • Embedment materials need to fill all voids in haunch zone to meet deflection acceptance tests • 1.5 inch maximum particle size • Don’t dump material off edge of trench; lower to top of pipe
INSTALLATION • Don't tell them how to install pipe • Just review basics; they are the experts • Take photos and make notes of your observations
INSTALLATION ASTM D2321 Table 1 Soil Classifications
INSTALLATION ASTM D 2321 Table 2 Recommendations for Installation & Use of Soils