Download
1 / 24
240 likes | 383 Views
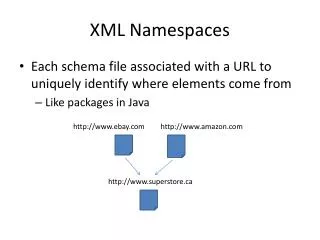
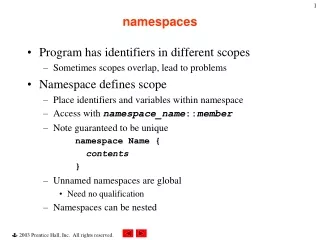
Using Namespaces in XML. COIN 78 Lecture 7. Designing a namespace name. Distinguish one similarly titled element from another Unique and permanent name In XML, must have an absolute URL Use your own domain name as a root to keep control over name’s uniqueness

E N D
Using Namespaces in XML COIN 78 Lecture 7
Designing a namespace name • Distinguish one similarly titled element from another • Unique and permanent name • In XML, must have an absolute URL • Use your own domain name as a root to keep control over name’s uniqueness • URL may point to a DTD or schema, but that is not required
Sample code http://www.domain.com/ns/rivers/1.0 • opening protocol • your domain name • optional namespaces directory information • short description of the namespace • optional version number
Declaring Default Namespaces • To declare a default namespace for an element and all its children: • Within the opening tag of an element, type: xmlns= • Then type “URL” where URL is the name of the namespace
Sample code - in No Namespace <endangered_species> <animal> <name language=“English”>Giant River Otter</name> … <source sectionid=“122” newspaperid=“21” contentid=“630” xmlns=“http://www.cookwood.com/ns/end_species1” /> <picture filename=“otter.jpg” x=“200” y=“197” />
Sample Code <endangered_species xmlns=“http://www.cookwood.com/ns/end_species1”>….. </endangered_species> • With the namespace declaration in the root element, all of the elements in the document are associated with the http://www.cookwood.com/ns/end_species1 namespace
Namespaces for Individual Elements • To declare a prefix for a namespace name: • In the document’s root element, type xmlns:prefix where prefix will be the nickname for this namespace • Then type =“URL” where URL is the name of the namespace to which the prefix will refer
Sample Code <endangered_species xmlns=“http://www.cookwood.com/ns/endspecies1” xmlns:rivers=“http://www.cookwood.com/ns/rivers1” … </endangered_species> • xmlns:rivers points to rivers1 as the namespace for the named prefix rivers
How Namespaces Affect Attributes • You could associate an attribute with a specific namespace, however... • By prefixing it with appropriate prefix, it’s almost never necessary, since... • Attributes are already made unique by the element that contains them...
Sample Code <source sectionid=“122” newspaperid=“21” contentid=“630” /> <orange sectionid=“3a” /> • “sectionid” does not require a separate name space • The two elements that contain it, source and orange, have no overlap
Namespaces, Schemas, and Valid Documents • An element is more than its name alone • XML processors consider the element to be called prefix:element • If you want to validate the document against a schema, you must declare each prefix element in the schema • Additionally, it is necessary to declare the attribute with which you declare the namespace, either xmlns or xmlns:prefix
Summary • Namespaces create super labels that can distinguish elements of similar names when two or more documents are combined. • The super label is called the namespace name • The namespace itself is the collection of related names identified by the namespace name. • Namespaces are located by URLs that point to a file with a given name. Namespaces may apply to all elements in a document or just one.
Namespaces, Schemas, and Validation COIN 78 Lecture 8
Schemas and Namespaces • Namespaces are a collection of related elements and attributes, identified by a common “URL-shaped” name. • Namespaces are most often used to distinguish similarly named globally declared elements from one another. • A schema can define what an XML document should look like, and can simultaneously create or populate a namespace.
Populating a Namespace • You can associate the globally declared (top level) components of a schema with a namespace in order to use those components in other schema documents. • To specify a target namespace: • Type targetNamespace=“URL” • Where URL is the namespace with which you want to associate the components defined in this schema: called “populating a namespace”
Adding All Locally Declared Elements • To add all the locally declared elements elements to the target namespace: • In the xsd:schema element, type elementFormDefault=“qualified”
Adding Particular Locally Declared Elements • To add a particular locally declared declared element to the target namespace • In the element’s declaration, type form=“qualified” • To keep a particular locally declared element from being associated with a target namespace (despite the default) • In the element's declaration type: form=“unqualified”
Referencing Components with Namespaces • To specify a default namespace for referenced components and then reference those components in the schema: • In the root element of the schema document, type xmlns=“URL” where URL is the namespace for the referenced components. • In the value of the type and ref attributes, type reference where reference is the name of the component associated with the default namespace.
The Schema of Schemas as the Default • You can declare the schema of schemas as the default namespace for a schema • Type <schema (not xsd:schema) • Type xmlns=“http://www.w3.org/2001/XMLSchema • Type targetNamespace=“URL” • Type xmlns:prefix=“URL” (repeat for each name) • Type > to complete the schema tag
Namespaces and Validating XML • You can qualify a set of components (identify them with a namespace) and validate a document that uses those components. • You must indicate the namespace of the desired components by either declaring a default namespace (xmlns=“URL”) or • Declaring a namespace with a prefix (xmlns:prefix=“URL”). It is sometimes necessary to indicate where the schema
Indicating Where a Schema Is • In the root element of the XML document, after the declaration of the namespace type: xmlns:xsi=“http://www.w3.org/2001/XMLSchema-instance” then: xsi:schemaLocation=“URL (of the namespace) then type file.xsd” where file.xsd is the actual file that contains the schema that defines the namespace used in this XML document.
Schemas in Multiple Files • You can divide a schema’s components into various individual files. Each file should be text only and saved with the .xsd extension. • Directly after xsd:schema type <xsd:include schemaLocation=“included-file.xsd” /> • Where includedfile.xsd is the URL of the schema document that contains the components you wish to include
Importing Components • To import components from schemas with different target namespaces: • Directly after the xsd:schema element in the schema document into which you are importing components, type <xsd:import • Then type namespace=”URL” • Then, if needed, xsi:schemaLocation=“URL” • Then type file.xsd then /> to close xsd:import
Summary • XML namespaces can be imported • Create and “qualify” schema definitions • Allows for independent development • Compartmentalization of schema files • Nomenclature in the schema document declarations is critical, keep references • Validation is still a -very- tricky issue