Download
1 / 36
360 likes | 542 Views
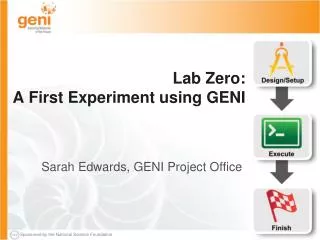
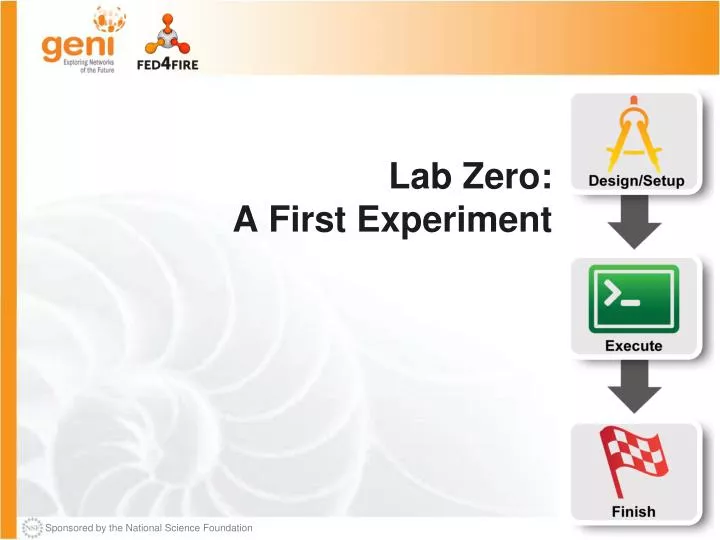
Lab Zero: A First Experiment. Hands On Exercise. Do a Simple Experiment Reserve two machines connected at Layer 2. VM. VM. Layer 2. Understand Terminology. project. slice. experimenter. resource. aggregate. Experiment Workflow. Part I: Design/Setup Part II: Execute

E N D
Hands On Exercise Do a Simple Experiment Reserve two machinesconnected at Layer 2 VM VM Layer 2
Understand Terminology project slice experimenter resource aggregate
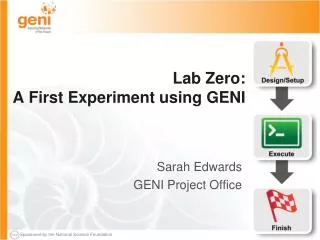
Experiment Workflow • Part I: Design/Setup • Part II: Execute • Part III: Finish
jFedis … A graphical user interface (GUI) for: • designing topologies • reserving resources
Experimenter An experimenteris a researcher who uses GENI/FIRE resources Different types of experimenters have different roles and permissions: • Advisor vs Grad Student • Teacher vs TA vs Student Experimenter
Projects Project Projects organize research in GENI/FIRE Projects contain both peopleand their experiments A project is led by a single responsible individual: the projectlead Today we will use a project created for this class Lead Members Slice
Experiment Workflow • Part I: Design/Setup • Part II: Execute • Part III: Finish
Creating an account • GENI Portal is at: https://portal.geni.net • Instructions for creating an account are: http://groups.geni.net/geni/wiki/SignMeUp • Instructions FIRE: http://doc.fed4fire.eu • Authority: www.wall2.ilabt.iminds.be • Join project: fgre
sshwith a public/private keypair Login to all compute resources using ssh with a private key There are several ways to offer your private key to ssh. Today we will use a tool called an ssh agent. $ ssh-add ~/.ssh/id_geni_ssh_rsa $ sshusername@hostname -p 12345 No password! You should never be prompted for a password to log into a compute node.
Expiration and renewal slice expiration time ≤ project expiration time each resource expiration time ≤ slice expiration time each resource expiration time ≤ aggregate’s max expiration project slice resource resource (optional) project expiration time resource resource expiration time slice expiration time now In general, to extend the lifetime of your resource reservation, you must renew the slice and allresources
Resource A resourceis a piece of infrastructure A resource can be real or virtual. Resource specifications (aka. RSpecs)are used to describe and request resources. Examples: • Compute: computer vs virtual machine (VM) • Wireline Network: VLAN or OpenFlow • Wireless: WiMAX
Slice A sliceis a container of resources used in an experiment. A slice can contain resources from one or more aggregates A slice is in a single project A slice has an expiration Slice names are public, reusable and unique (within a project)
Putting it all together Member: project Lead: Experimenter (aka Professor) slice Experimenter (aka Student) aggregate resource resource Layer 2
Part Icontinued:Obtain Resources slice 3.1 Create a slice 3.2 (optional) Renew your slice 3.3 Reserve two VMs at on aggregate 3.4 Check Whether VMs are Ready to be Used VM VM Layer 2
Experiment Workflow • Part I: Design/Setup • Part II: Execute • Part III: Finish
Part II: Execute Experiment 4.1 Login to nodes (two nodes: client & server) 5 Execute experiment 5.1 Send IP traffic 5.2 Install and use iperf 5.3 Bring down the server’s data interface 5.4 Bring down the server’s control interface 6.1 Logout of nodes Internet ssh Control Interfaces client server Layer 2 Data Interfaces Experimenter
5.1 5.1 $ sudoifconfig $ ping 10.1.1.2 –c 5 # server data i/f $ ping 172.17.1.9 –c 5 # server ctrl i/f client $ sudoifconfig server
Worksheet 5.1 Internet Project Name: GEC20 Slice Name: lab0<your initials> ___.___.___.___ eth___ ___.___.___.___ eth___ server client eth___ eth___ Control plane switch 10.1.1.1 10.1.1.2 Control i/f Control i/f Data plane switch Data i/f Data i/f GENI Rack
$ sudo apt-get install iperf $ hash # start an iperf server $ iperf -s 5.2 $ sudo apt-get install iperf $ hash # server data i/f $ iperf –c 10.1.1.2 … client server
What is the bandwidth of the data link? Why? What is the bandwidth of the control link? Why? 5.2 Internet ___.___.___.___ eth___ ___.___.___.___ eth___ server client eth___ eth___ Control plane switch 10.1.1.1 10.1.1.2 Control i/f Control i/f Data plane switch Data i/f Data i/f GENI Rack
When you bring down the datainterface, the destination should become unreachable. Why? 5.4 Internet ___.___.___.___ eth___ ___.___.___.___ eth___ server client eth___ eth___ Control plane switch 10.1.1.1 10.1.1.2 Control i/f Control i/f Data plane switch Data i/f Data i/f GENI Rack
After you bring down the controlinterface, the destination becomes unreachable. Why? 5.4 Internet ___.___.___.___ eth___ ___.___.___.___ eth___ server client eth___ eth___ Control plane switch 10.1.1.1 10.1.1.2 Control i/f Control i/f Data plane switch Data i/f Data i/f GENI Rack
After you bring down the controlinterface, your ssh session should immediately hang. Why? 5.4 Internet ___.___.___.___ eth___ ___.___.___.___ eth___ server client eth___ eth___ Control plane switch 10.1.1.1 10.1.1.2 Control i/f Control i/f Data plane switch Data i/f Data i/f GENI Rack
Experiment Workflow • Part I: Design/Setup • Part II: Execute • Part III: Finish
Part III: Finish Experiment When your experiment is done, you should always release your resources. • Normally this is when you would archive your data • Delete your resources at each aggregate project resource experimenter aggregate slice
Congratulations! You have… • Run your first Experiment! • Exercised your knowledge of terminology
Welcome to GENI-FIRE!
Projects Project Projects organize research in GENI Projects contain both peopleand their experiments A project is led by a single responsible individual: the projectlead Lead Members Slice
Project Membership example Projects have 1 Lead and any number of Admins, Members, and Auditors Expiration Typical Class Typical Research Project http://groups.geni.net/geni/wiki/GENIConcepts#Project
Populating a Project • Member-initiated Each experimenter asks to join a project, approval needed • Typical for Research projects • Admin-initiated Project Lead/Admin bulk-adds experimenters • Typical for Classrooms or Tutorials
Working with multiple members in a slice Members of all slices in a project: • Project Leads (Professor) • Project Admins (TAs, Graders) Other can be added manually Professor Slice Admin Research Asst Post-Doc Slice Member Slice Lead http://groups.geni.net/geni/wiki/GENIConcepts#Slice
Slice Access Being a member of a slice means you can act on a slice: • Add resources • Check status • Delete resources • Renew resources With any tool!
Slice Access: Logging in to resources Slice membership does not guarantee ability to login to resources! To ensure access in collaborator’s resources: Option 1: Make resource reservation from Portal • fix the membership of the slice • Use the add resource button in the portal Option 2: Make resource reservation using omni • fix the membership of the slice • Call createsliver Option 3: Ensure common public key is loaded • distribute common public key to collaborators • ask collaborators to upload it in their profile • use corresponding private key to login