Download
1 / 42
420 likes | 432 Views
Experience the traditional craft of firing black clay pots from Jutland using heather peat and iron pots for stunning results. Learn about the process, materials required, and essential tips for a successful firing session.

E N D
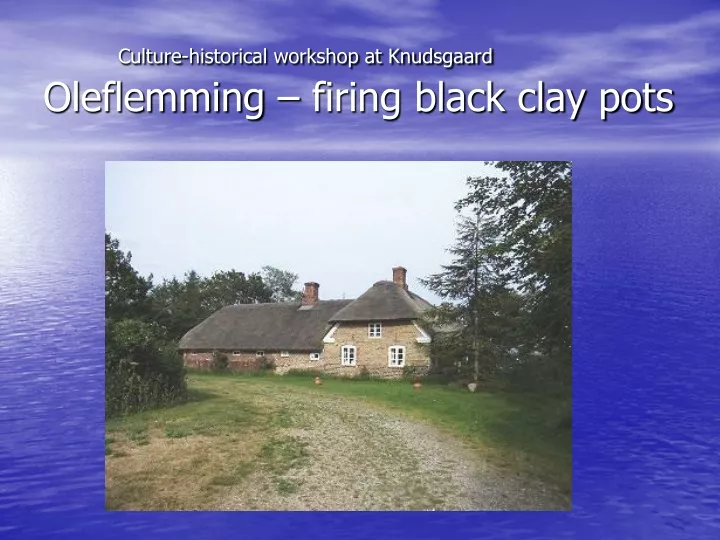
Culture-historical workshop at Knudsgaard Oleflemming – firing black clay pots
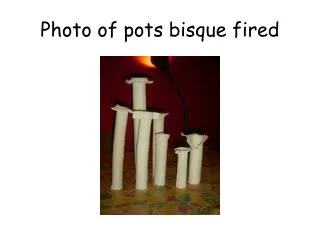
Firing your own pots • In Jutland were black pots originally fired with heather peat. • You placed more and more at the fire - until you were able to see the pots glow. • In order to obtain the black color (reducing combustion) in the end all were covered with sand and ash from previous firings.
Firing your own pots • Potty wives found out that an iron pot that totally covered the black pots ensured a consistent result. • Use such big iron pot and it's really black pots you get. • Firing pot this way is however a tough way to fire! • The burning process takes approx. 6-7 hours hours! • Any kind of sloppiness punished!
Firing your own pots • Why do the pots turn into black? • The clay contains from natural iron oxide (rust) and is in a regular ceramic oven they will be red. • Under the big iron pot the pots are wrapped in straw, which by the 8-900 degrees consum all the oxygen. • The last oxygen is coming from the red iron oxide, which then turn into black iron oxide.
Firing your own pots • It is essential that the pots are allowed to dry slowly. • 2 weeks is not too much! • Loosely covered with plastic.
Firing your own pots • The pots are now dry enough. • Check by putting your cheek to the pot. • Is it cold, let it dry a little longer!
Firing your own pots • The pots are preheated to 150-200 degrees. • In the old days the open chimney was used, here the pots stood on some planks for some days. • Or they had a “firehouse”. (see photo)
Firing your own pots • Now it's easy with an electric ceramic kiln or the oven in the kitchen. • The heating to 150-200 degrees must go slowly 2 - 3 hours. • Before it took 2 - 3 days!
Firing your own pots • You will need: • 1-2 old big iron pots • 1 wheelbarrow • 1 pair of blacksmithsgloves • 1-2 bales of straw • 1m3 dry wood • 1 wax taper • 1 broom • 1 long rake
Firing your own pots • Wax taper “Fidibus” = iron fence post on which a cloth is secured with wire. • With a little diesel fuel added it is a nice little torch to light the fire with.
Firing your own pots • 4 – 5 large wheelbarrow full of wood. (spruce - pine - larch, and the like) • It depends on the calorific value. • Hardwood - a little less volume, but everything can in theory be used.
Firing your own pots • You can do this with smaller amounts of the different stuff. • You just have to find a smaller castings pot at a garage sale.
Firing your own pots • You will also need: • Plenty of space. (At least 5 m free to all sides of your fireplace.) • Fine weather = (dry and calm - wind under 4 m / s) • It is best to start in the evening, when the wind usually settles a bit.
Firing your own pots • Do not take chances with the weather! Use the local weather forecast • Do not start the firing, if there is a risk of rain / thunderstorms. • The gusts before such would give so an imbalanced heating, that the pots burst.
Firing your own pots • The big iron pot is put into the wheelbarrow supported by straw. • Then start by putting straw in the bottom of the pot. • At least 5 cm thick layer formed as a nest.
Firing your own pots • The clay pots should be wrapped securely in straw - both outside and inside. • Do not let them touch the iron pot inside!
Firing your own pots • The wood and straw are ready. • The cast iron pot is placed with the opening down. • There is covered with a 5-10 cm wide buffer strip sand and ash along the rim of the big pot. • This is important to get it airtight.
Firing your own pots • The wood is placed around the ironpot • The thickest pieces inside. • Place short pieces at the top.
Firing your own pots • The layer of wood around the iron pot must be at least 40-50 cm thick. • Over the pot smaller pieces of wood in an equally thick layer.
Firing your own pots • Place straw around the entire stake. • It is important that the fire catches from all sides at the same time. • Help possibly with diesel fuel. • The even heating is EVERYTHING.
Firing your own pots • In order to have fire all around you using your wax taper. • Wetted with diesel • You must be as swift as possible, ignite the straw with 30 centimeters intervals.
Firing your own pots • Use sand to put it out again.
Firing your own pots • The flames turn now high. • Look carefully to see all sides burns alike.
Firing your own pots • WARNING • Starting the firing using diesel fuel is dangerous – use as little as possible. • And keep children and animals in safe distance!!
Firing your own pots • To think of: • When the fire really flames, it emits a very strong radiant heat. • It's a very good idea to have water nearby! • But don’t hit the ironpot with cold water, it’ll break.
Firing your own pots • The iron pot is exposed and are not glowing. • Do you see this - within the first 45 minutes - more wood should be added on the spot. • It's a always a good idea to have some extra wood lying nearby.
Firing your own pots • Use a rake or other to get the pieces of wood put right where they should be. • Walk side wards when you approach the fire, then you feel the heat less.
Firing your own pots • The first time you see the iron kettle exposed, it should glow cherry red! • The temperature is then from 800 to 900 degrees.
Firing your own pots • After a time the iron pots are again to be seen. • One must still be wary of getting the cooling regularly. • With the batten / rake can push around with the wood.
Firing your own pots • The flames die out, and there are only embers. • It takes approx. 3 hours. • So you just have to wait 3-4 hours more before everything cools down. • You should be able to keep your hand on the iron pot (50 degrees) before removing it. • Open to see the nice black pots too soon might ruin them!
Firing your own pots • Dew or a small rain shower make no harm. • You can just wait until the next morning. • However if your impatience is too big, you can also wait up (Until 2 a.m.or 3 a.m.)...... • It just needs to be cooled so much, that you can tuch the big ironpot!!
Firing your own pots • Then it's time to see the result.
Firing your own pots • Are they now completely black? • If they are not, you've saved too much on the wood! • They can be fired once more, but you MUST get temperature higher up the 2nd time.
Firing your own pots • We polish the pots after firing with a paste of beeswax • Should they not be used for food, one can simply dissolve the wax with turpentine.
Firing your own pots • A more "green" paste can be obtained by melting the bee wax in cooking oil in a water bath. • Mix 1 part wax with 6-7 parts of cooking oil. • Warm up slowly and cool, stirring constantly. • If the paste is gritty cooling happened too fast. Start all over again! • The consistency should be like gruel. • Is it too thick, it can be primed up a bit with cooking oil.
Firing your own pots • The wax solution is applied with a soft brush. • Then polish with a stiff brush. • Eventually the "refined" with a cloth. Do you store the pots in a cold place, the wax may crystallize, and the pot will be gray and dull to look at. • It is then necessary to polish them again.
Firing your own pots • Here you can see the difference on the front pot. • Patterns and glossy surfaces more clearly after beeing polished.
Firing your own pots • Many prefer not to polish their pots. • Pots not polished, clearly shows how the straws have left their marks. • Personally, I prefer unpolished pots.
Firing your own pots • Should you encounter problems, or have unanswered questions, please feel free to contact me. • Mail: oleflemming@yahoo.dk • Skype Name: oleflemming1 • Facebook Ole Flemming Nielsen • Please tell me, should you desire other presentations.
Firing your own pots • Would you like visit Knudsgaard? • The address is: Tim Kirkevej 30, 6980 Tim, Denmark (15 km north of Ringkøbing) • To be sure I’m at home mail me rather in advance. • oleflemming@yahoo.dk • More information to be found on my site: http://www.jydepotter.dk
Firing your own pots • This is a description of how I do, but .... • I do not know the local fire statutes, where you live. • You are solely responsible for everything going legally.