Download
1 / 44
460 likes | 683 Views
Payroll - W-2 Processing. FREEDOM SYSTEMS PAYROLL – W-2 PROCESSING WEBINAR POWERPOINT PRESENTATION YOU MAY DOWNLOAD THIS FILE TO RUN ON YOUR WORKSTATION. Payroll – W-2 Processing. Step 1. Step 2. Step 3. Step 4. Step 5. Payroll – W-2 Processing Step 1a – Print Quarterly Reports.

E N D
Payroll - W-2 Processing FREEDOM SYSTEMS PAYROLL – W-2 PROCESSING WEBINAR POWERPOINT PRESENTATION YOU MAY DOWNLOAD THIS FILE TO RUN ON YOUR WORKSTATION Freedom Systems – Payroll – W-2 Processing
Payroll – W-2 Processing Step 1 Step 2 Step 3 Step 4 Step 5 Freedom Systems – Payroll – W-2 Processing
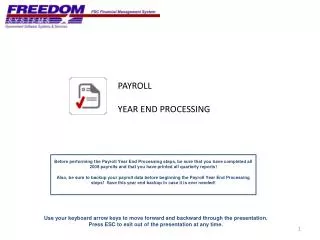
Payroll – W-2 ProcessingStep 1a – Print Quarterly Reports Before running the Payroll Year End Process, be sure you have completed all 2009 payrolls and printed all quarterly reports! Select ‘Year End Process’ from the main menu. Freedom Systems – Payroll – W-2 Processing
Payroll – W-2 ProcessingStep 1b – Print Quarterly Reports Make sure the correct quarter is listed in the site parameters of your program and then print the desired quarterly report(s). Freedom Systems – Payroll – W-2 Processing
Payroll – W-2 ProcessingPayroll Overview Step 2 Freedom Systems – Payroll – W-2 Processing
Payroll – W-2 ProcessingStep 2a – Run Year End Processing Before running the Payroll Year End Process, be sure you have completed all 2009 payrolls and printed all quarterly reports! Select ‘Year End Process’ from the main menu. Freedom Systems – Payroll – W-2 Processing
Payroll – W-2 ProcessingStep 2b – Run Year End Processing The ’Benefits Statement’ is a one page report per employee and summarizes municipal contributions to employee accounts during the year. ‘Move Data To History’ accomplishes just that. ‘Clear Employee Totals’ zeroes out all MTD, QTD and YTD totals for every employee file and carries forward leave balances. This step is irreversible. 2009 Freedom Systems – Payroll – W-2 Processing
Payroll – W-2 Processing Step 3 Freedom Systems – Payroll – W-2 Processing
Payroll – W-2 ProcessingStep 3a – Review Inc/Ded/Match Codes The W2 process accumulates data from check histories based on income and deduction parameters. These parameters are contained in the income/deduction/match setup and should be reviewed prior to W2 processing. Freedom Systems – Payroll – W-2 Processing
Payroll – W-2 ProcessingStep 3b – Review Inc/Ded/Match Codes Freedom Systems – Payroll – W-2 Processing
Payroll – W-2 ProcessingStep 3c – Review Inc/Ded/Match Codes Review each income, deduction and match category for the proper W-2 Box number and letter. Be sure to check the pension and insurance related boxes if necessary for retirement and group life insurance codes respectively. Freedom Systems – Payroll – W-2 Processing
Payroll – W-2 ProcessingPayroll Overview Step 4 Freedom Systems – Payroll – W-2 Processing
Payroll – W-2 ProcessingStep 4a – Create and Print W-2’s The W- 2 Processing Steps can be accessed by clicking ‘W-2 Forms’ (or W-2 processing depending on your version) from the main menu. Freedom Systems – Payroll – W-2 Processing
Payroll – W-2 ProcessingStep 4b – Create and Print W-2’s The W-2 process is run from this screen. Verify the data in the top half of the window including the tax year, FICA totals, form and locality name. THIS DATA IS REFRESHED EACH TIME YOU ACCESS THIS MENU SELECTION! The buttons located in the bottom half of the window will complete the process. 2009 Freedom Systems – Payroll – W-2 Processing
Payroll – W-2 ProcessingStep 4c – Create and Print W-2’s The first step is to re-add the ‘gross’ amounts for all employees. To do so, simply click the RE-ADD GROSS AMTS button. You will receive a confirmation message upon completion. Freedom Systems – Payroll – W-2 Processing
Payroll – W-2 ProcessingStep 4d – Create and Print W-2’s Next, re-add the W-2 boxes for all employees. To do so, simply click the RE-ADD W-2 BOXES button. You will receive a confirmation message upon completion. Freedom Systems – Payroll – W-2 Processing
Payroll – W-2 ProcessingStep 4e – Create and Print W-2’s Next, decide which of the three options to use for completing the ‘locality name’ information on the W-2’s. Freedom Systems – Payroll – W-2 Processing
Payroll – W-2 ProcessingStep 4f – Create and Print W-2’s Option 1 – Update to Locality as Shown Above. This will insert the name found in the ‘Locality name’ field found on this screen into each W-2 for all employees. Freedom Systems – Payroll – W-2 Processing
Payroll – W-2 ProcessingStep 4g – Create and Print W-2’s Notice that BEST PLACE has been inserted into the Locality Name field (box 20) Freedom Systems – Payroll – W-2 Processing
Payroll – W-2 ProcessingStep 4h – Create and Print W-2’s Option 2 – Update to Local Tax ID in Employee’s File This uses the ‘local tax’ code used for each employee and inserts the description of that code into the into the W-2’s. This will result in a unique entry for each employee. Freedom Systems – Payroll – W-2 Processing
Payroll – W-2 ProcessingStep 4i – Create and Print W-2’s Each employee must have a ‘local tax’ deduction code used in their employee file The description of that deduction will be inserted into the locality name (Box 20) on the W-2’s. Freedom Systems – Payroll – W-2 Processing
Payroll – W-2 ProcessingStep 4j – Create and Print W-2’s Option 3 – Update to Employee’s Local City Name. This will insert the city name found in each employee’s information file into the W-2’s. This will result in a unique entry for each employee. Freedom Systems – Payroll – W-2 Processing
Payroll – W-2 ProcessingStep 4k – Create and Print W-2’s Option 3 uses the City field . Freedom Systems – Payroll – W-2 Processing
Payroll – W-2 ProcessingStep 4l – Create and Print W-2’s Notice that SPECIAL PLACE has been inserted into the Locality Name field (box 20) Freedom Systems – Payroll – W-2 Processing
Payroll – W-2 ProcessingStep 4m – Create and Print W-2’s Next, you have the option to edit W-2’s. This allows you to manually update the W-2 information. Freedom Systems – Payroll – W-2 Processing
Payroll – W-2 ProcessingStep 4n – Create and Print W-2’s This process can be used to edit the locality name, add items to box 14, add sick pay details, etc. Freedom Systems – Payroll – W-2 Processing
Payroll – W-2 ProcessingStep 4o – Create and Print W-2’s After editing W-2’s, we recommend printing the W-2 register. This will display the data which will print on the W-2’s and give you the opportunity to review before printing the W-2’. Freedom Systems – Payroll – W-2 Processing
Payroll – W-2 ProcessingStep 4p – Create and Print W-2’s Freedom Systems – Payroll – W-2 Processing
Payroll – W-2 ProcessingStep 4q– Create and Print W-2’s Finally, you are ready to print W-2’s. Make sure the correct W-2 selection is listed in the top half of the window. Freedom Systems – Payroll – W-2 Processing
Payroll – W-2 ProcessingStep 4r – Create and Print W-2’s Sample 2-up form 2-up – two copies on a page 4-up – four copies on a page Freedom Systems – Payroll – W-2 Processing
Payroll – W-2 Processing Step 5 Freedom Systems – Payroll – W-2 Processing
Payroll – W-2 ProcessingStep 5a – Create Federal File Electronic filling of 2009 W-2’s with the federal government needs to be done by March 31, 2010 Select W-2 processing from the main menu to begin the process. Freedom Systems – Payroll – W-2 Processing
Payroll – W-2 ProcessingStep 5b – Create Federal File Complete the ‘Additional Diskette Parameters’ of this window and then click ‘CREATE FED DISKETTE’ Freedom Systems – Payroll – W-2 Processing
Payroll – W-2 ProcessingStep 5c – Create Federal File A file labeled W2REPORT.TXT will be created and stored in the My Documents folder on your computer. This is the file you will transmit to the SSA. Freedom Systems – Payroll – W-2 Processing
Payroll – W-2 ProcessingStep 5d – Create Federal File To electronically file your W-2’s, go to www.socialsecurity.gov/employer and select Electronically File Your W-2’s . Freedom Systems – Payroll – W-2 Processing
Payroll – W-2 ProcessingStep 5e – Create Federal File Log in using your User ID and Password Freedom Systems – Payroll – W-2 Processing
Payroll – W-2 ProcessingStep 5f – Create Federal File Select Report Wages to Social Security Freedom Systems – Payroll – W-2 Processing
Payroll – W-2 ProcessingStep 5g – Create Federal File Click I Accept to continue Freedom Systems – Payroll – W-2 Processing
Payroll – W-2 ProcessingStep 5h – Create Federal File Select the tab labeled Upload Formatted Wage File Freedom Systems – Payroll – W-2 Processing
Payroll – W-2 ProcessingStep 5i – Create Federal File Click Continue to continue the process Freedom Systems – Payroll – W-2 Processing
Payroll – W-2 ProcessingStep 5j – Create Federal File Select New W-2s and then Continue Freedom Systems – Payroll – W-2 Processing
Payroll – W-2 ProcessingStep 5k – Create Federal File Browse to find your file called W2REPORTS.TXT and then clock SUBMIT to complete the process. Freedom Systems – Payroll – W-2 Processing
Payroll – W-2 ProcessingRecap Step 1 Step 2 Step 3 Step 4 Step 5 Freedom Systems – Payroll – W-2 Processing
Payroll – W-2 Processing THANK YOU FOR ATTENDING THE PAYROLL – W-2 PROCESSING WEBINAR! Freedom Systems – Payroll – W-2 Processing